Setting Up a Hosted Webex Meeting in the Commons Room
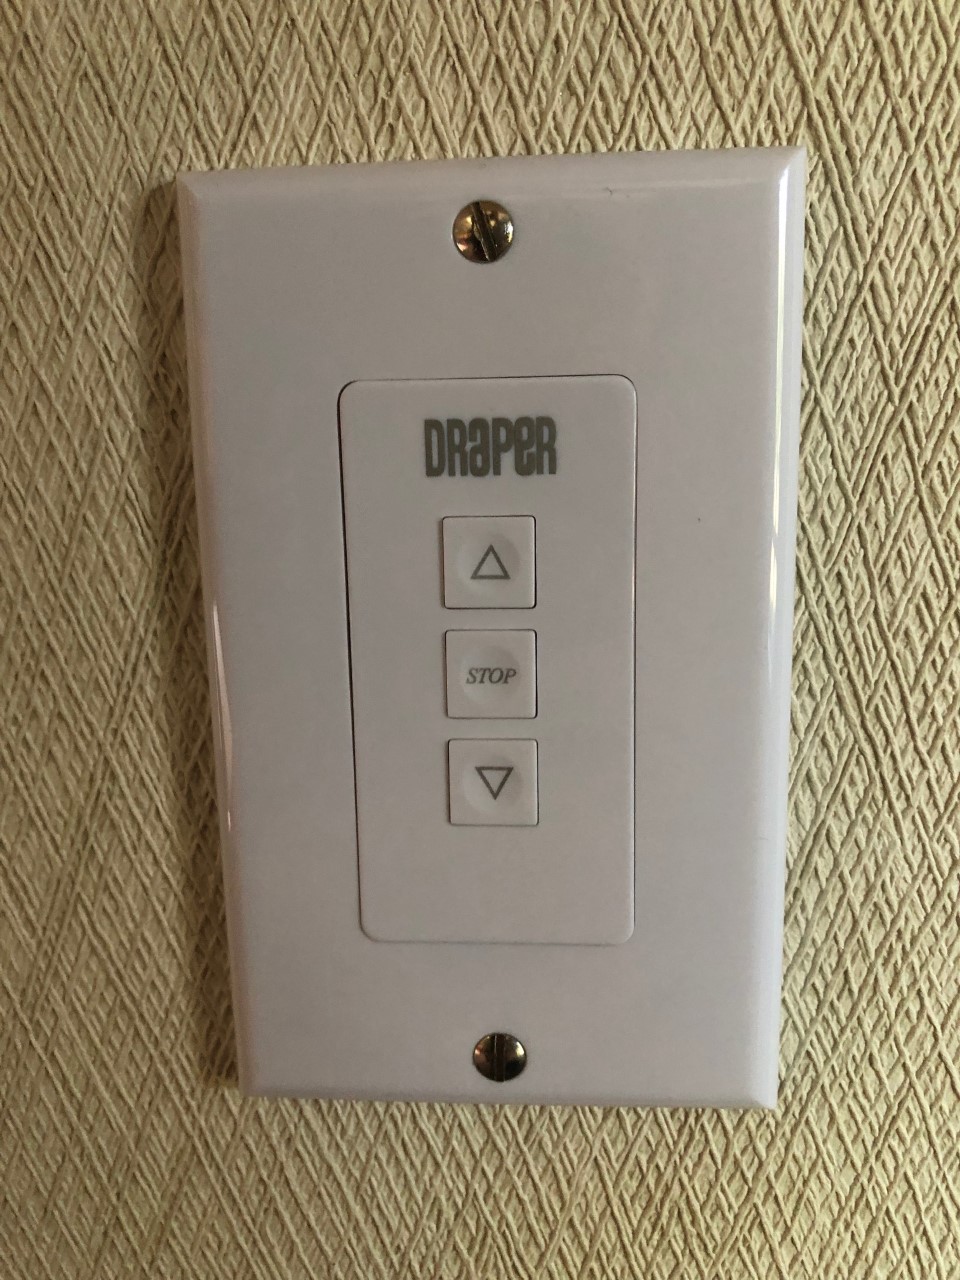
- Lower the Projector Screen with the Control Panel on the Wall
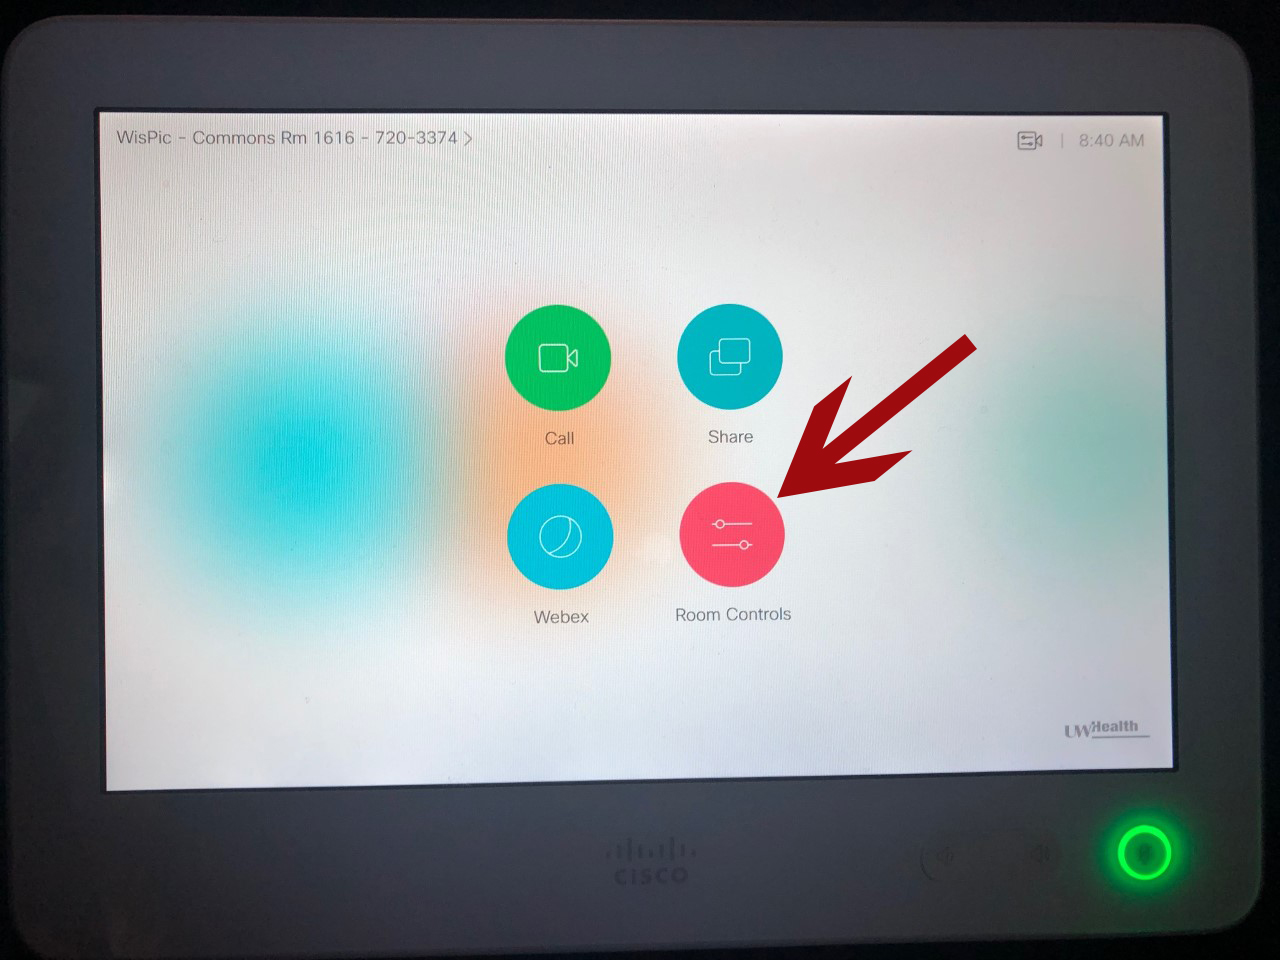
- On the Cisco Interface on the podium, click Room Controls
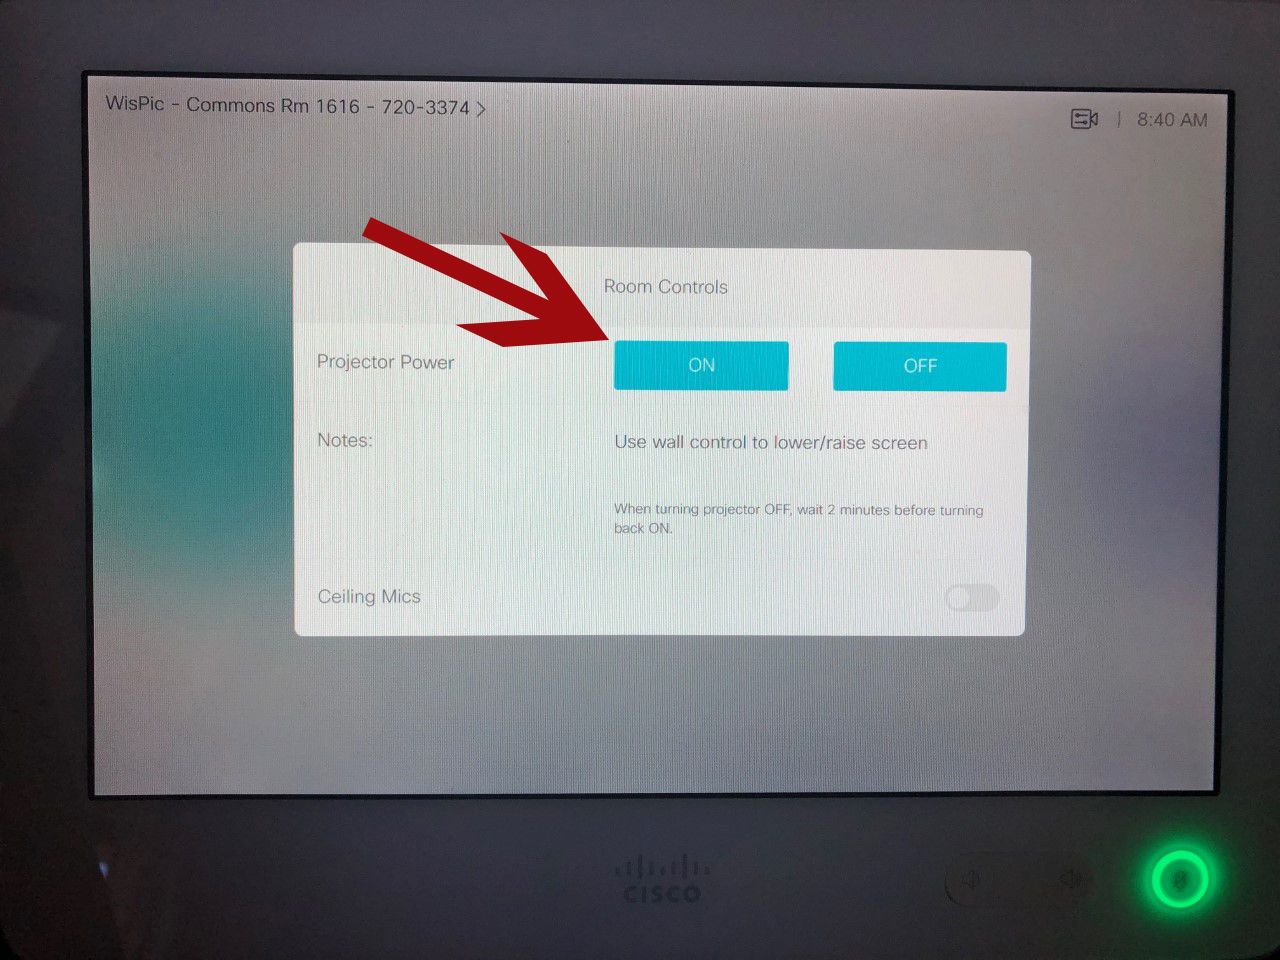
- Select ON from Project Power
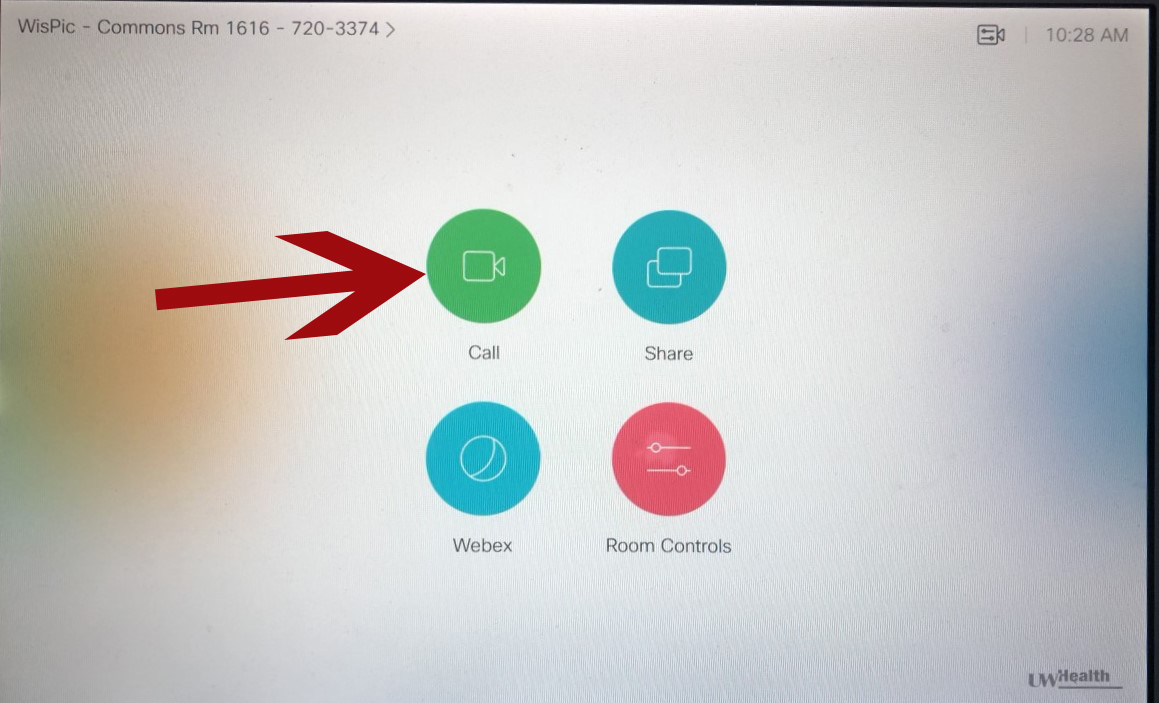
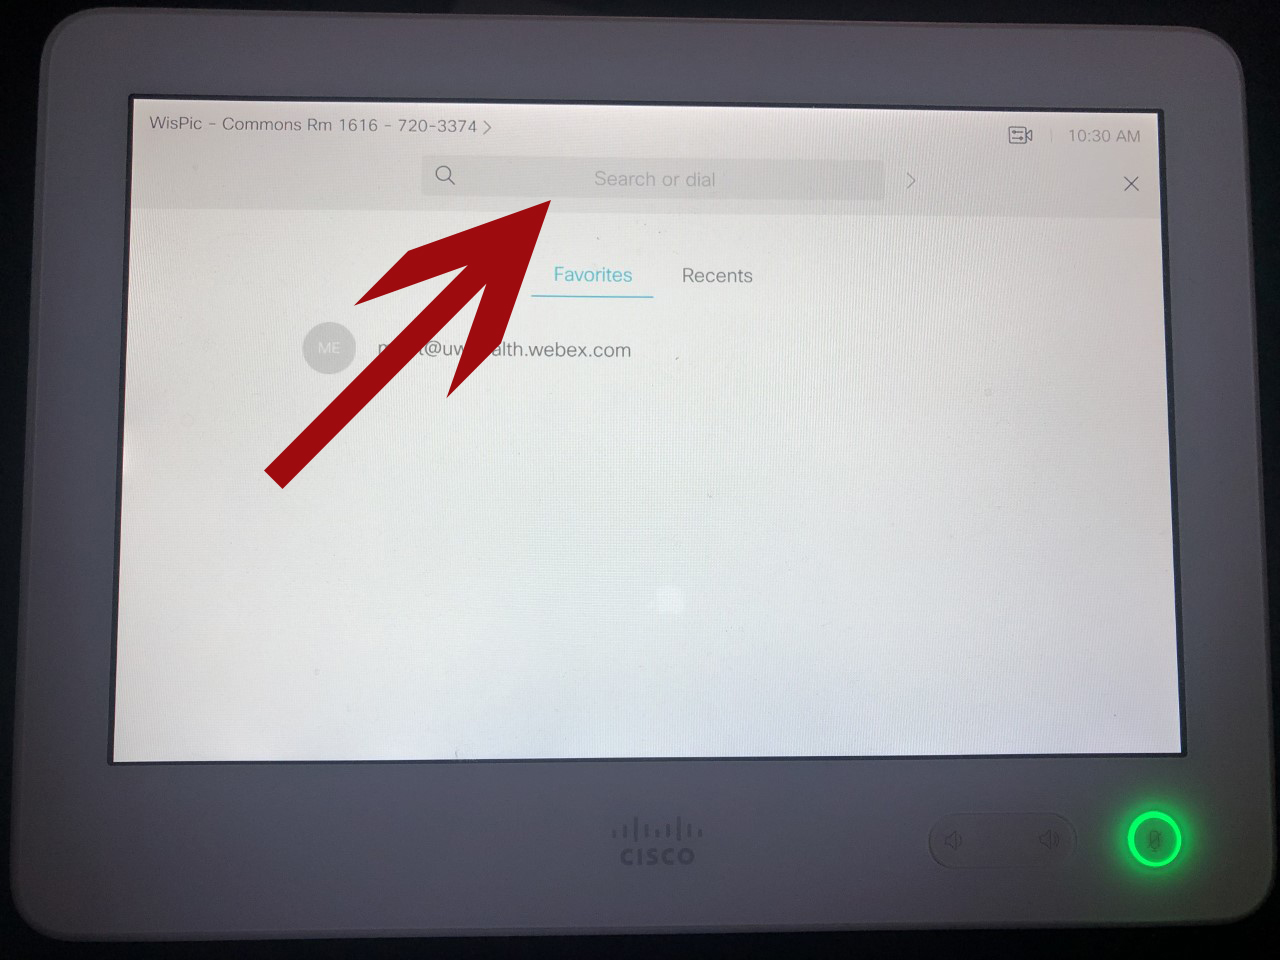
- Navigate back to the home screen, select Call
- Tap on the Search or Dial bar
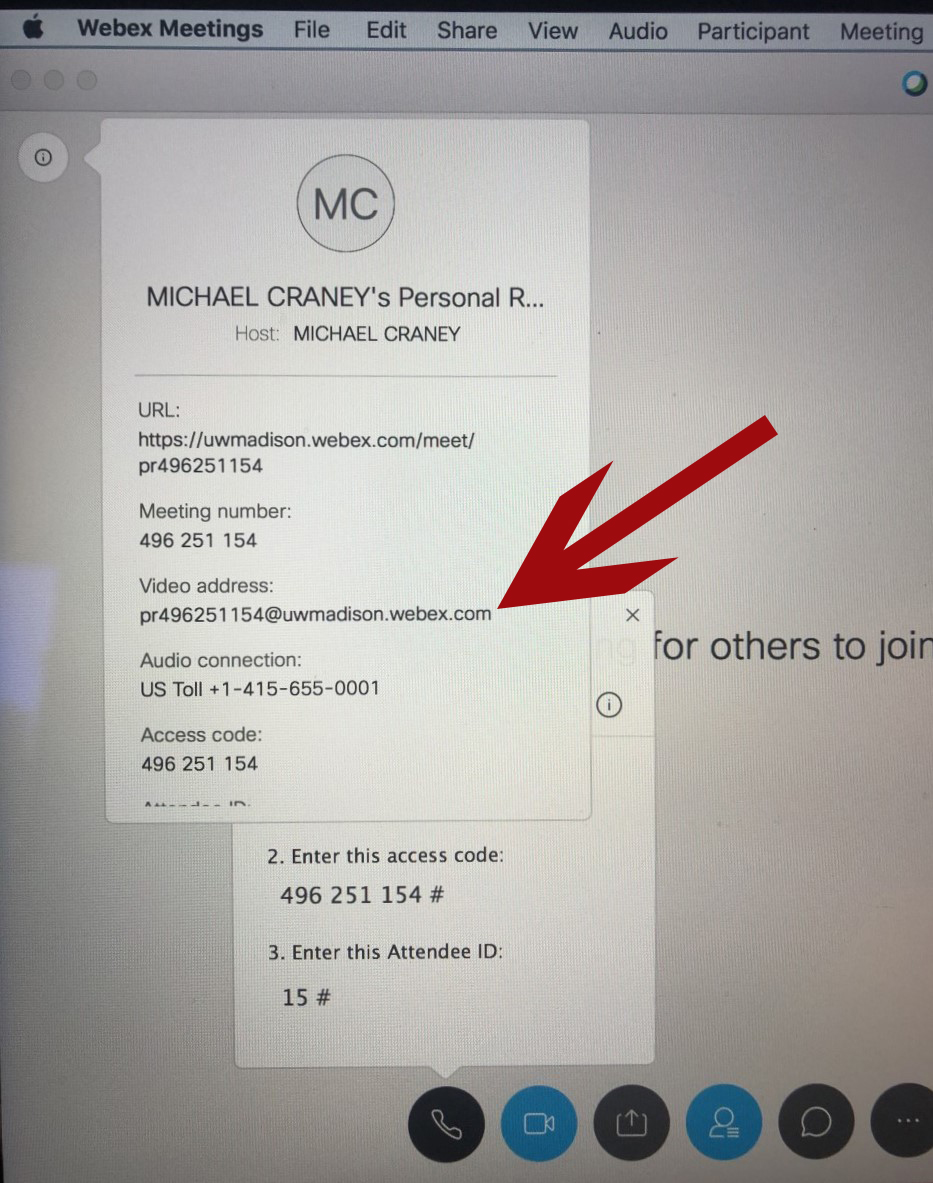
- Locate the Video Address for your meeting, this can be found on the host email message or through the information button on the Webex client. It should be along the lines of something@uwmadison.webex.com
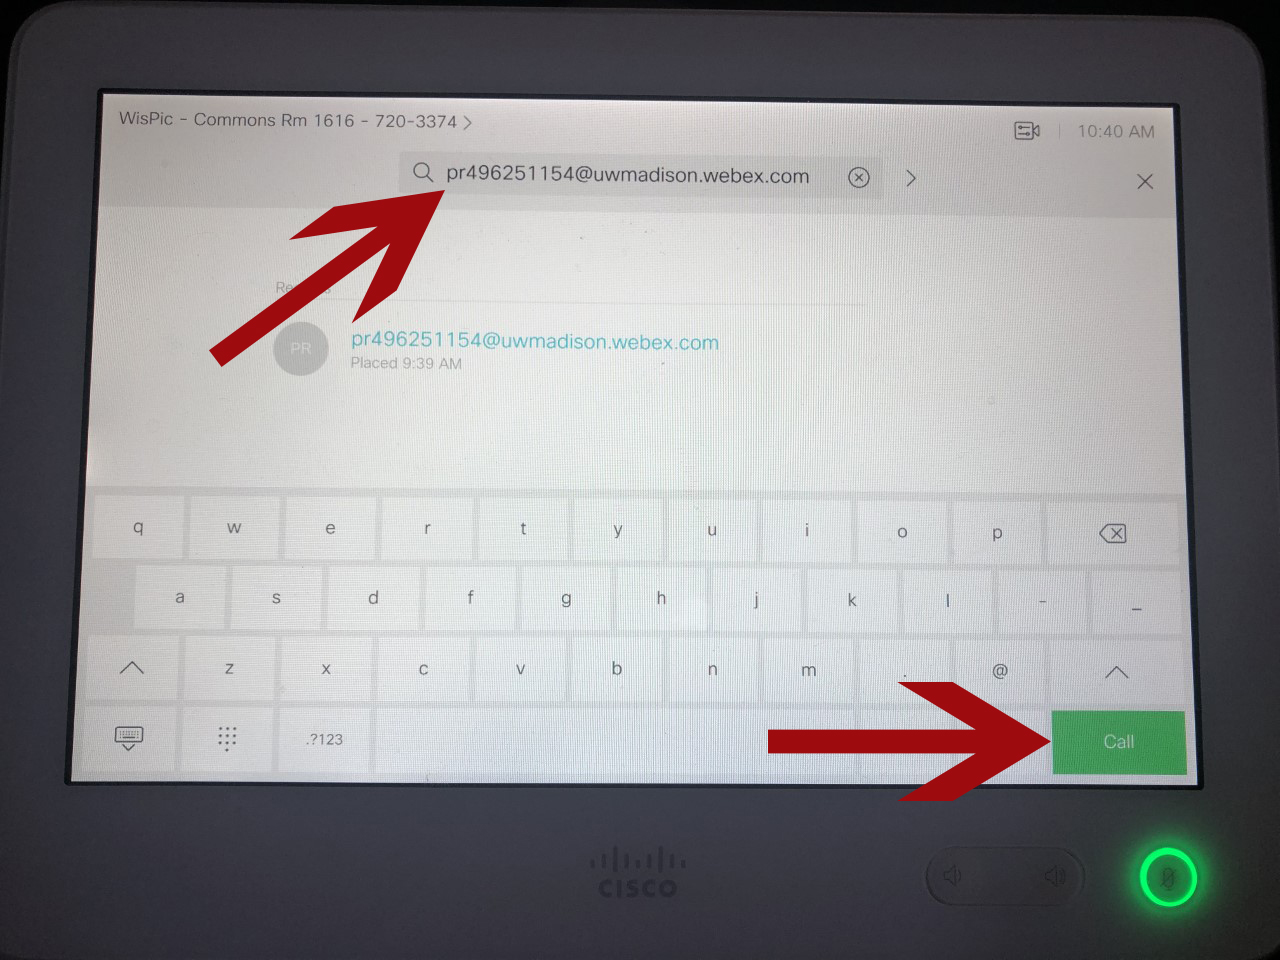
- Enter the full Video Address in the Search or Dial bar and click Call
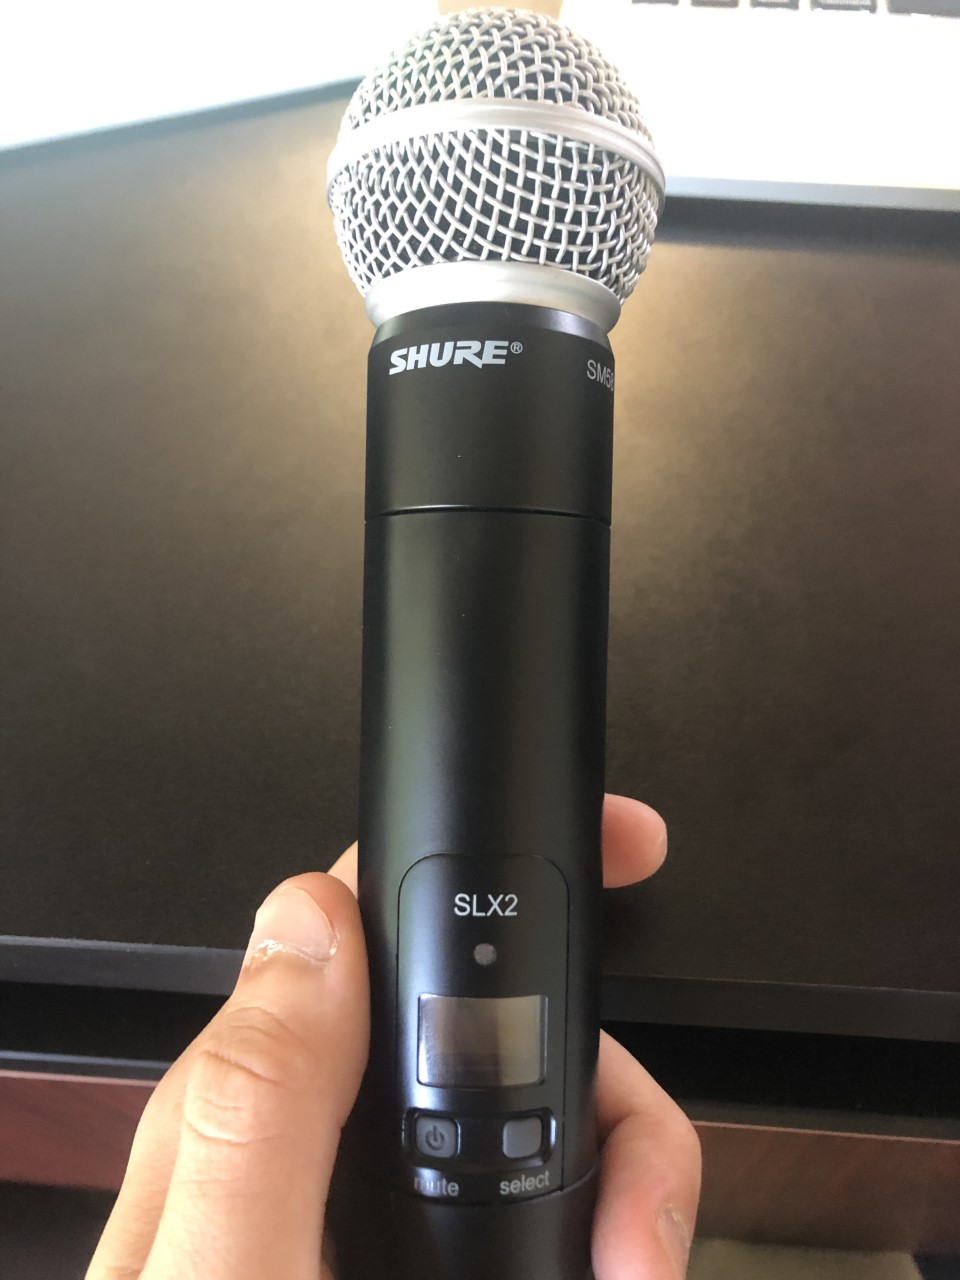
- Power on the Microphone by holding the power button (Please be sure to power it back off when you are finished)
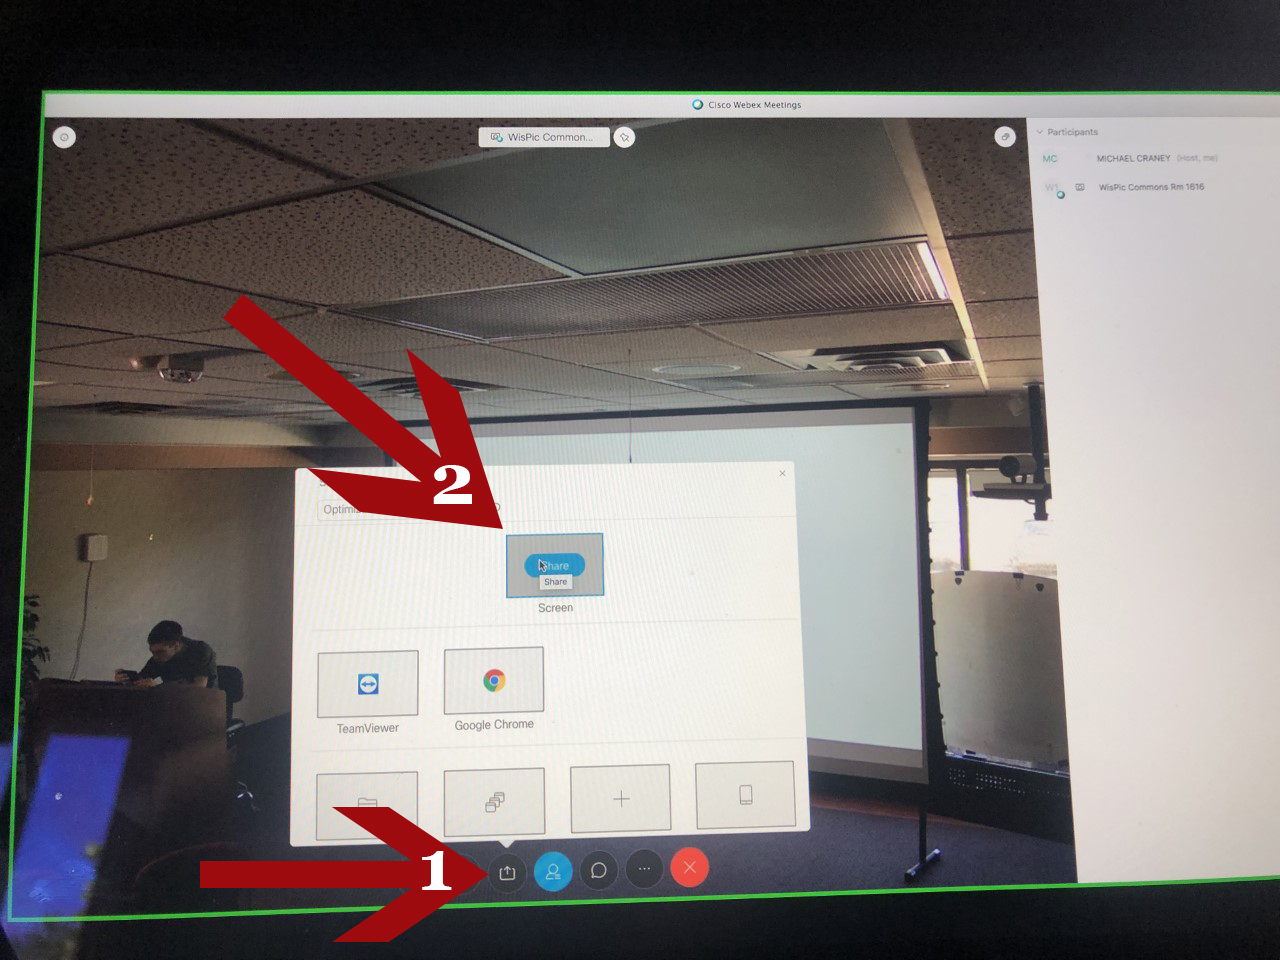
- If you are presenting slides, open them up on your computer and select the Share button on the bottom of the Cisco Webex Application, then select share on the screens tab
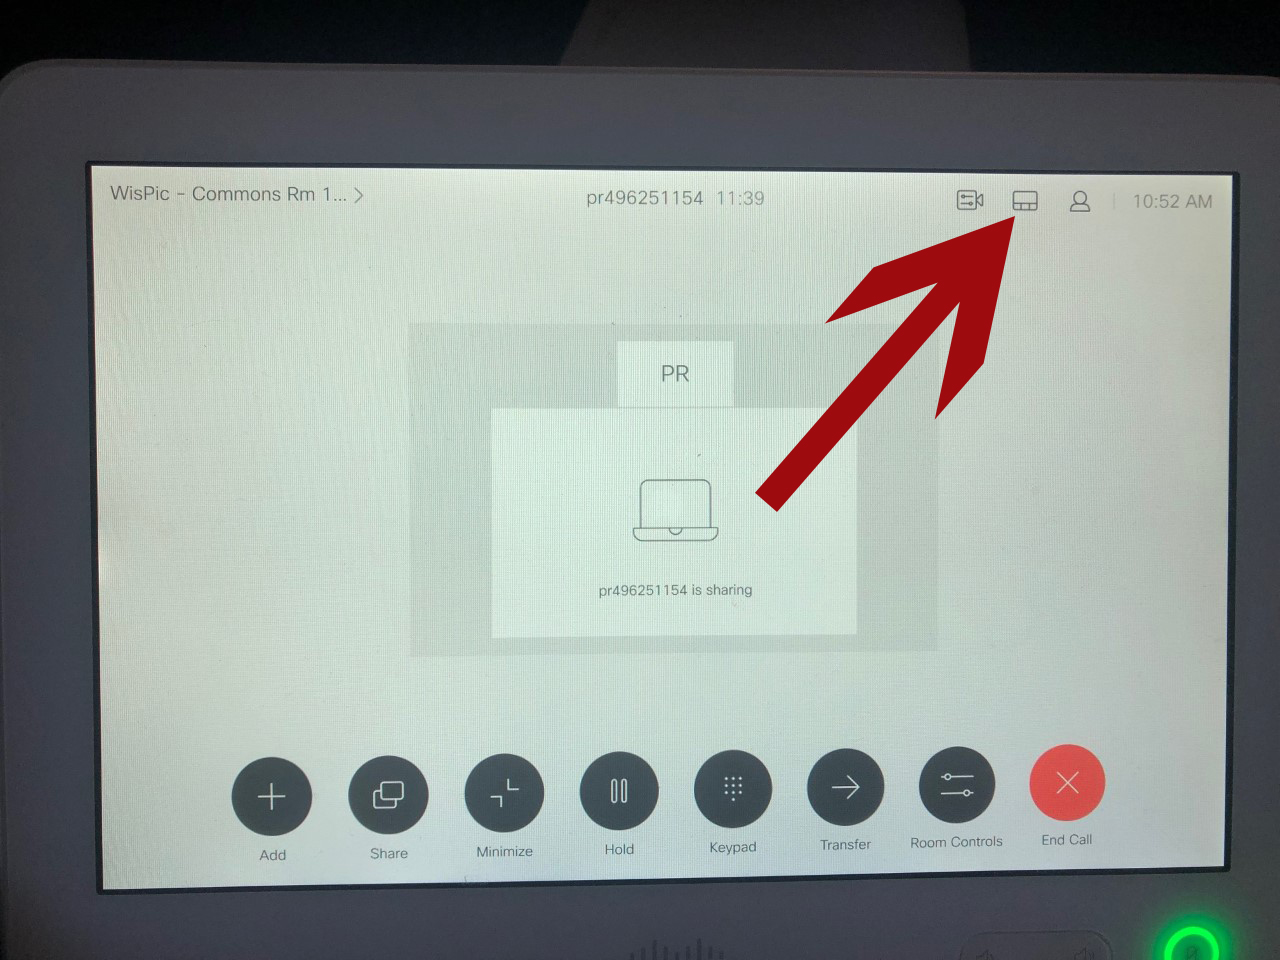
- On the Cisco Webex Interface, select the Screen Modification tab on the top right
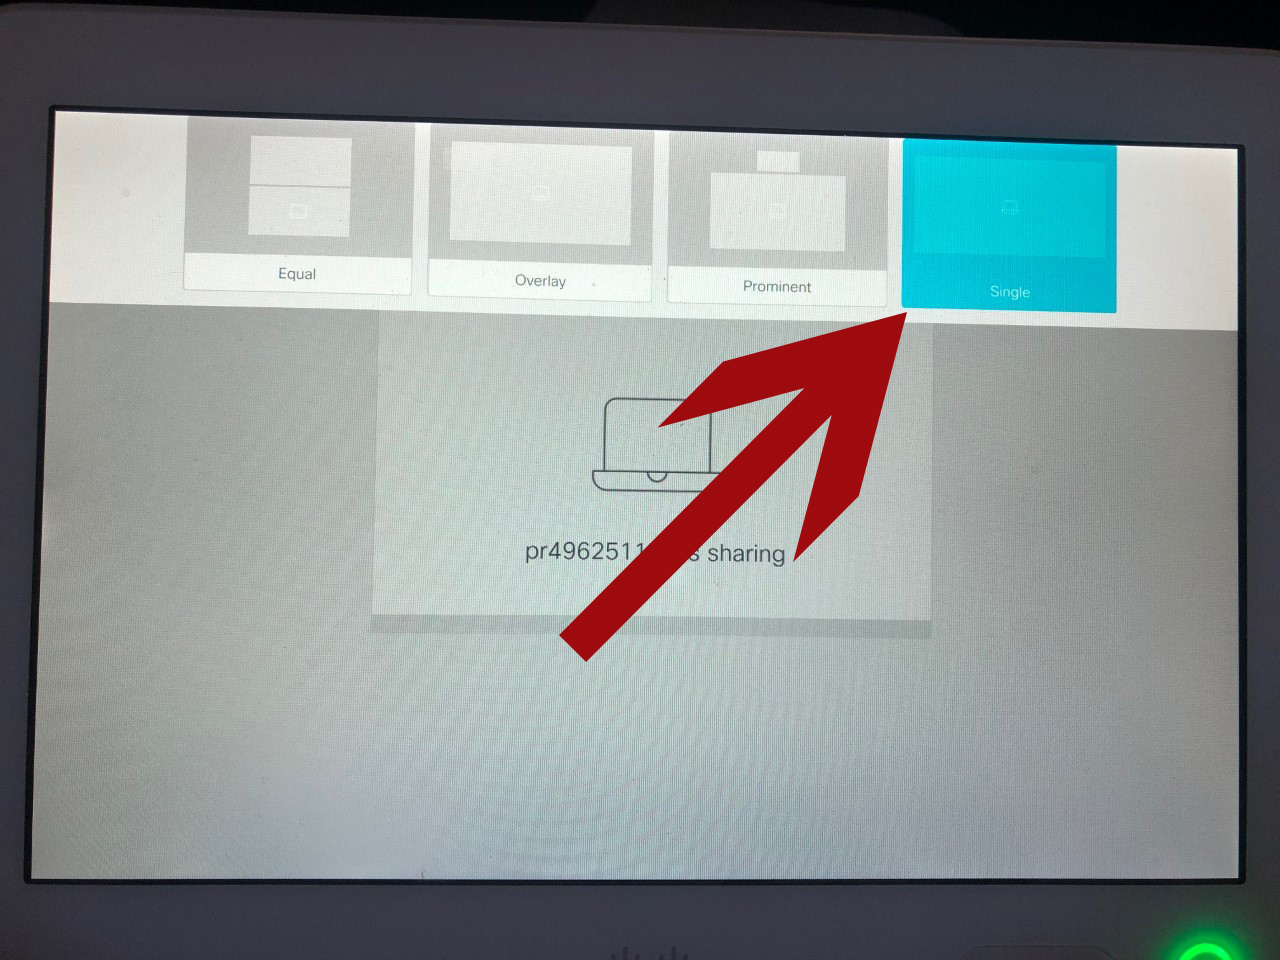
- Select Single
Your meeting should be set-up, but if you’re having any difficulties feel free to contact the help desk staff. If you’d like to add video feed of you talking on the podium, read below.
- Lower the Projector Screen with the Control Panel on the Wall
- On the Cisco Interface on the podium, click Room Controls
- Select ON from Project Power
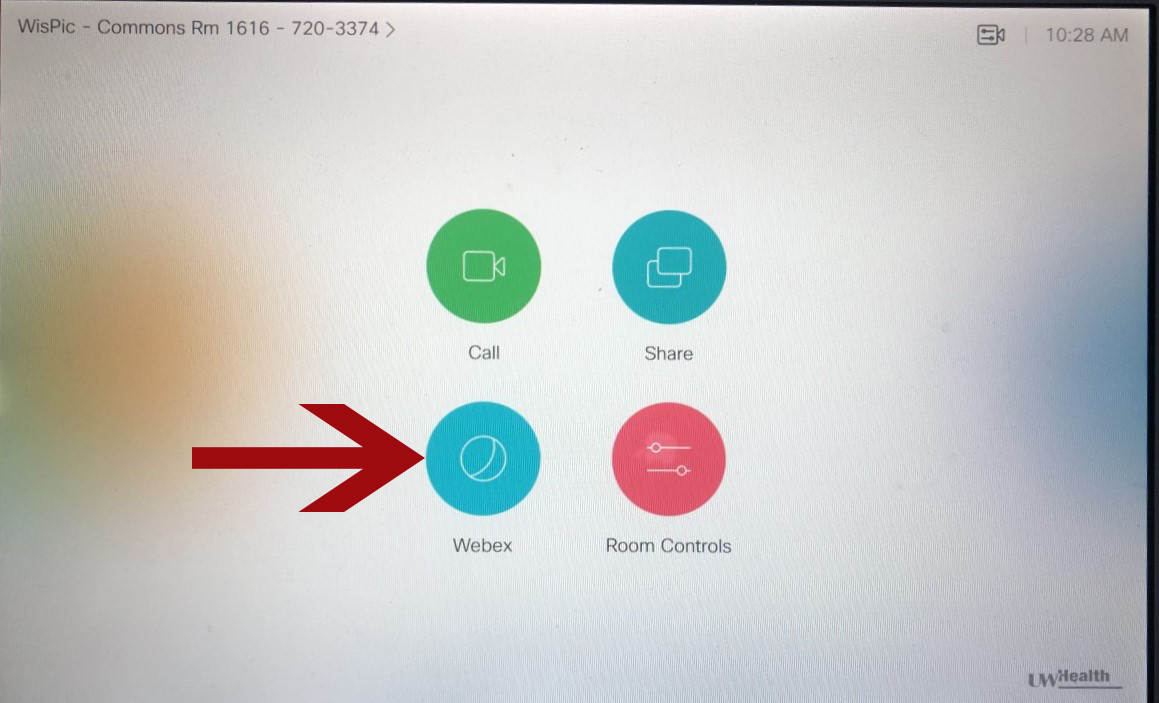
- Navigate back to the home screen, select Webex
- Click on Keypad, then enter your meeting number followed by #
- Power on the Microphone by holding the power button (Please be sure to power it back off when you are finished)
- If you are presenting slides, open them up on your computer and select the Share button on the bottom of the Cisco Webex Application, then select share on the screens tab
- On the Cisco Webex Interface, select the Screen Modification tab on the top right
- Select Single
Your meeting should be set-up, but if you’re having any difficulties feel free to contact the help desk. If you’d like to add video feed of you talking on the podium, read below.
- Select End Call
- Click on Room Controls and select OFF for Projector Power
- Turn off the Microphone
- Use the Control Panel on the wall to put the screen back up
Helpful Tips and Tricks
This is an accordion element with a series of buttons that open and close related content panels.
Trouble Shooting Lack of Audio
- Check if the Mute Button on the Cisco Interface is red. If it is click the button once to unmute, it should turn green.

- Check if you have accidentally clicked the mute button on the microphone, indicated by an orange light. If so, simply click the mute button on the microphone, the light should turn green to signify it is no longer muted.
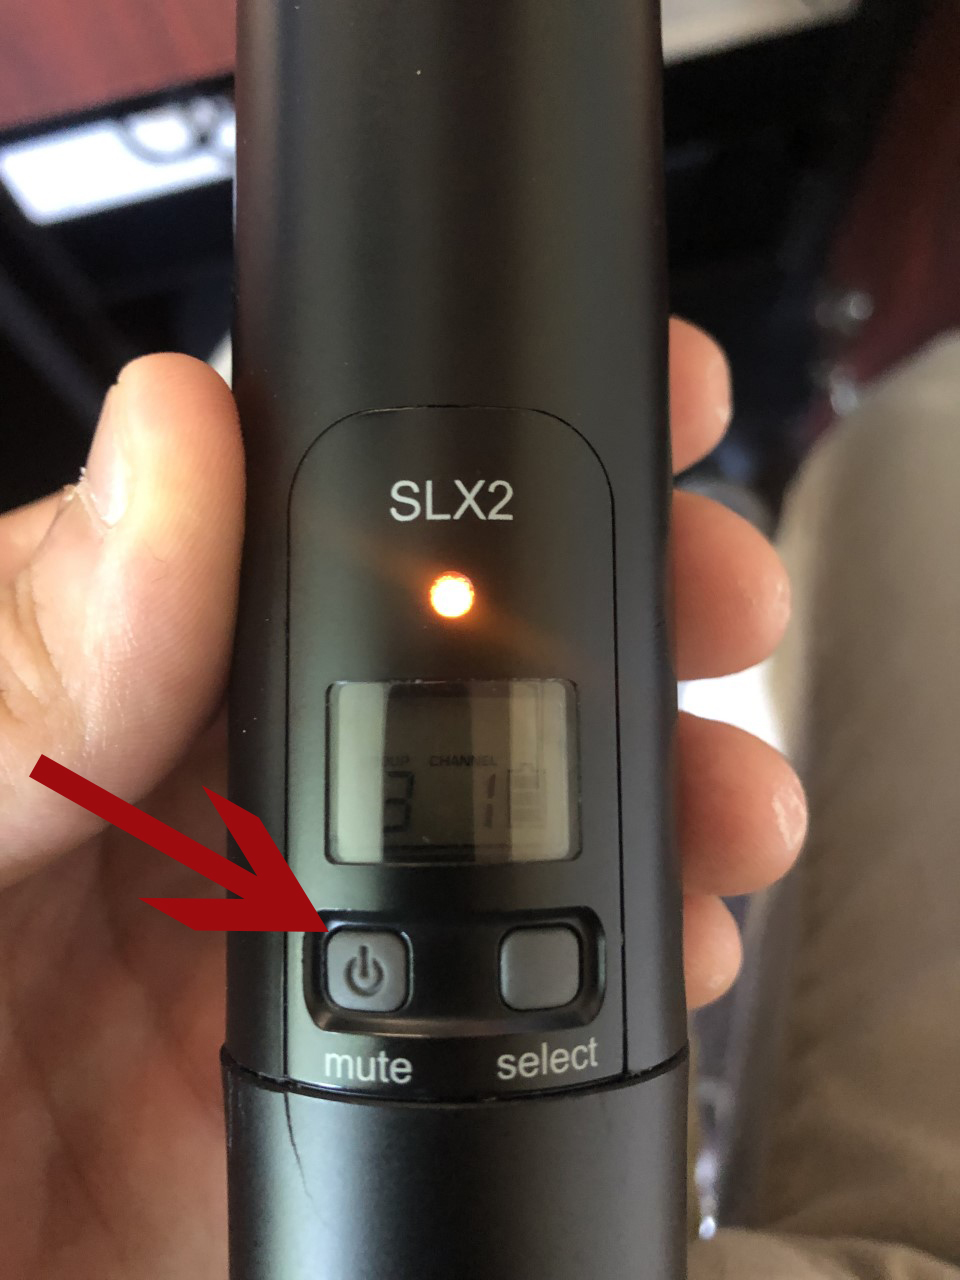
- Underneath the podium, check to ensure the SHURE box is on indicated by the screen being light up. If it is not, hold the power button and the screen should light up indicating it has turned on.

If you need further assistance, or this process didn’t work, please contact the help desk.
Adding Video of Podium
- Select the Video Controls Button
![]()
- Click on Podium and make sure Selfview is checked, the camera can also be adjusted by the displayed controls if you’d like to zoom and focus in on the podium
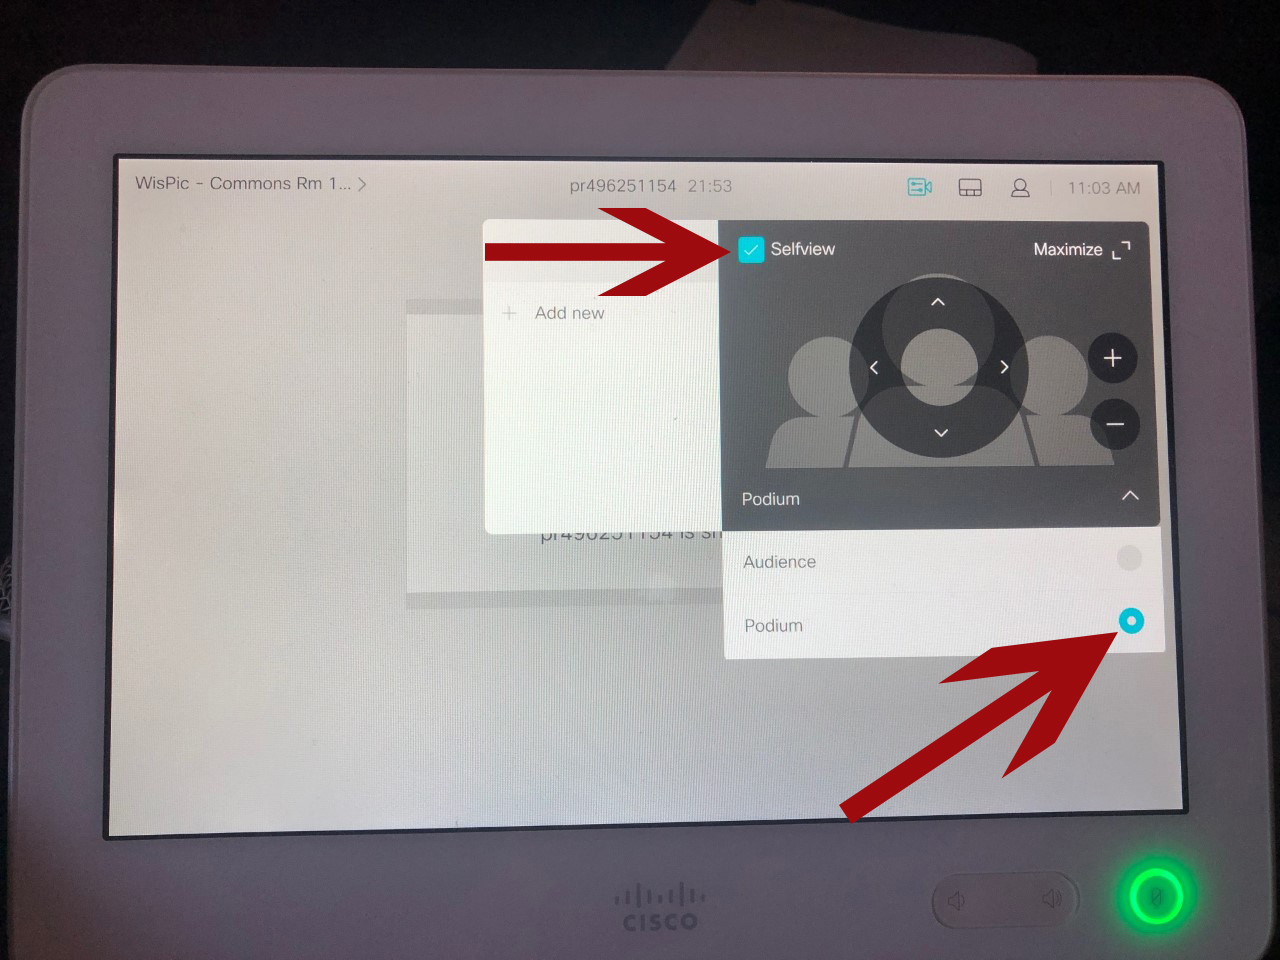
- You can control where the video feed is displayed by clicking on it and dragging it to one of the other available locations

Turning on the Ceiling Mics for Audience Discussion
- Click on Room Controls

- Click on the Ceiling Mics button
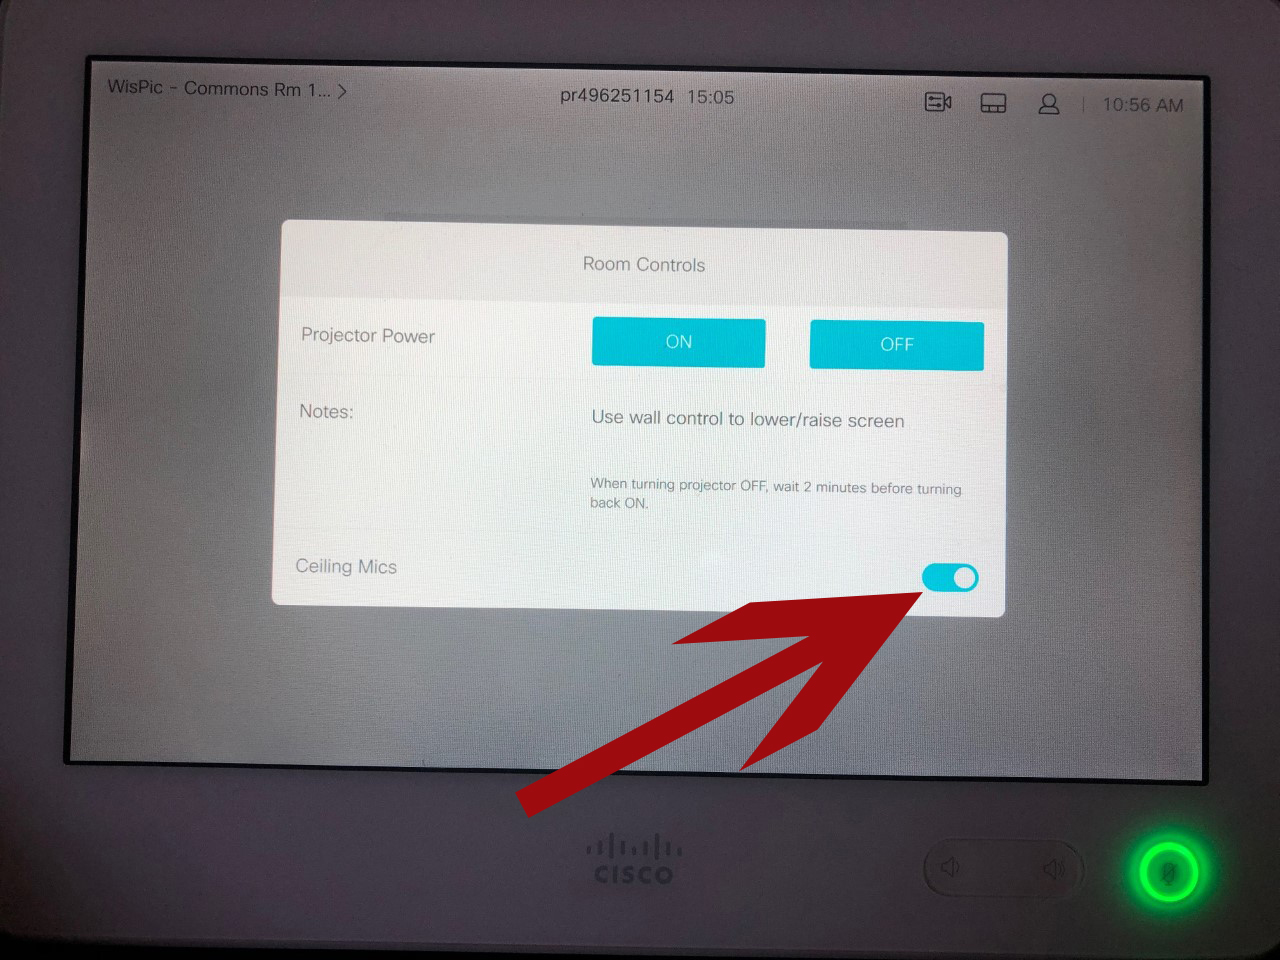
Note: If using the ceiling mics, it’s likely a good idea to power off the personal microphone you have been using as it can cause an unwanted feedback loop