In order to connect to the J-Drive, you must be on the Wispic internal network. You are on this network if any of the following conditions are true:
- You are on a computer in Wispic that has a physical Ethernet cable connected to it
- You are on a computer that has a VPN connection
If one of these conditions is true, you should be able to follow the steps for your computer operating system below. Please contact the helpdesk if you need help.
This is an accordion element with a series of buttons that open and close related content panels.
Windows
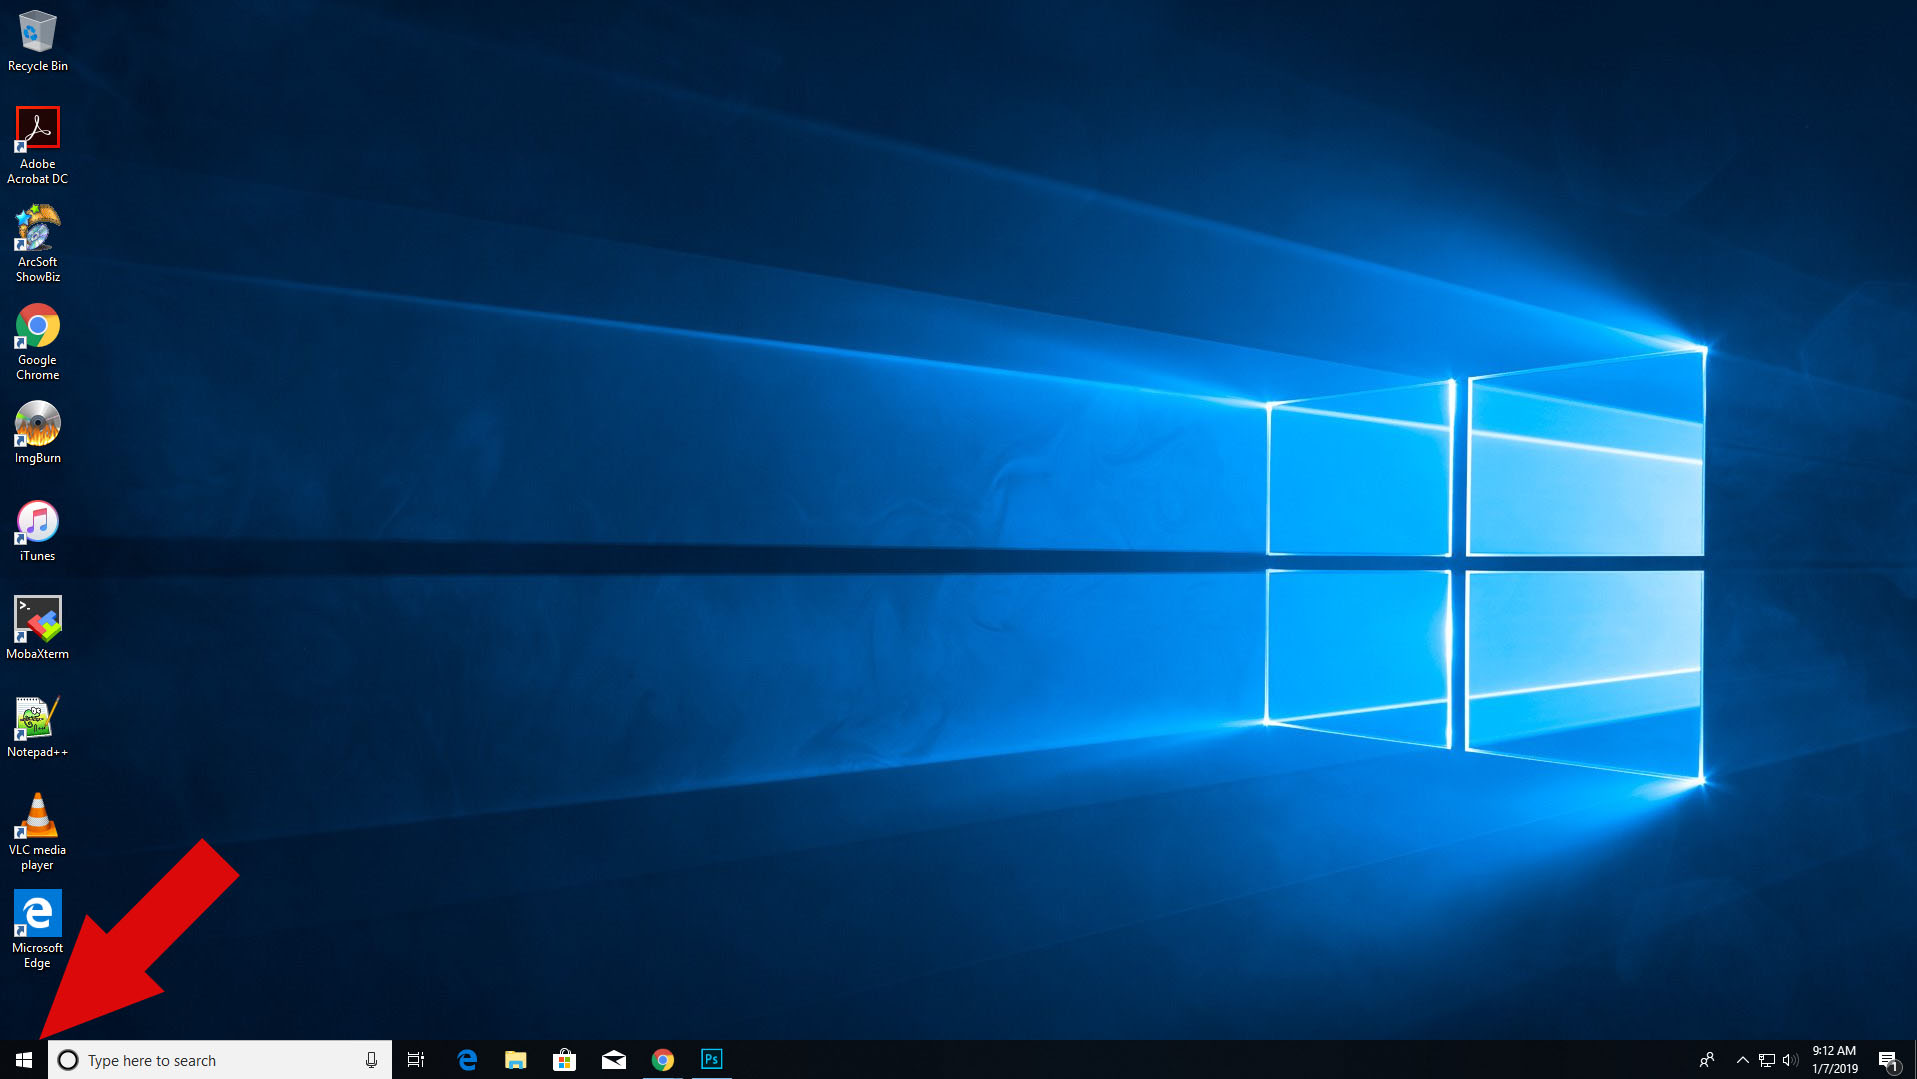
- Click the Start in the bottom left corner (the Windows icon for Windows 10).
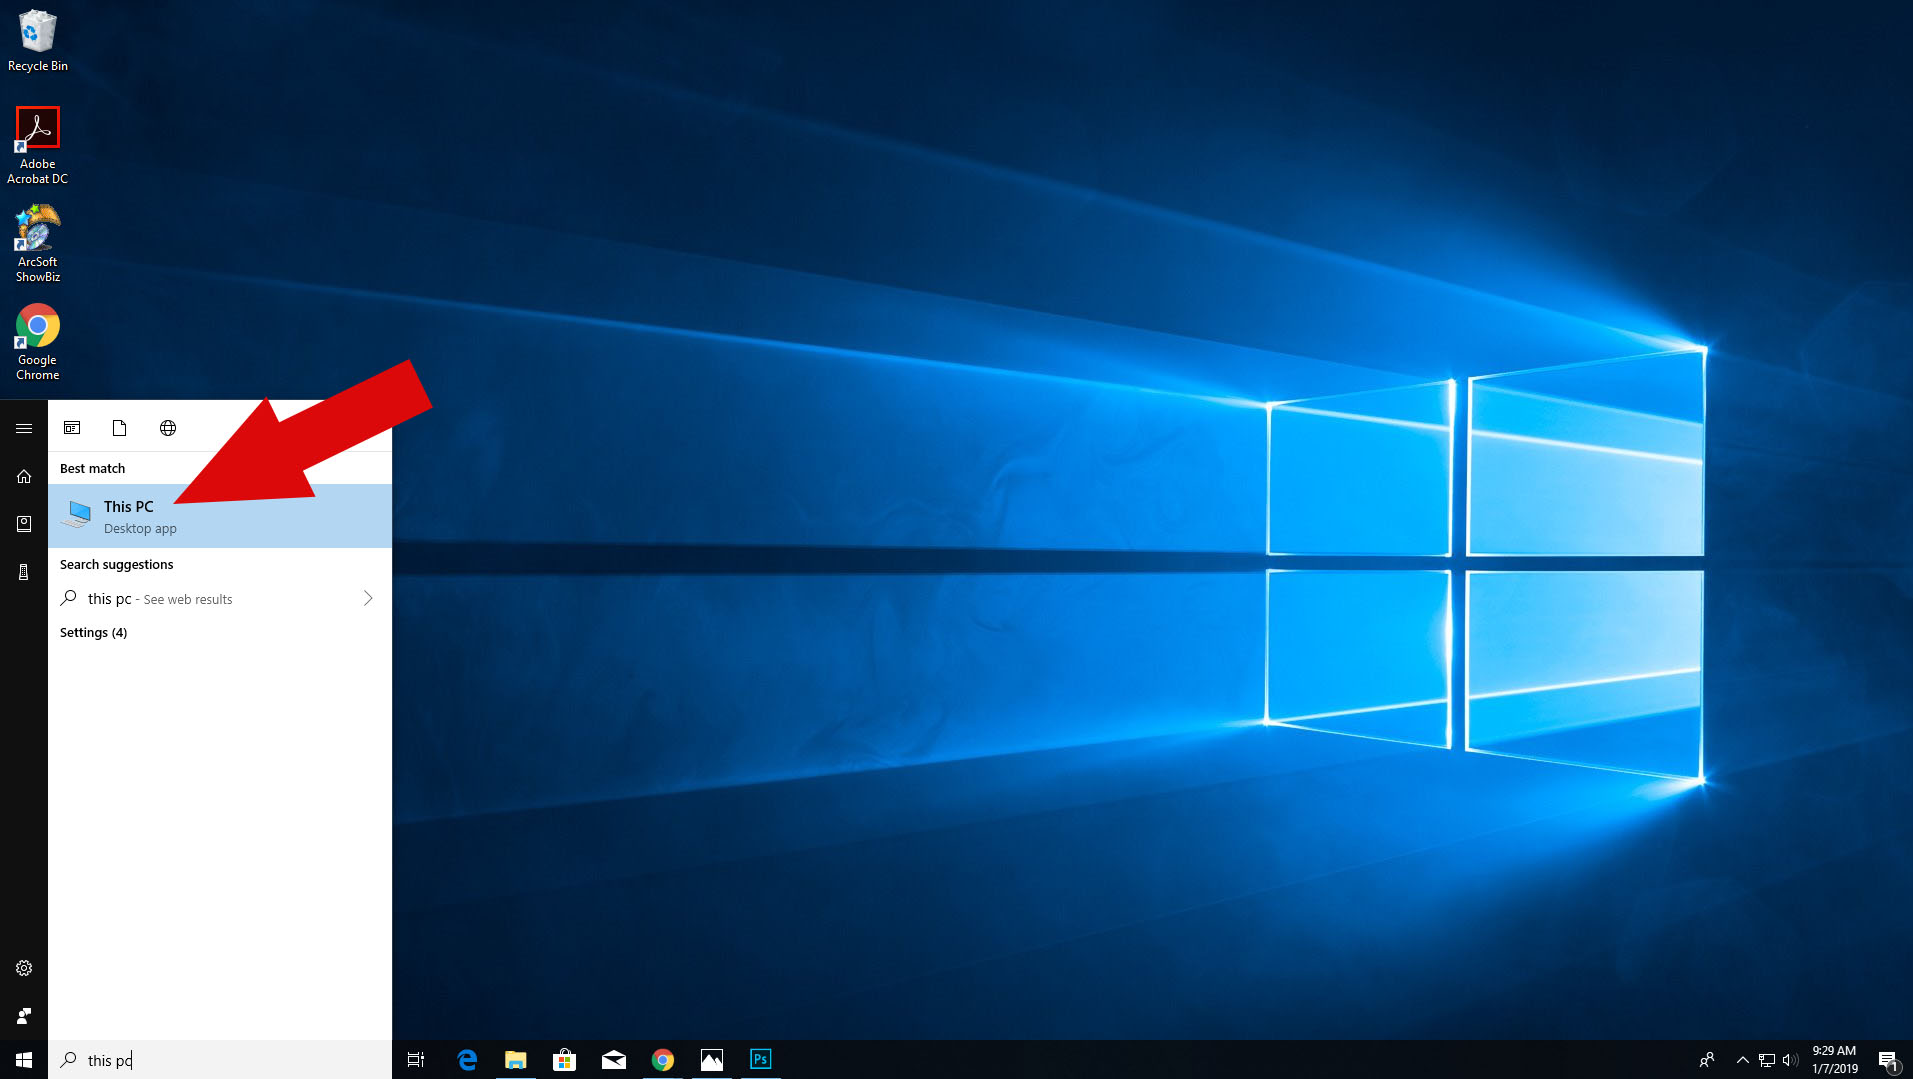
- Begin typing This PC and select it from the menu.
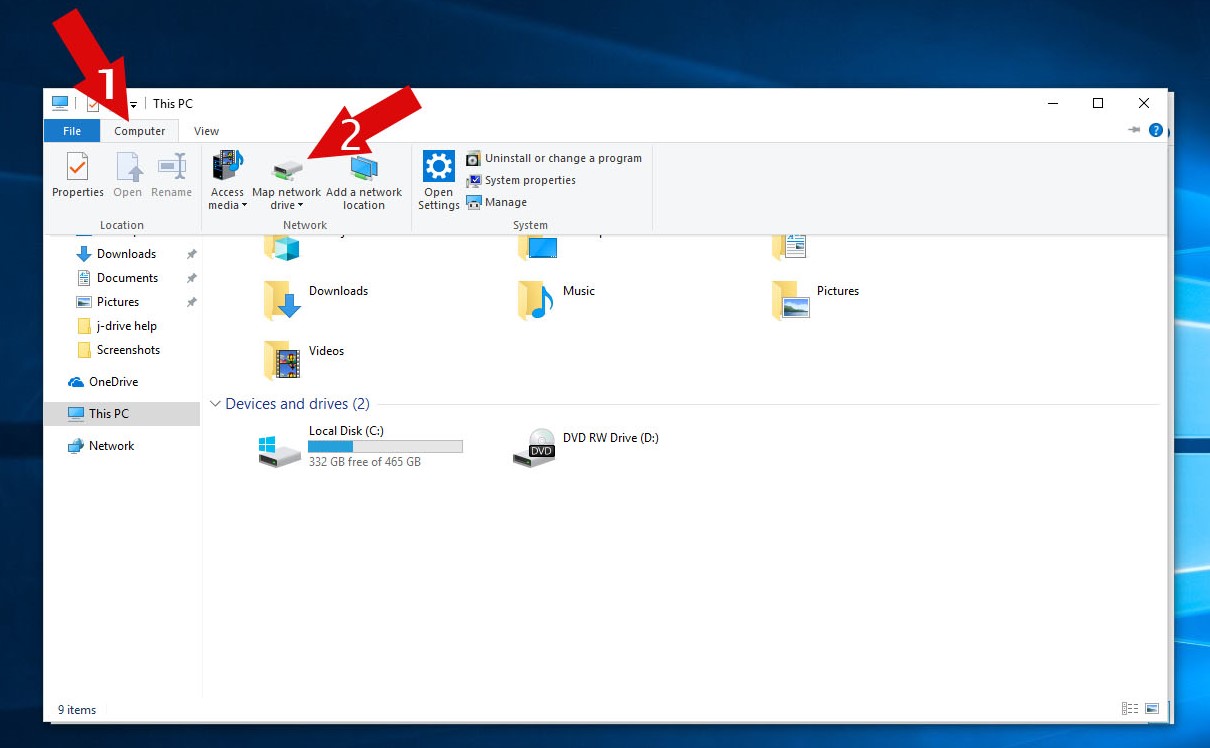
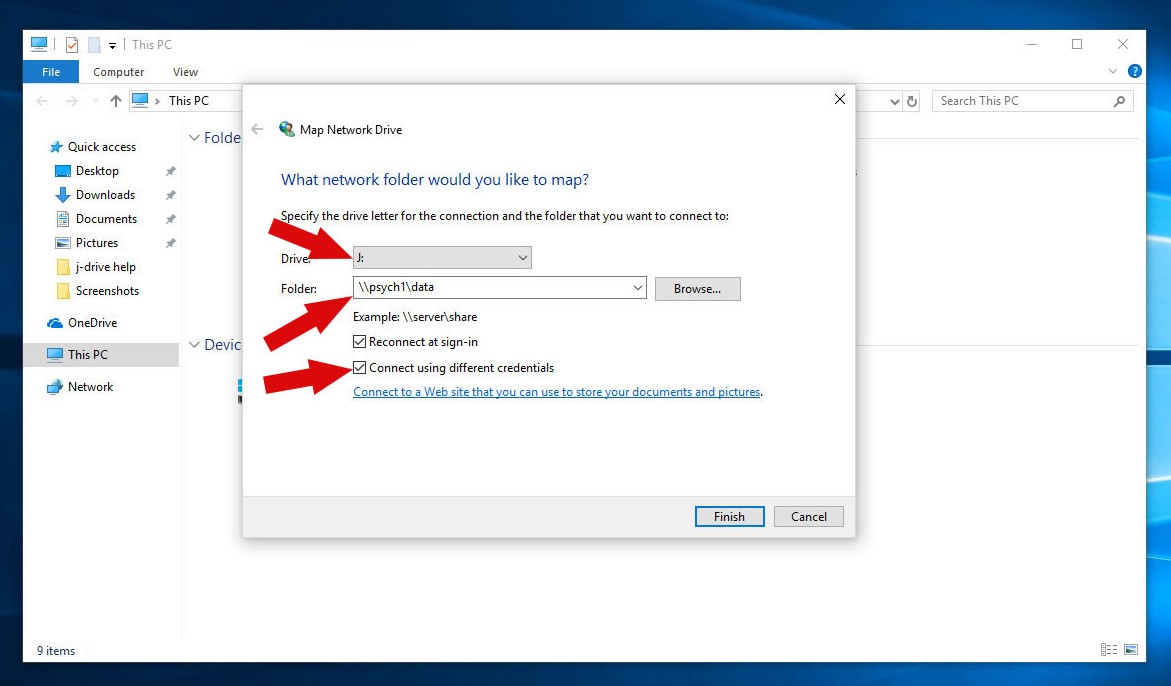
- In the window that opens, click Computer from the top tabs, then select Map Network Drive from the drop down menu.
- Select J: from the drop down menu where it asks you to select a drive letter. For the folder, type \\psych1\data and check the box to Connect using different credentials. Note: For vpn connected devices, it is recommended that you uncheck the Reconnect at sign-in box.
- Click Finish. Note: For VPN users, if you get an error message stating it cannot find psych1, there could be a DNS resolution problem. Try substituting the IP address 144.92.2.10 for psych1 in the path, so the new path would be \\144.92.2.10\data.
- In the next Windows Security window that opens, type psychiatry\username (e.g. psychiatry\bbadger) and password in the corresponding boxes.
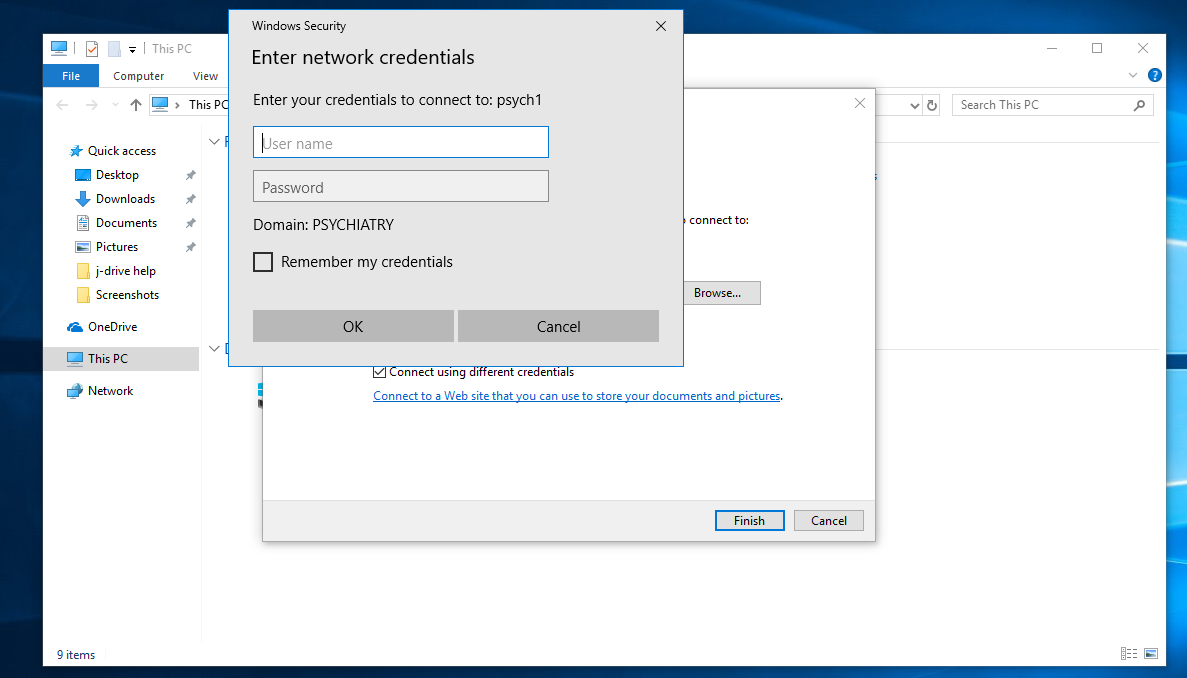
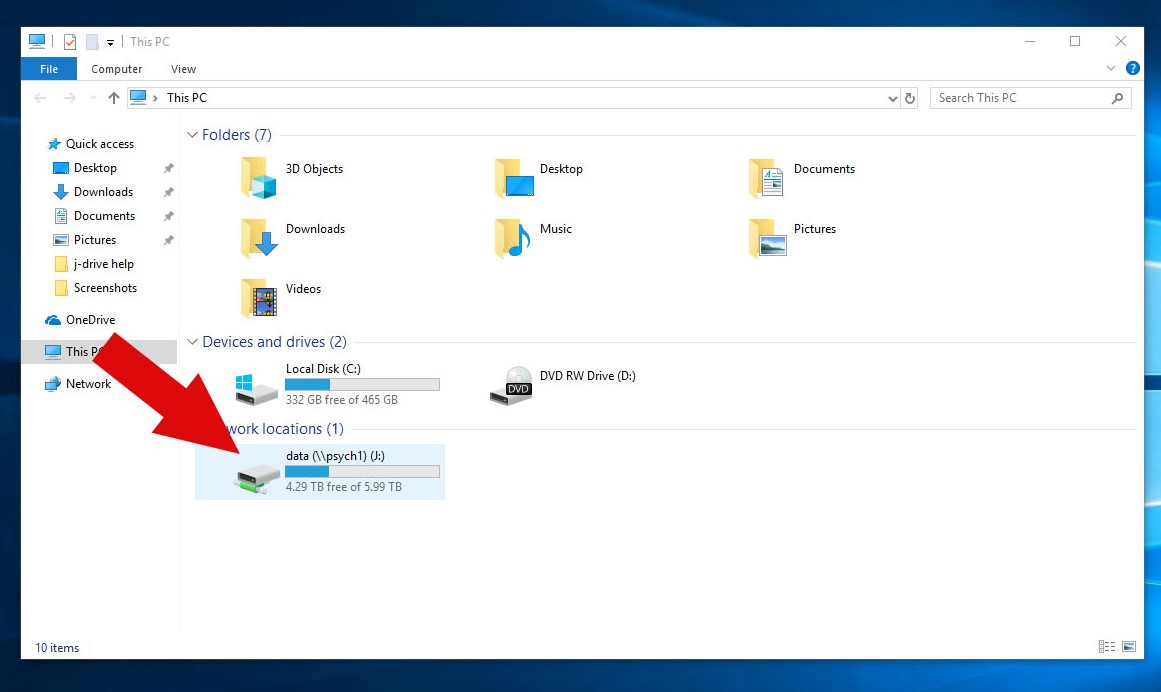
- Click OK. If everything went well, you should see the J: drive every time you open File Explorer under Computer or This PC. If you need further assistance, or this process didn’t work, please contact the help desk.
Mac
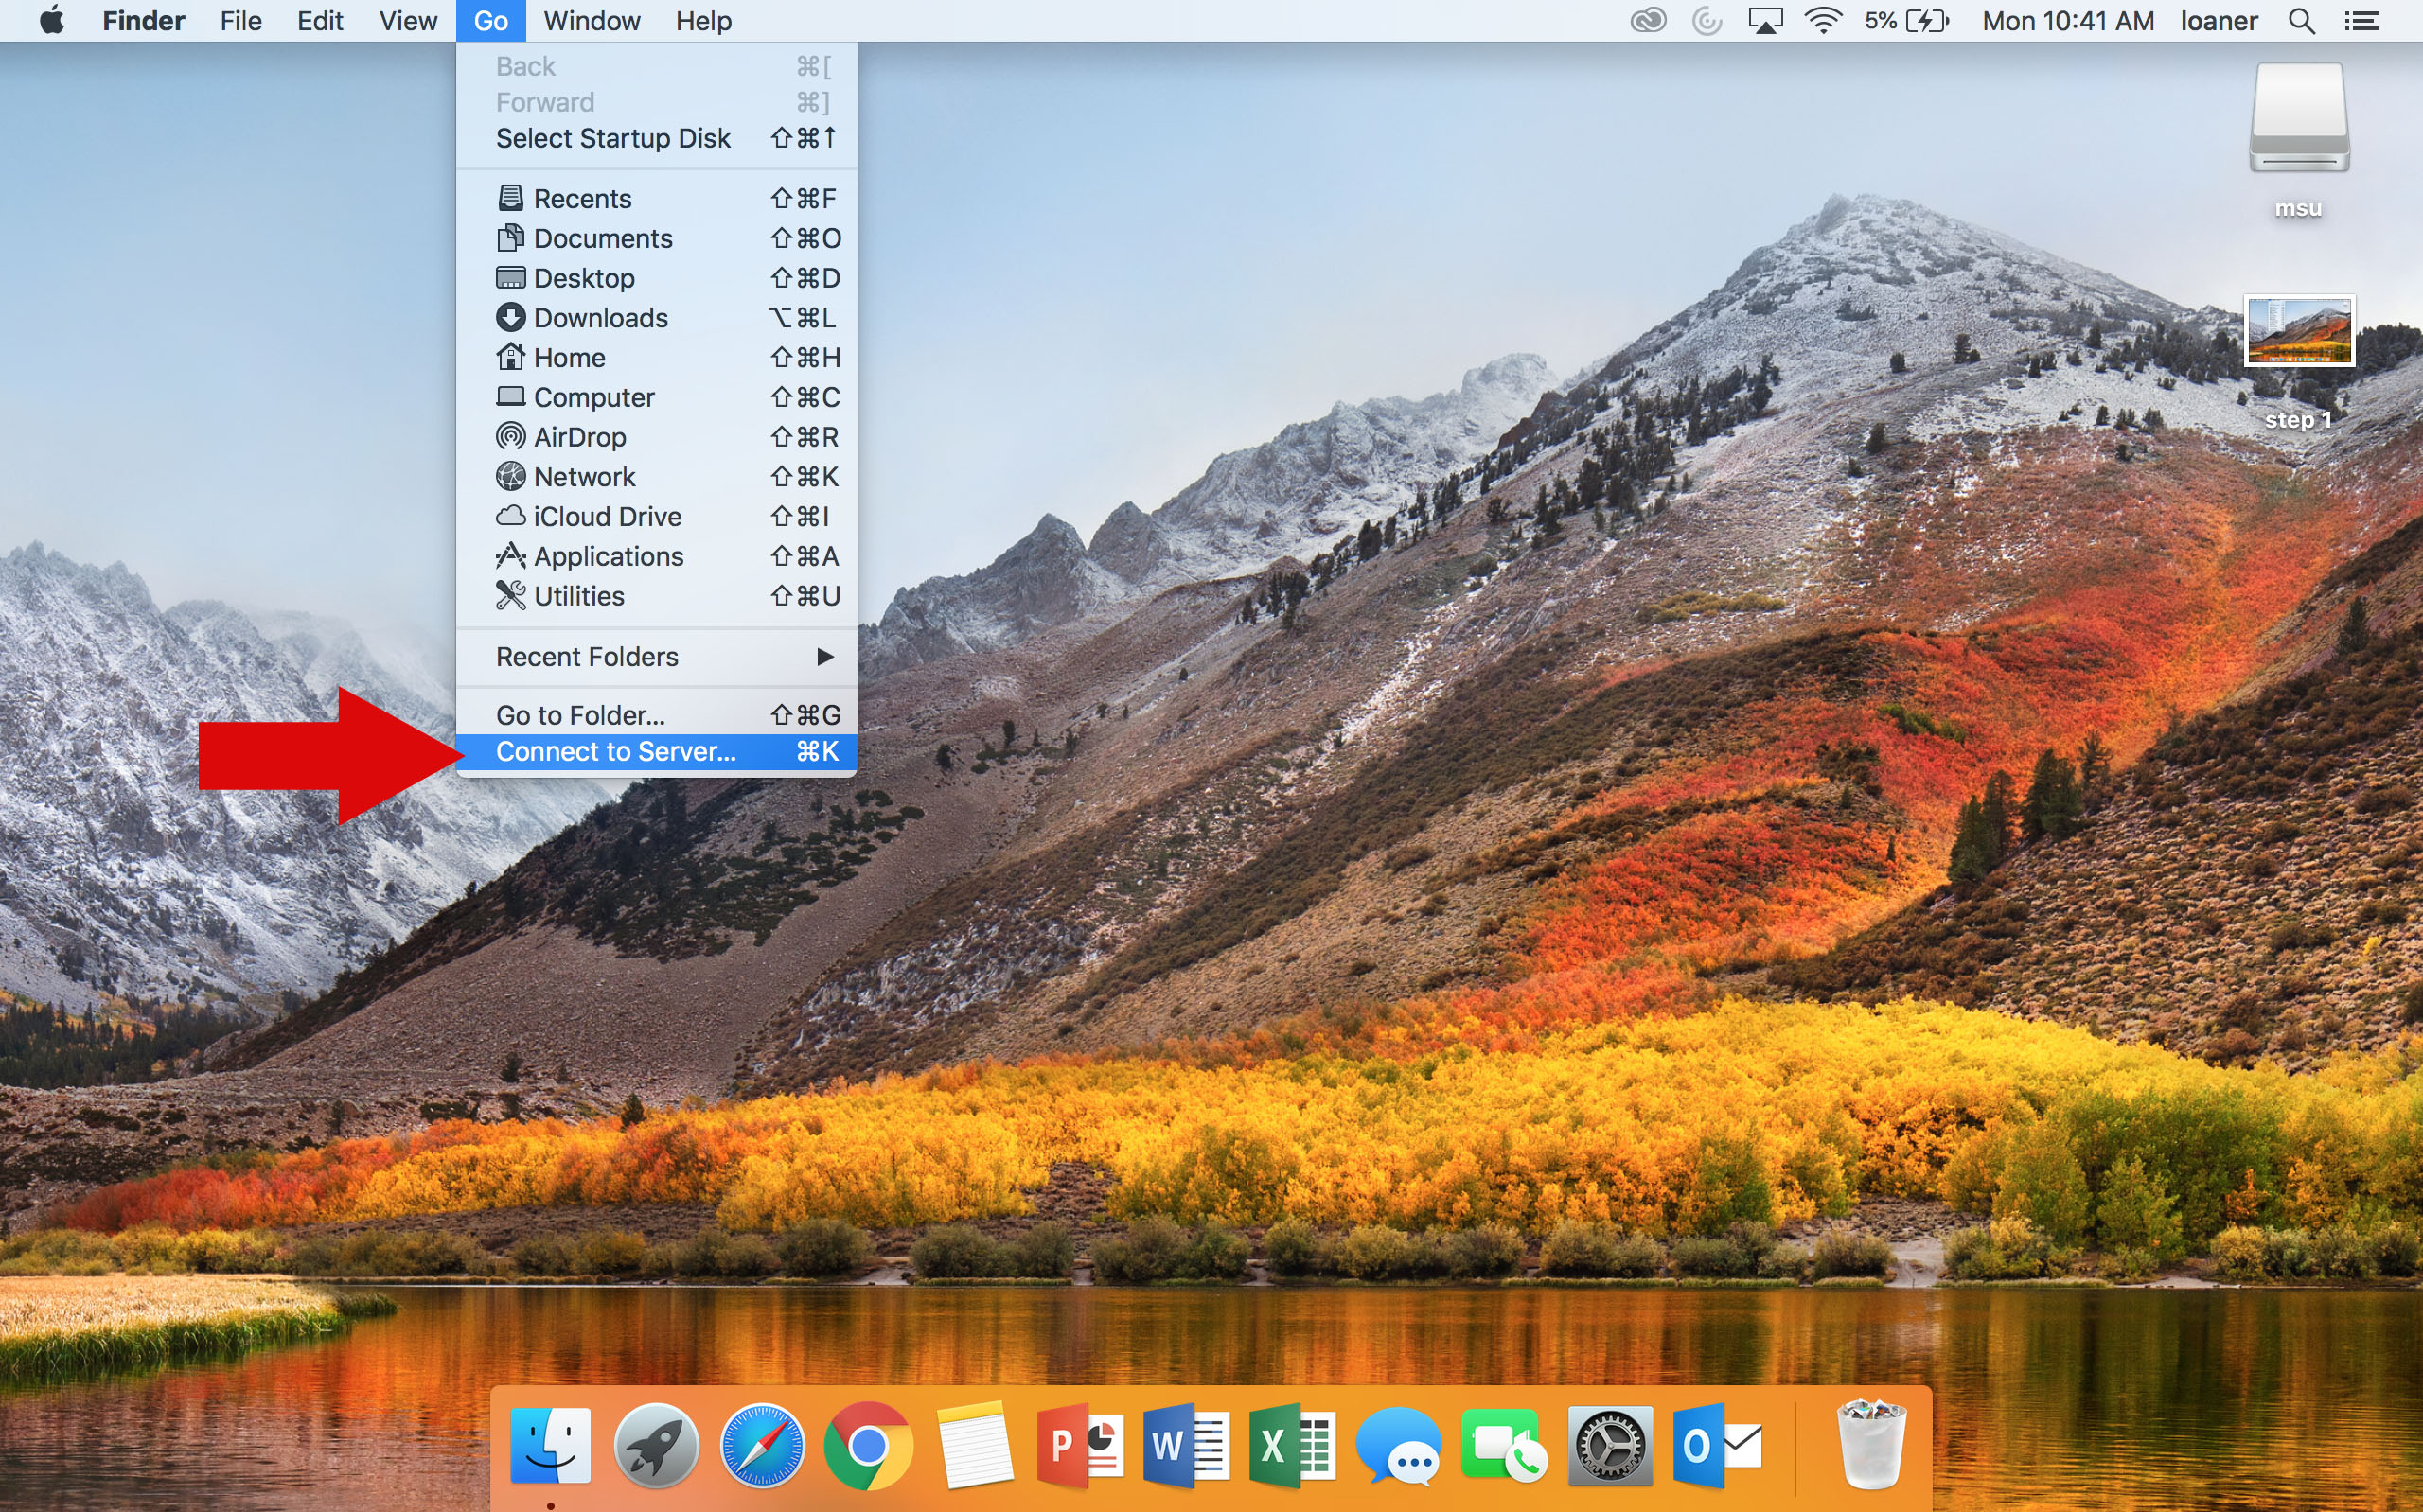
- Click on Go in the top bar.
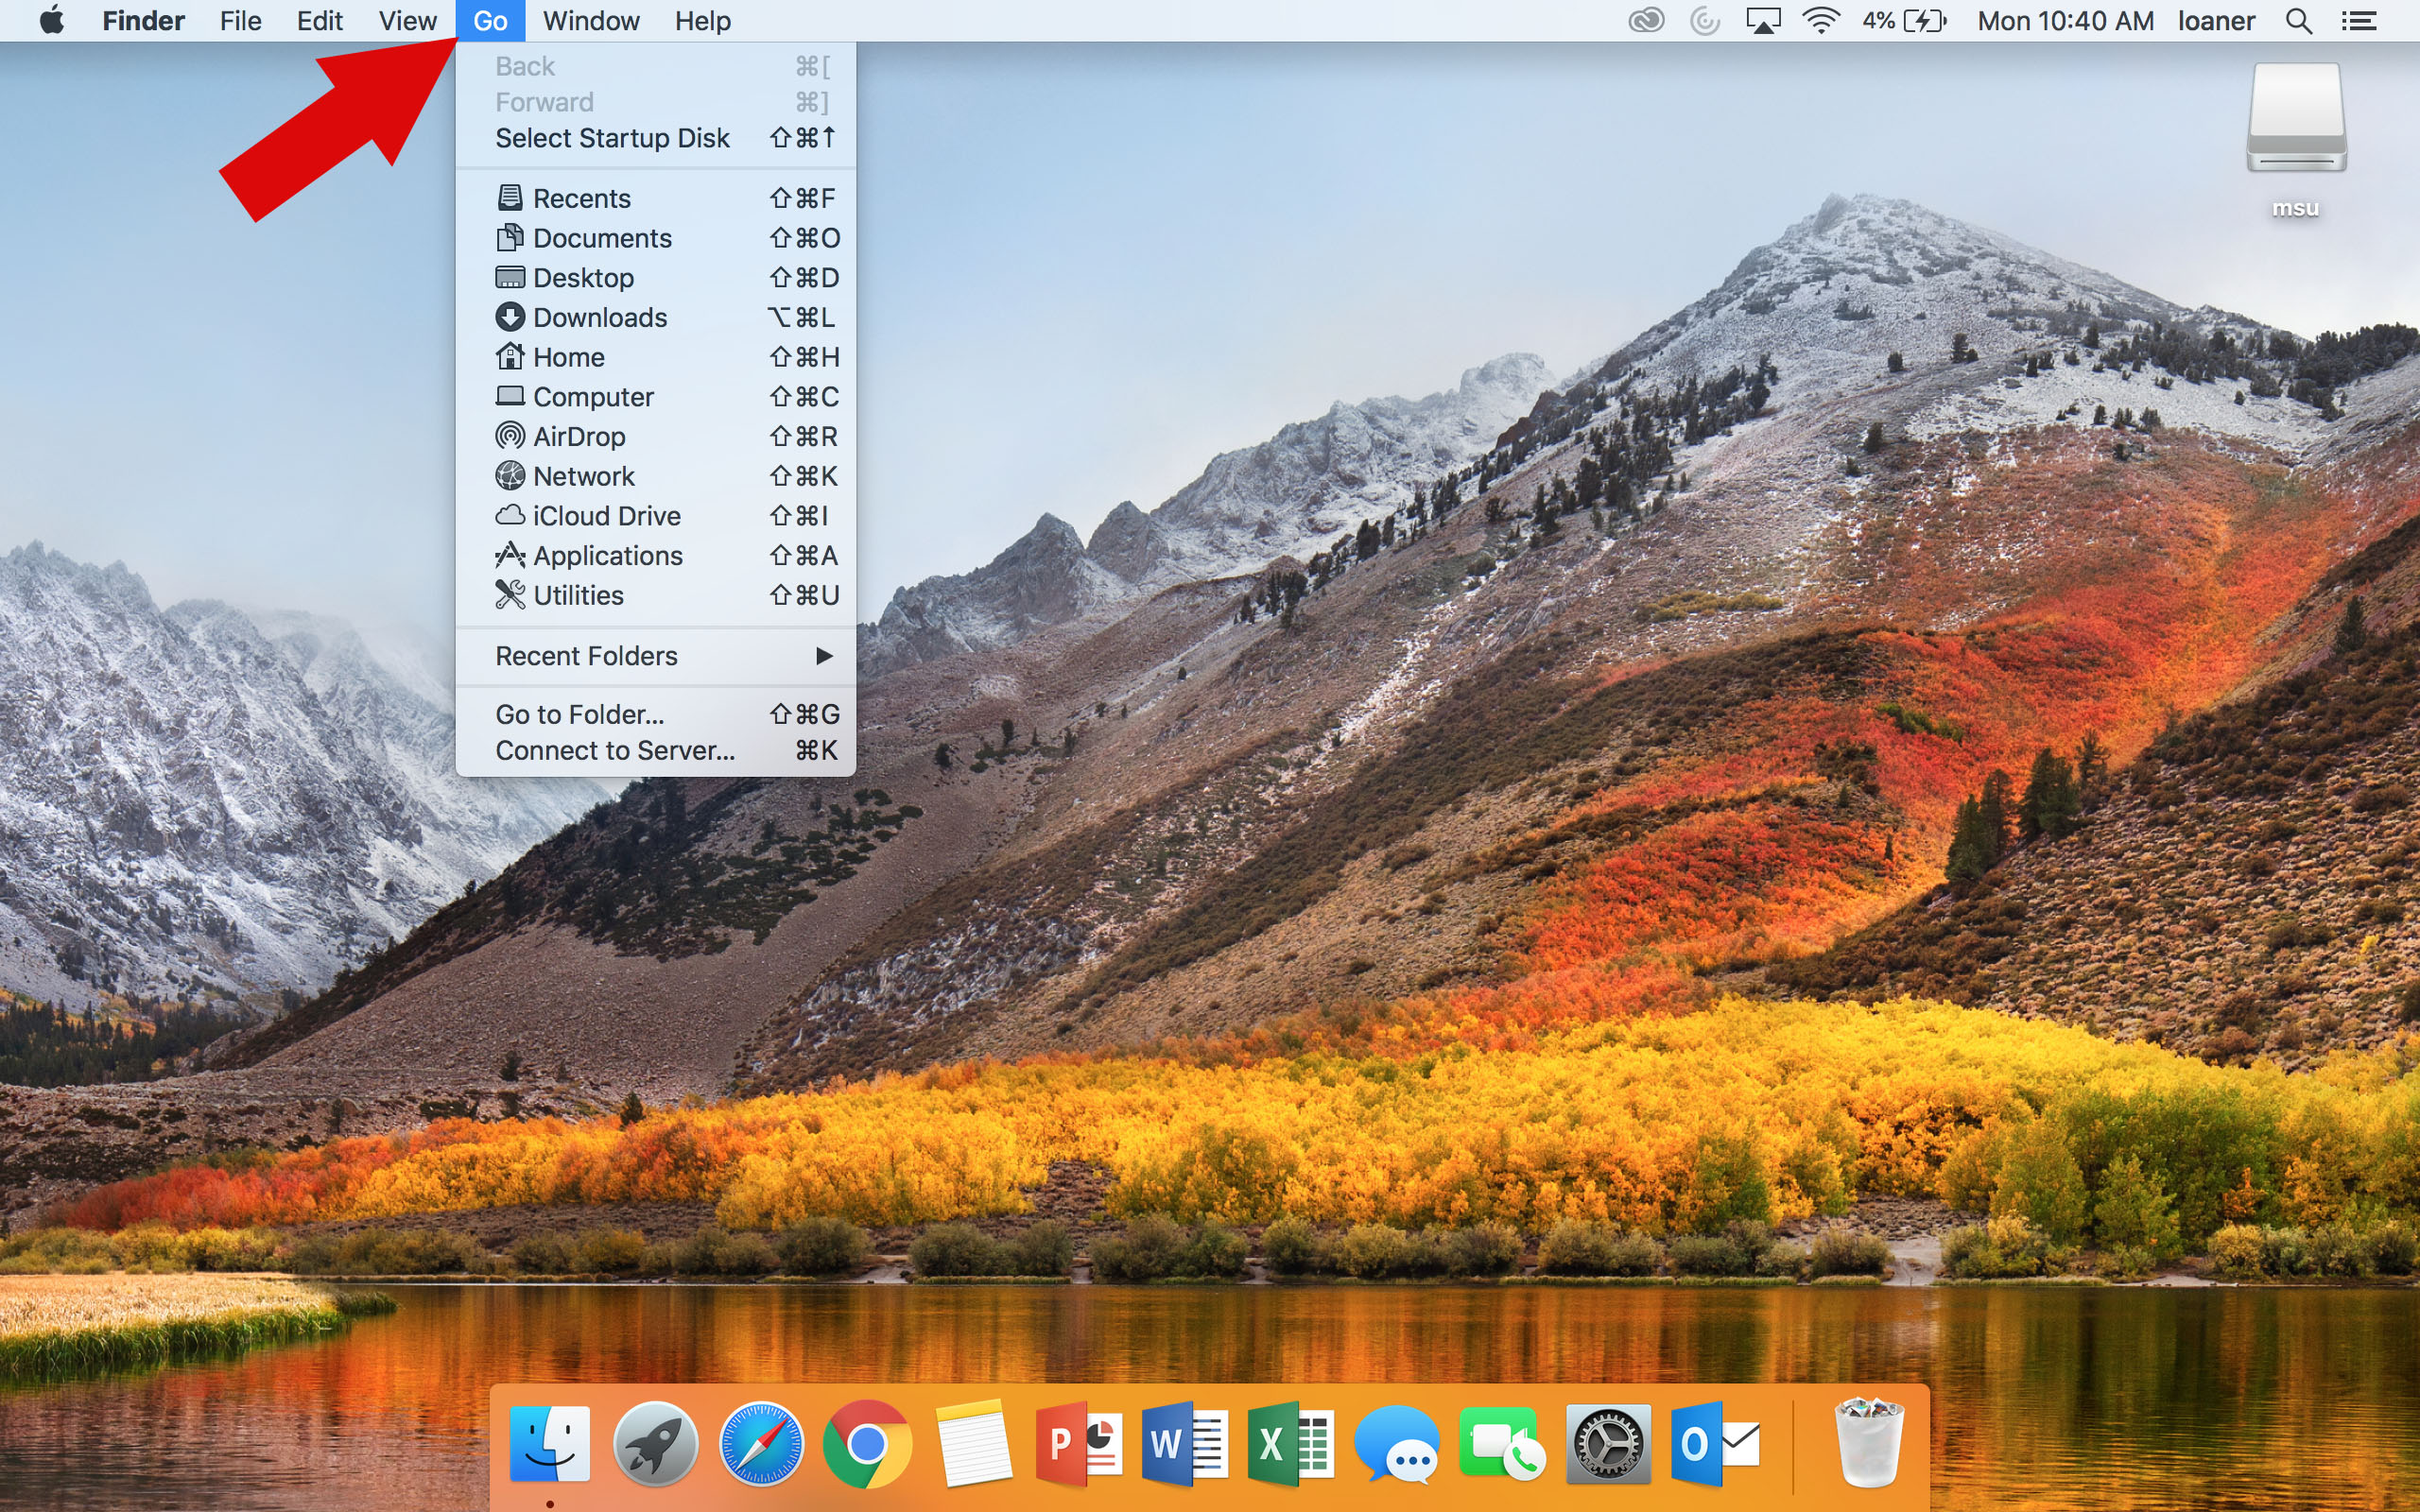
- In the drop down menu, click Connect to Server or press Command-K.
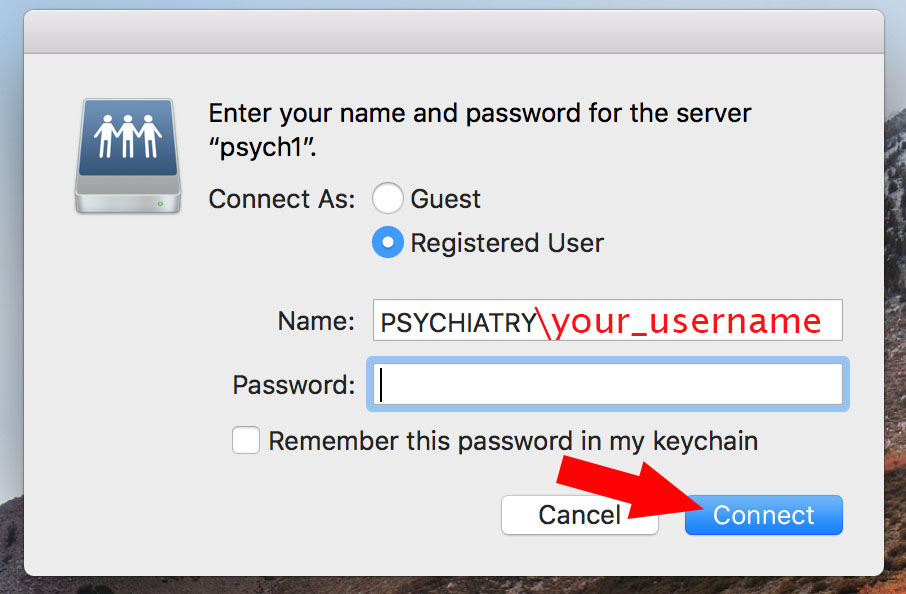
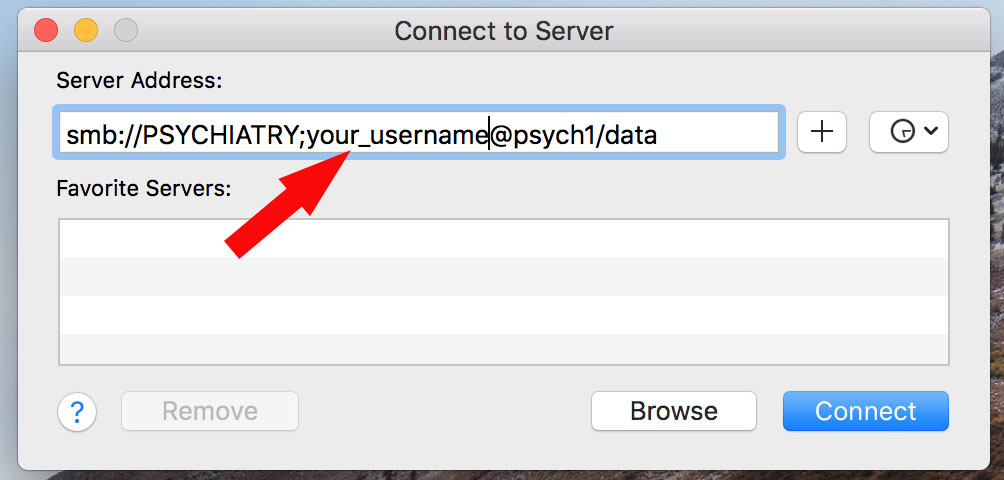
- In the box Server Address: type smb://PSYCHIATRY;your_username@psych1/data.
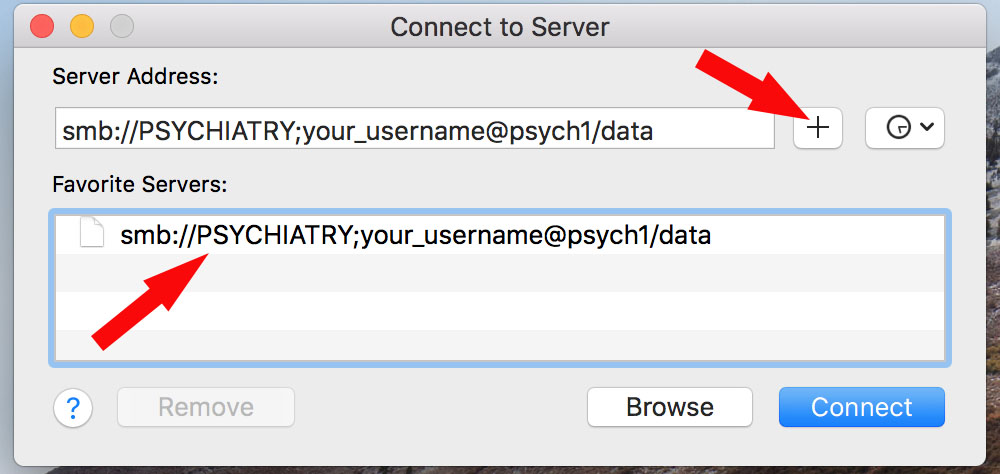
- (Optional) If you would like to add this server to your favorites, click the + next to the server address box.
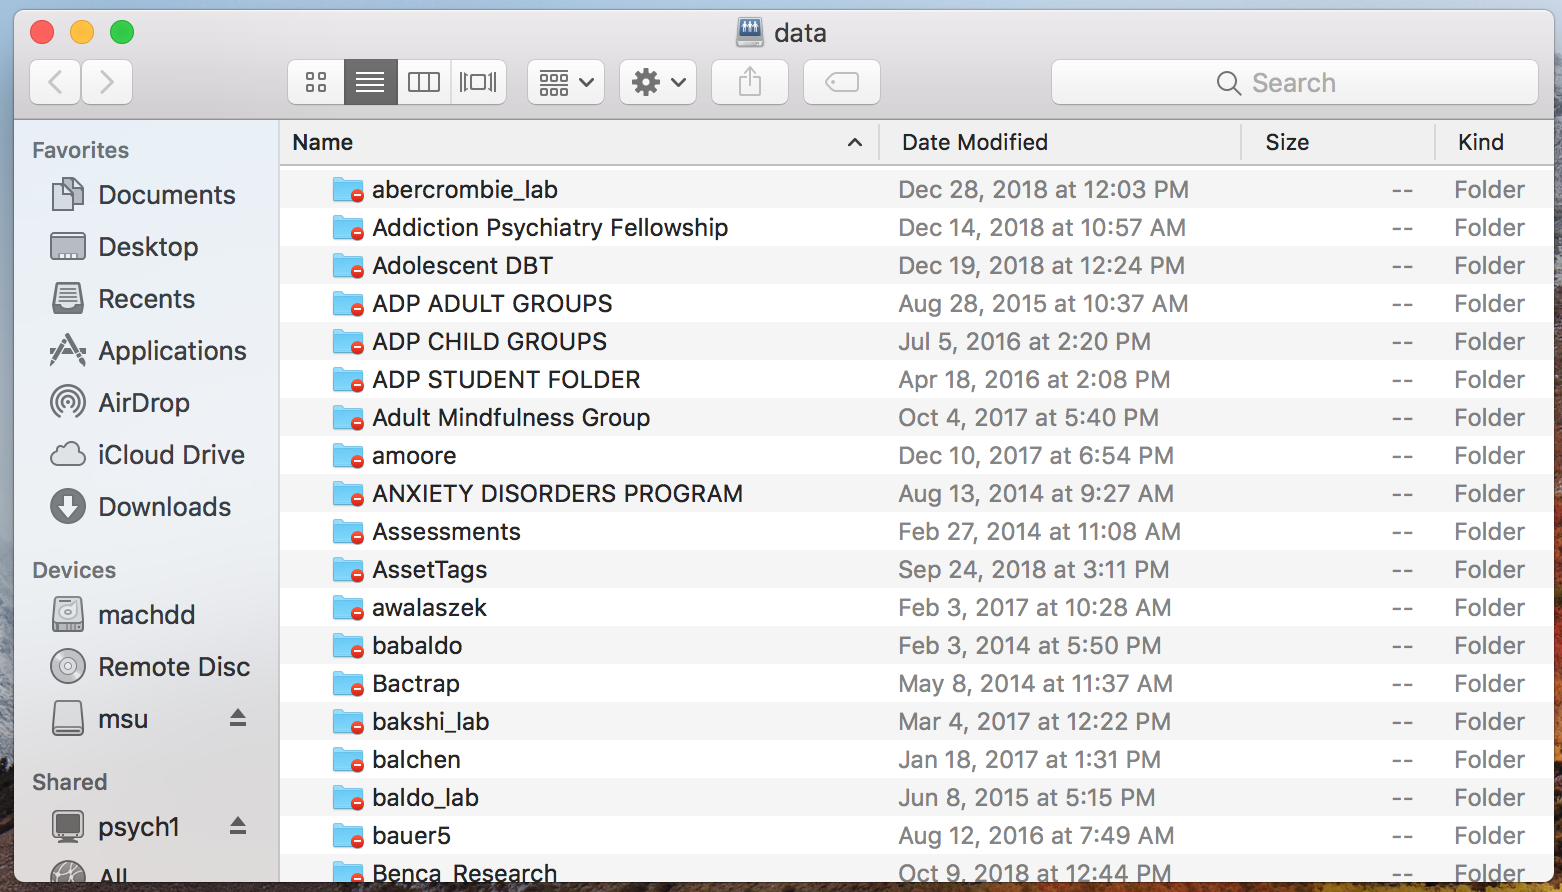
- Click Connect. If everything went well, data should automatically open in Finder, which should look roughly like the screenshot below. Additionally, it can be found in Finder under Shared -> psych1 -> Data. Note: For VPN users, if you get an error message stating it cannot find psych1, there could be a DNS resolution problem. Try substituting the IP address 144.92.2.10 for psych1 in the path, so the new path would be smb://PSYCHIATRY;your_username@144.92.2.10/data.
- (Optional) If it does not connect automatically because the username and password were not saved, type your password into the new window that appears and click Connect. If you need further assistance, or this process didn’t work, please contact the help desk.