Location of Projectors / TV’s
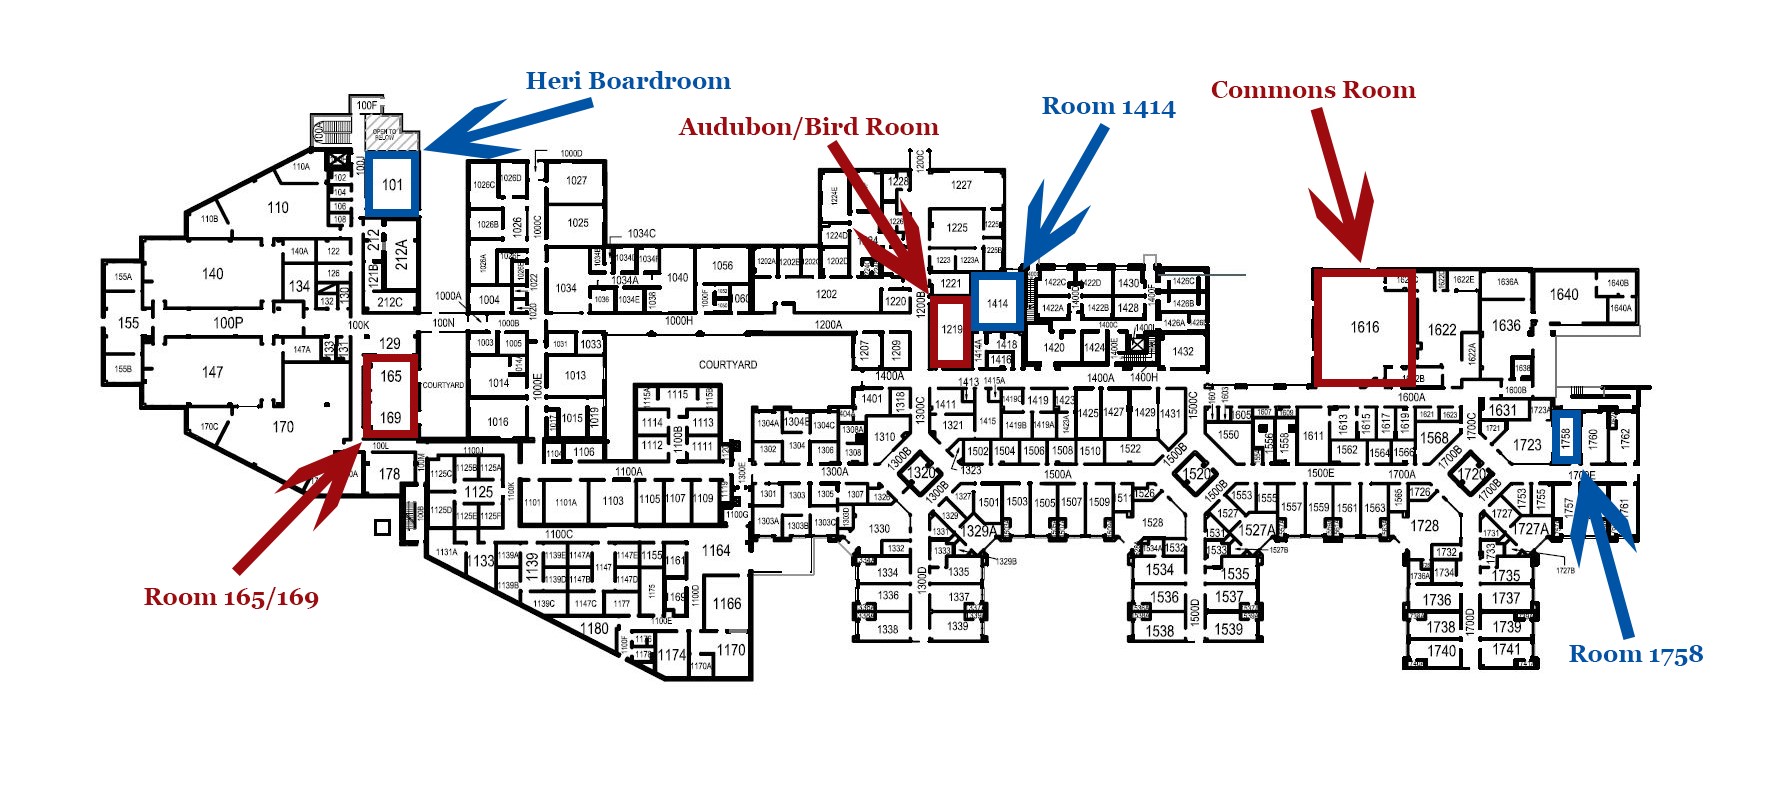
Connect to a Projector or TV
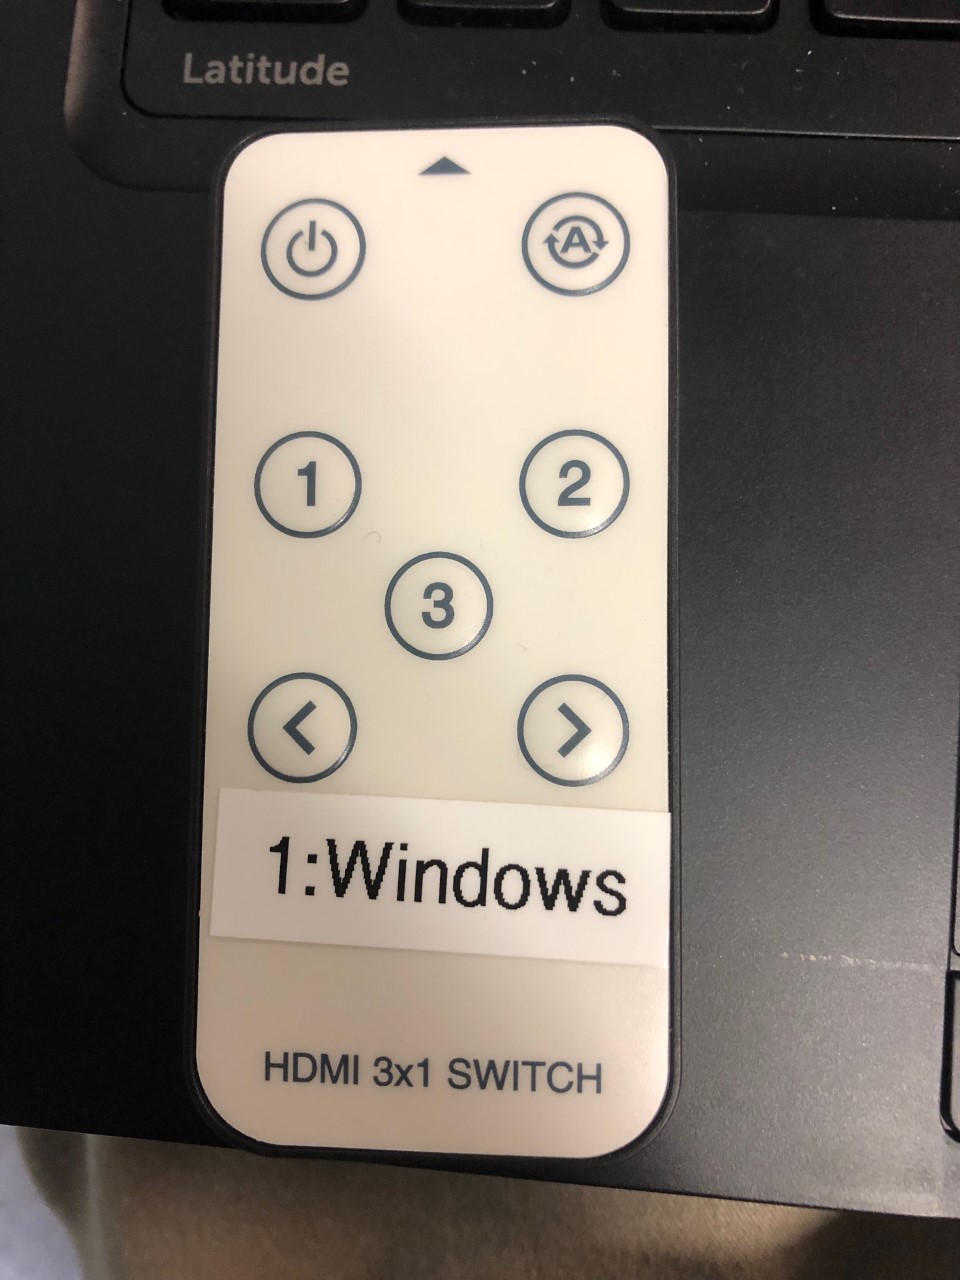
Audubon/Bird Room (Room 1219)
This is an accordion element with a series of buttons that open and close related content panels.
Microsoft Connect (Windows 10 only)
- Turn on the television by pressing the green “ON” button on the remote.
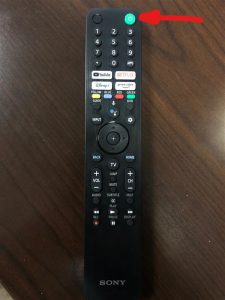
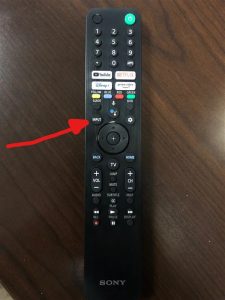
- Press the “Input button on the remote. This will pull up all the available input options for the tv.
- Select the “MS Wireless HDMI 1” option.
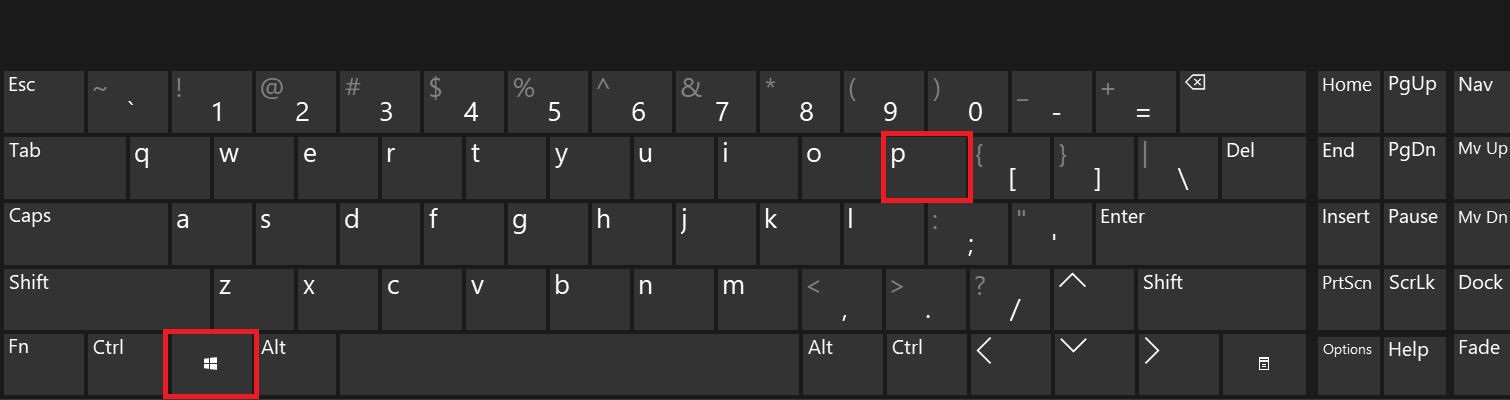
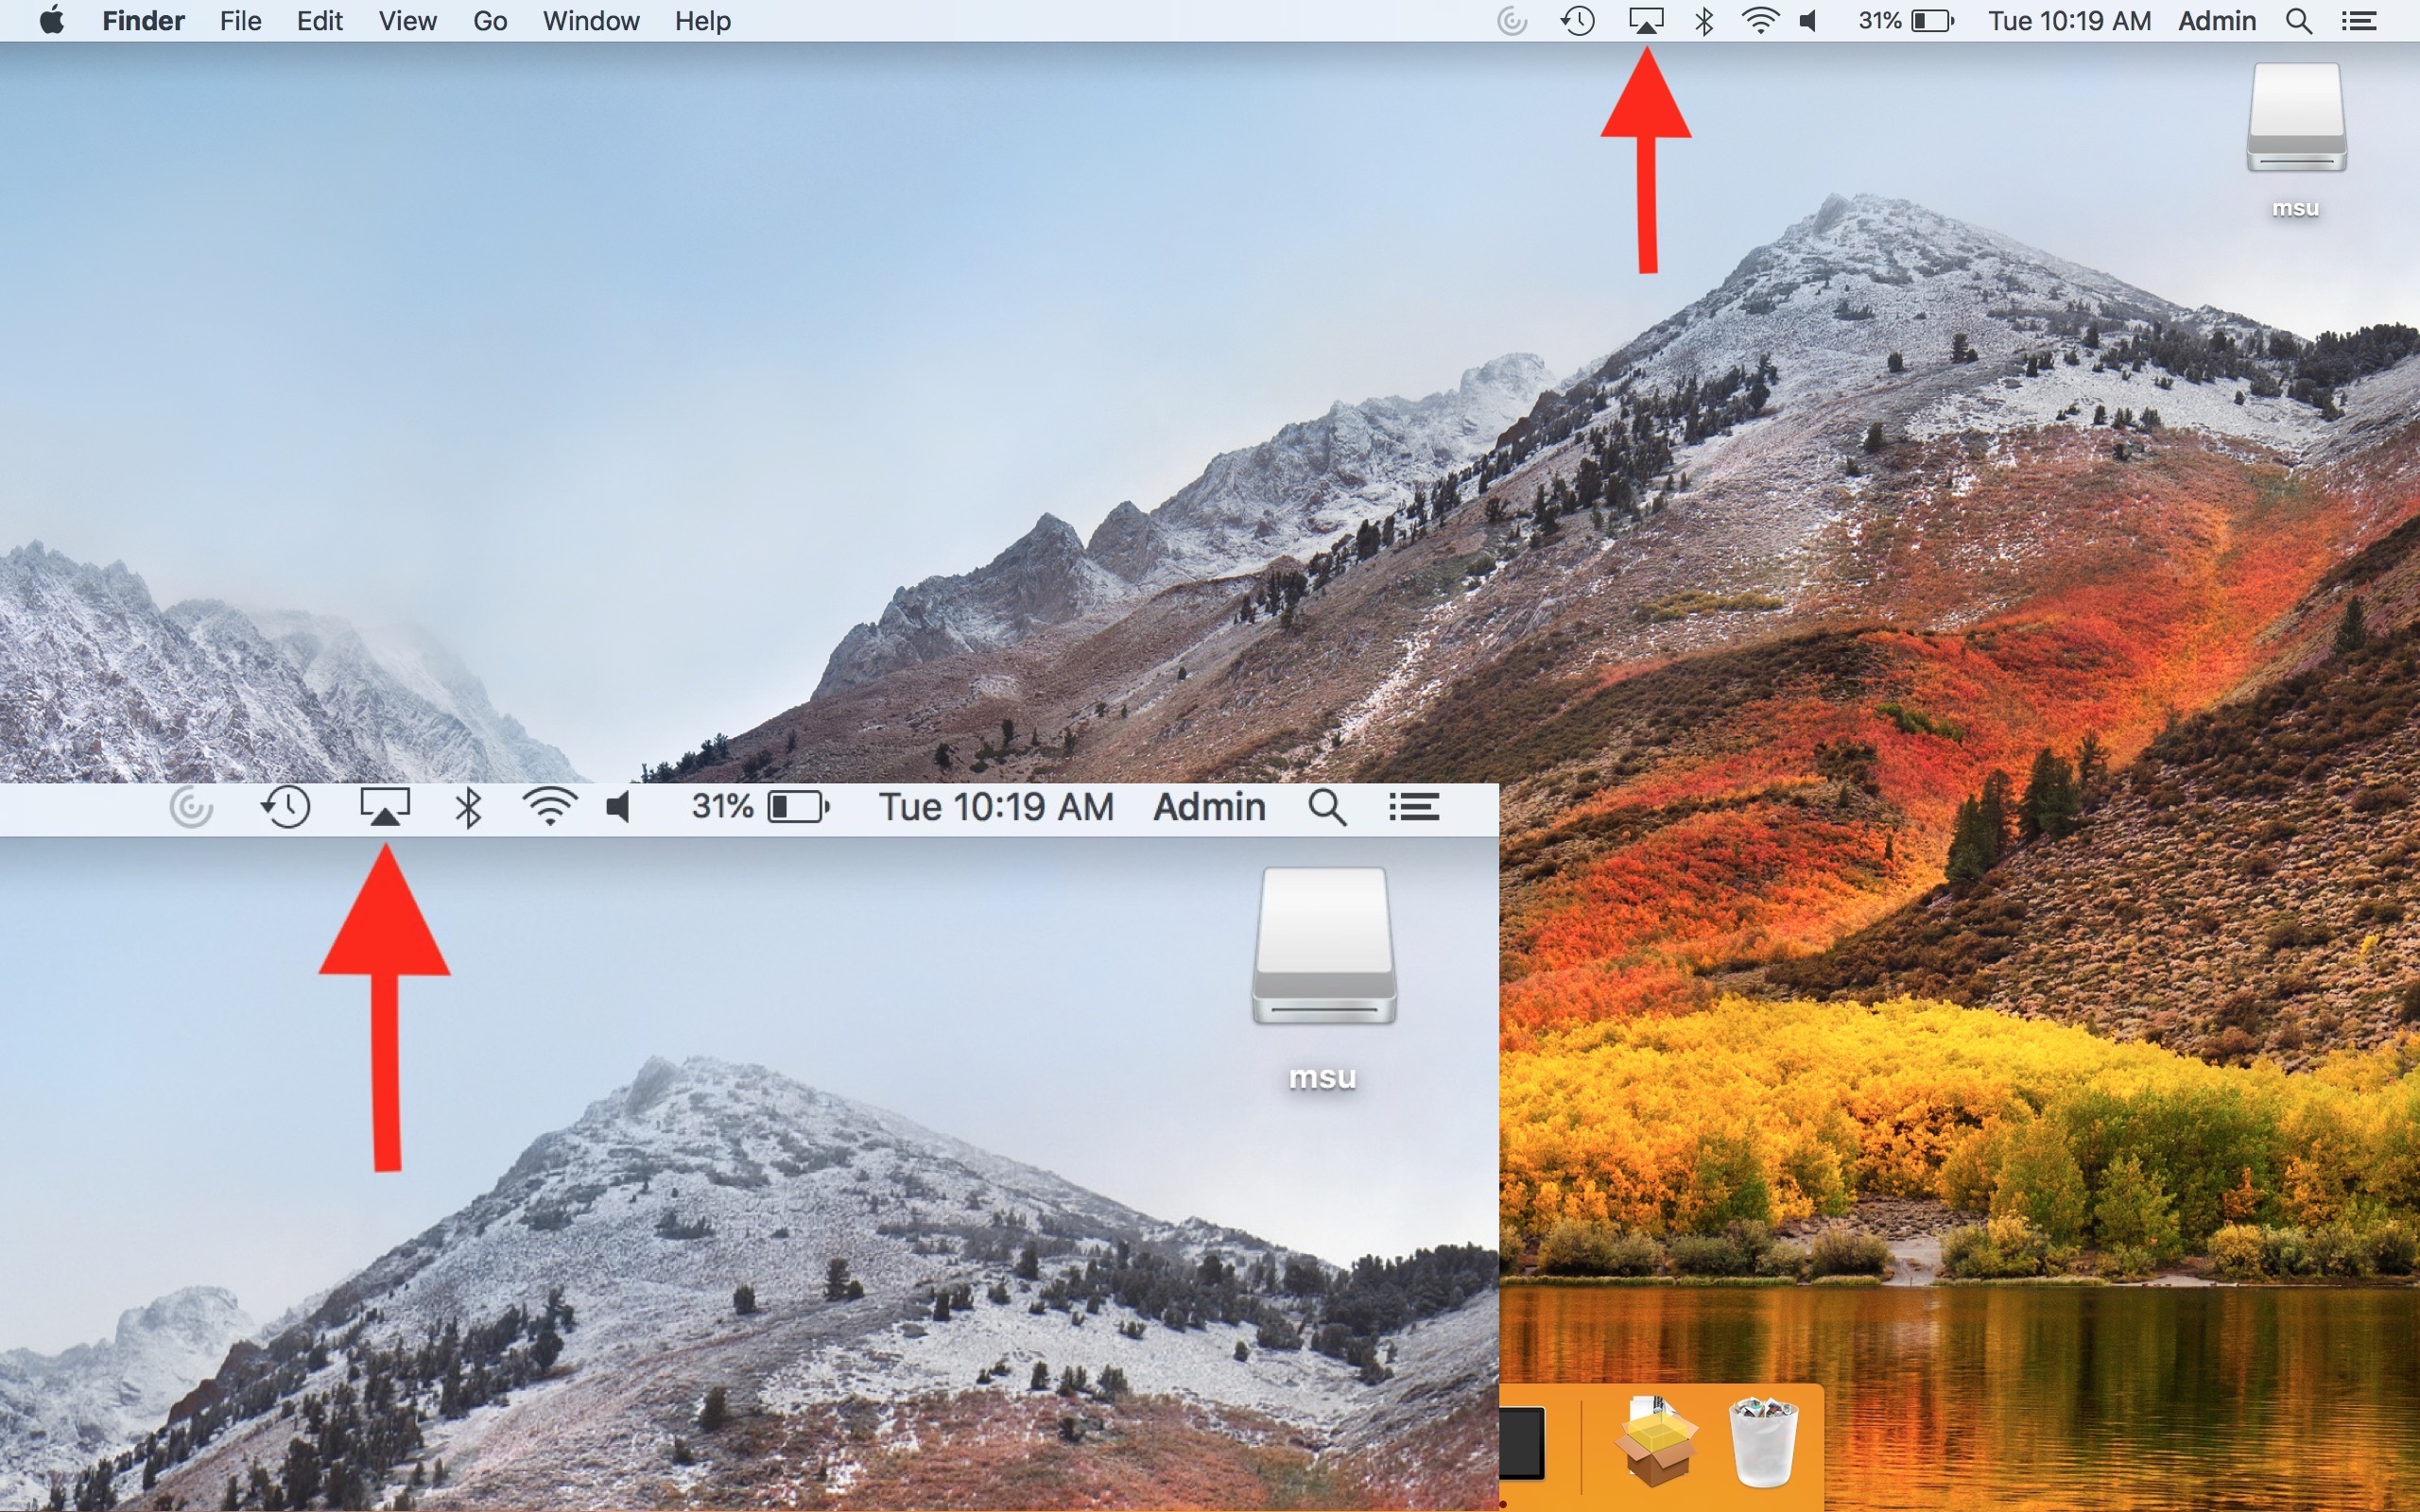
- On your Windows computer, press the Windows key and “P” together.
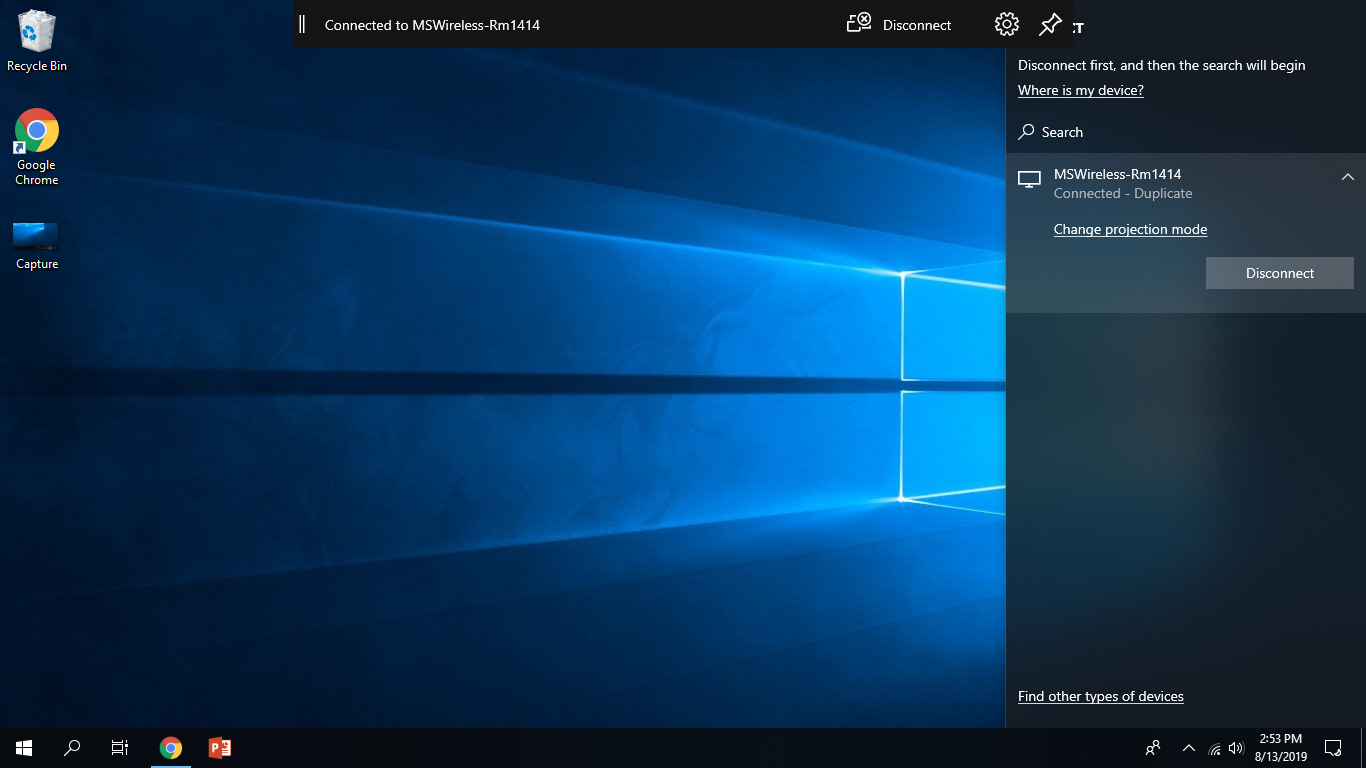
 You should see the following menu on your laptop:
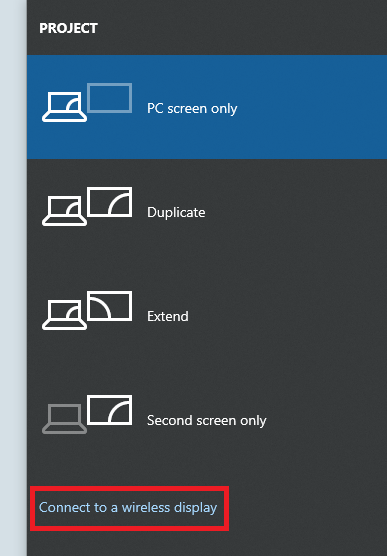
- Select “Connect to a wireless display” (Note, if you do not see this option, then your laptop is not capable of wireless display. Try to use either the HDMI or VGA cable connections if your machine supports them or contact the Helpdesk to either borrow a loaner laptop or request troubleshooting help.)
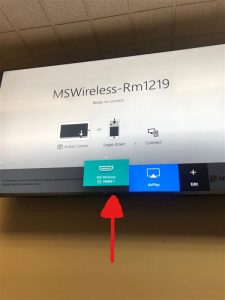
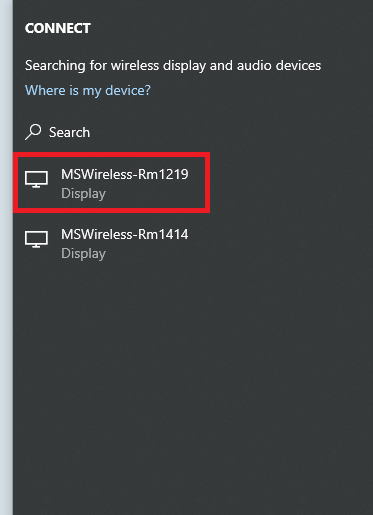
- Select “MSWireless-Rm1219” from the given options.
- You should see a code displayed on the projector screen and a prompt to enter the code on your laptop screen. Enter the code and then your laptop should begin connecting.
- If you run into any issues, please contact the HelpDesk in 1202. Please remember to turn off the projector when you are finished.
AirPlay (Mac or iOS devices Only)
-
- Turn on the television by pressing the green “ON” button on the remote.
- Press the “Input button on the remote. This will pull up all the available input options for the tv.
- Select the “AirPlay” option.
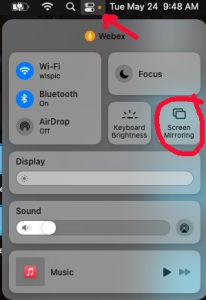
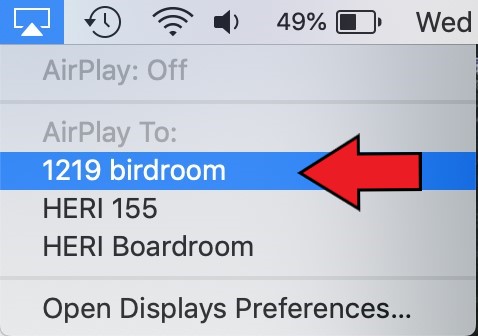
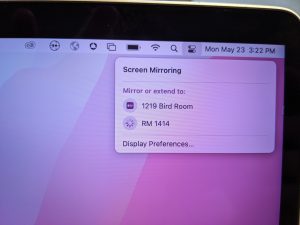
- Open the Airplay Menu by clicking the icon at the top of your screen as shown below or on newer devices, click the notification center symbol, then screen mirroring.
- In the drop down menu, select 1219 birdroom on your computer, your Mac will ask for a code which will show up on the projector.
Note: Audio will automatically be connected to speakers in ceiling. If the formatting looks incorrect through the projector, disconnect and reconnect to the AirPlay.
- Turn on the television by pressing the green “ON” button on the remote.
Using the Logitech Rally Plus Camera/Mic System (Windows and Mac)
Room 1414
This is an accordion element with a series of buttons that open and close related content panels.
Connecting Wirelessly with Windows (Windows 10 Only)
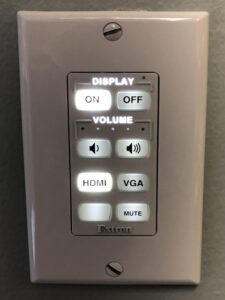
- Turn on the TV using the power the button

- Using the INPUT button
 select HDMI INPUT #3
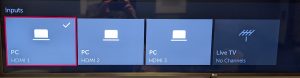
- On your computer press the WINDOWS key
 and “K” key at the same time to bring up displays.
 - Select the MSWireless-Rm1414 from the given options.
You should now see your computer displayed through the TV. If you run into any issues, please contact the HelpDesk in 1202. Please remember to turn off the TV when you are finished.
Connecting Wirelessly via Apple Devices (Mac or iOS Users)
- Turn on the TV using the power the button
- Using the INPUT button select HDMI INPUT #1
- Open the Airplay Menu by clicking the icon at the top of your screen as shown below or on newer devices, click the notification center symbol, then screen mirroring.
- In the drop down menu, select RM 1414 on your computer, your Mac will ask for a code which will show up on the TV.
Please remember to turn off the TV when your are finished.
Connecting Directly via HDMI (Any HDMI capable device)
- Turn on the TV using the power the button
- Using the INPUT button select HDMI INPUT #2
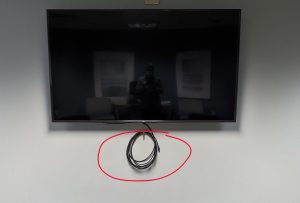
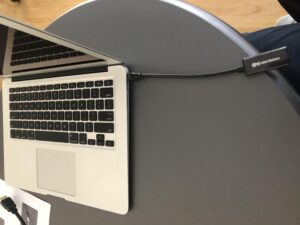
- Uncoil the HDMI cable and plug it into your computer. (NOTE: various HDMI adapters are in the room for you to use).
- Your device should automatically start displaying its screen onto the TV.
Please remember to turn off the TV, return any adapters, and put back the HDMI cable to its storage hook.
Heri Classroom (Room 165/169)
This is an accordion element with a series of buttons that open and close related content panels.
Microsoft Connect (Windows 10 Only)
-
- Go to the projector control panel and click the button labeled “ON” as well as the button labeled “HDMI” . The projector may need time to warm up before displaying.
- Press the 1 button on the white remote while pointing it at the projector, the display will switch to the Microsoft Connect screen.
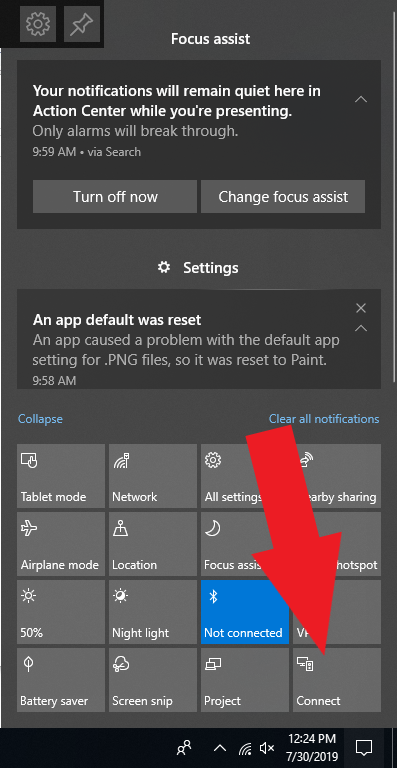
- On your computer, click on the action center in the bottom right corner.
- If the menu is not already expanded, click the expand button.

- Next, click on the button that says Connect towards the bottom right corner.
- Select the MSWireless-Rm165_169 from the given options.
You should now see your computer displayed through the projector. If you run into any issues, please contact the HelpDesk in 1202. Please remember to turn off the projector when you are finished.
- Go to the projector control panel and click the button labeled “ON” as well as the button labeled “HDMI” . The projector may need time to warm up before displaying.
Mac Users
- If there is not one availible in the room, you must retrieve a Thunderbolt to HDMI converter from the IT Department, located in room 1202-1.
- Go to the projector control panel and click the button labeled “ON” as well as the button labeled “HDMI” . The projector may need time to warm up before displaying.
- Press the 3 button on the white remote while pointing it at the projector.
- Plug the thunderbolt to HDMI converter cable into your Mac’s thunderbolt port.
- Locate the HDMI cable coming out of the wall and plug it into your thunderbolt to HDMI converter cable
Standard HDMI
- Go to the projector control panel and click the button labeled “ON” as well as the button labeled “HDMI” . The projector may need time to warm up before displaying.
- Press the 3 button on the white remote while pointing it at the projector.
- Locate the HDMI cable coming out of the wall and plug it into your HDMI input
VGA
- Go to the projector control panel and click the button labeled “ON” as well as the button labeled “VGA” . The projector may need time to warm up before displaying.
- In order to enable video, locate the VGA cable coming from the wall and plug it into the VGA input on your computer. In order to enable sound, locate the 3.5 mm audio cable and plug it into the AUX input on your computer.
Room 1758
This is an accordion element with a series of buttons that open and close related content panels.
All Users
Using the TV in 1758
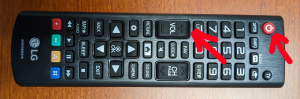
- Turn on the TV with the remote control. (Note the TV can be turned on with the button on the TV under the LG logo as well). Only the Power and Volume buttons on this remote will work.
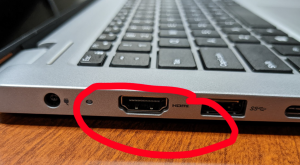
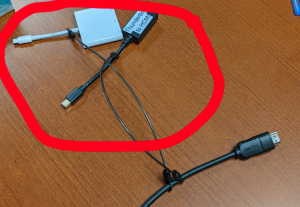
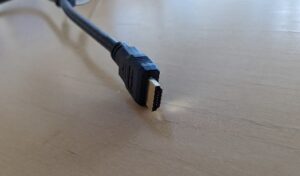
- Connect the HDMI cable to your device. If you don’t have an HDMI port on your device, there are adapters in the room for you to use. (Contact the help desk if these adapters won’t work for you).
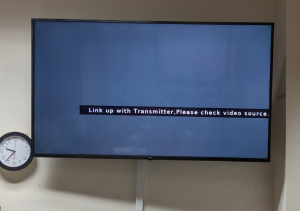
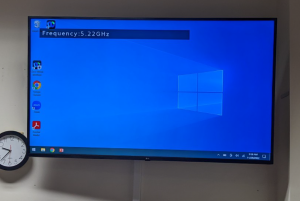
- Wait approximately 5 to 10 seconds for the connection to take. You’ll initially see this screen until connection:
- Once the HDMI connection is complete your screen will be mirrored to the TV and audio will also transfer to the TV automatically:
If audio or video is not transferring to the TV, reboot your device and reconnect to the HDMI cable. If you have further trouble, contact the help desk.
Heri Boardroom (Room 101)
The projector in this room uses a wired connection. To connect to the projector, you will need to identify the connections that are available on your computer.
This is an accordion element with a series of buttons that open and close related content panels.
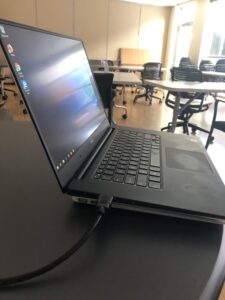
Standard HDMI
For devices that have an HDMI port (most Laptops do), you can use the cable without any extra adapters.
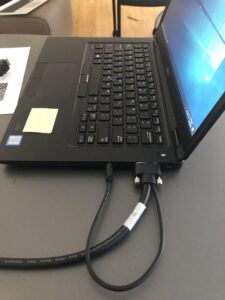
Mini DisplayPort
For devices that have mini DisplayPort (common in high end laptops and old MacBook’s), you will need to use the HDMI to mini DisplayPort adapter.
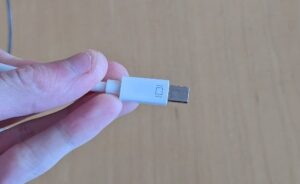
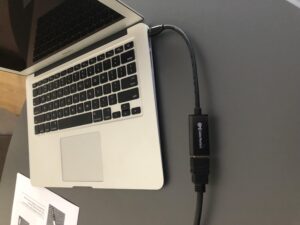
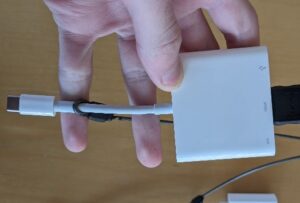
USB-C
For devices that have a USB-C port (common in most new computers), you will need to use the HDMI to USB-C adapter.
Commons Room
This is an accordion element with a series of buttons that open and close related content panels.
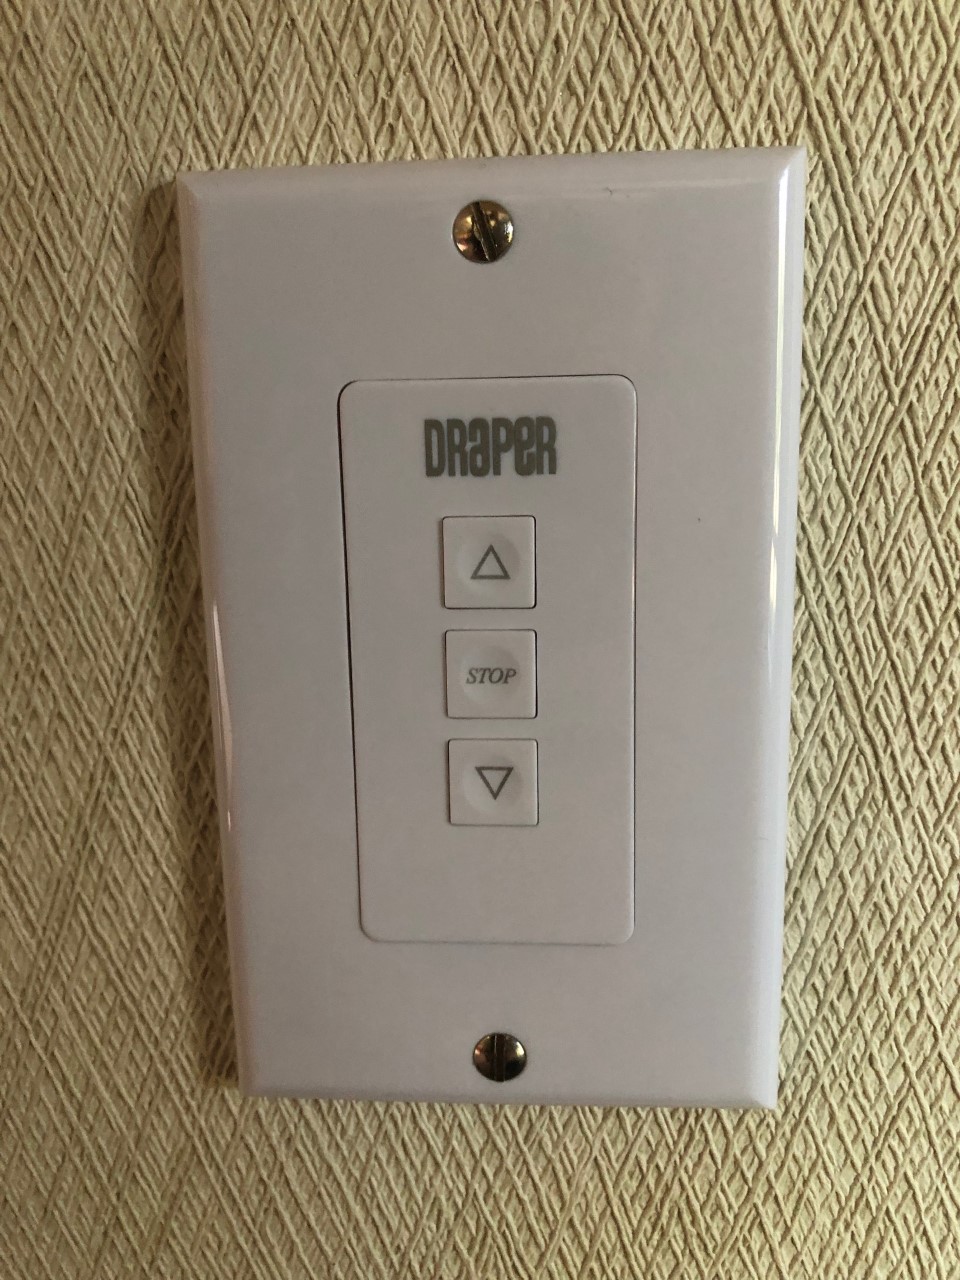
Standard HDMI
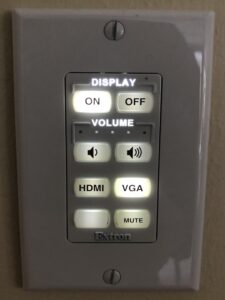
- If the projector screen is not yet down, lower it using the control panel on the wall.
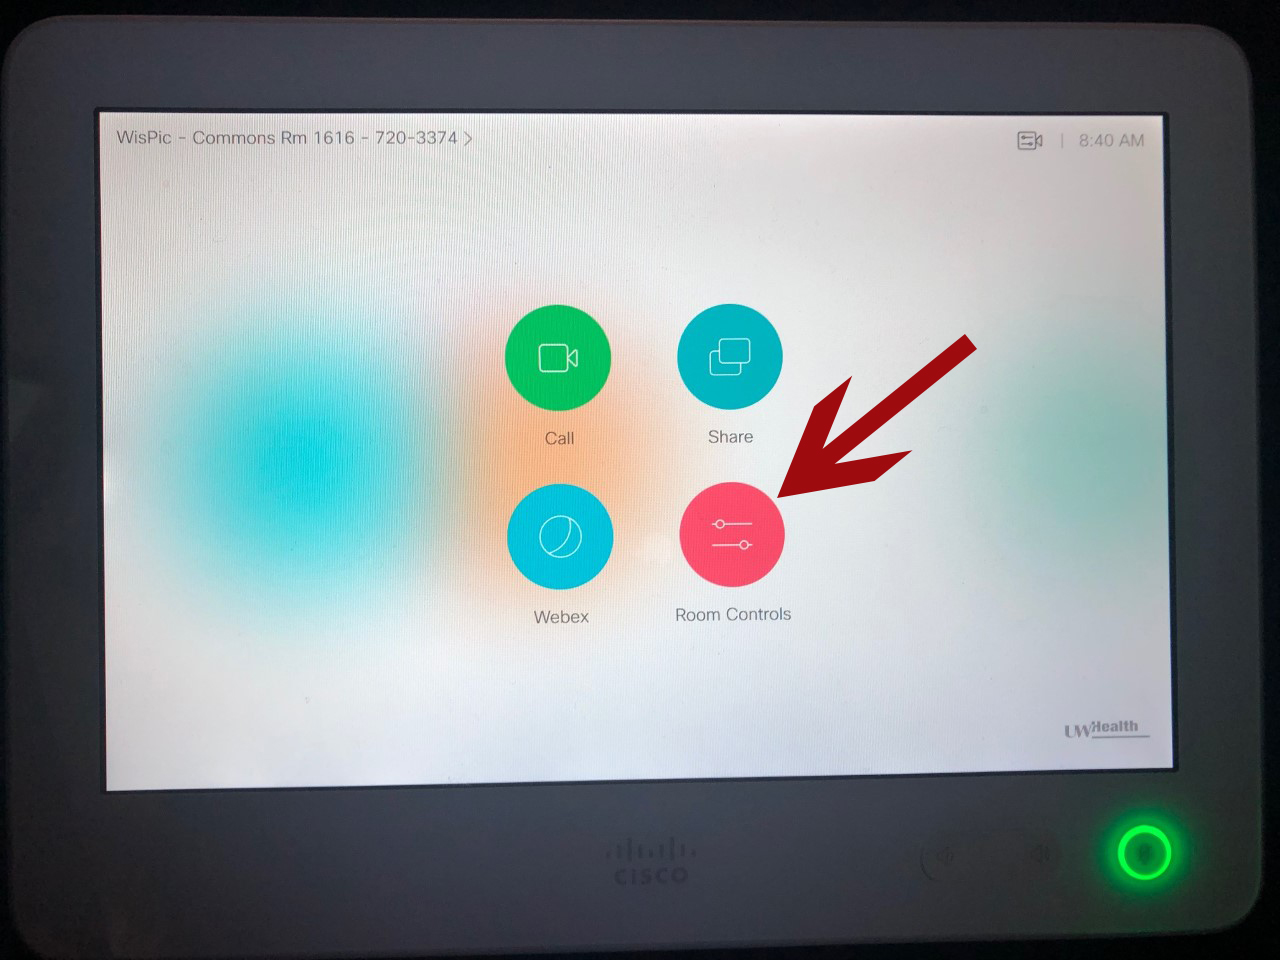
- Click the “Room Controls” button on the Cisco Interface on the podium.
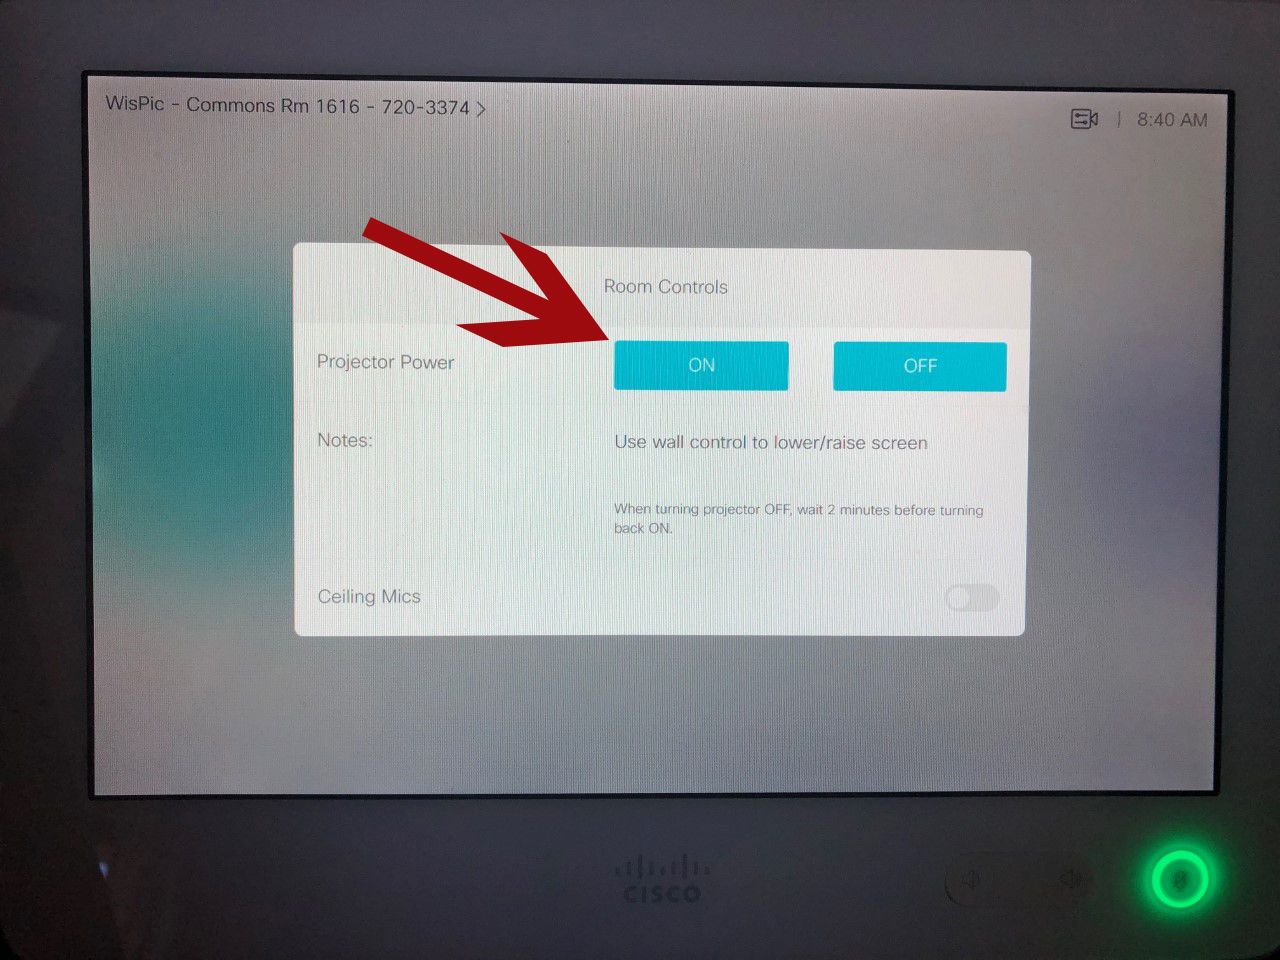
- Click the “ON” button to turn the projector on.
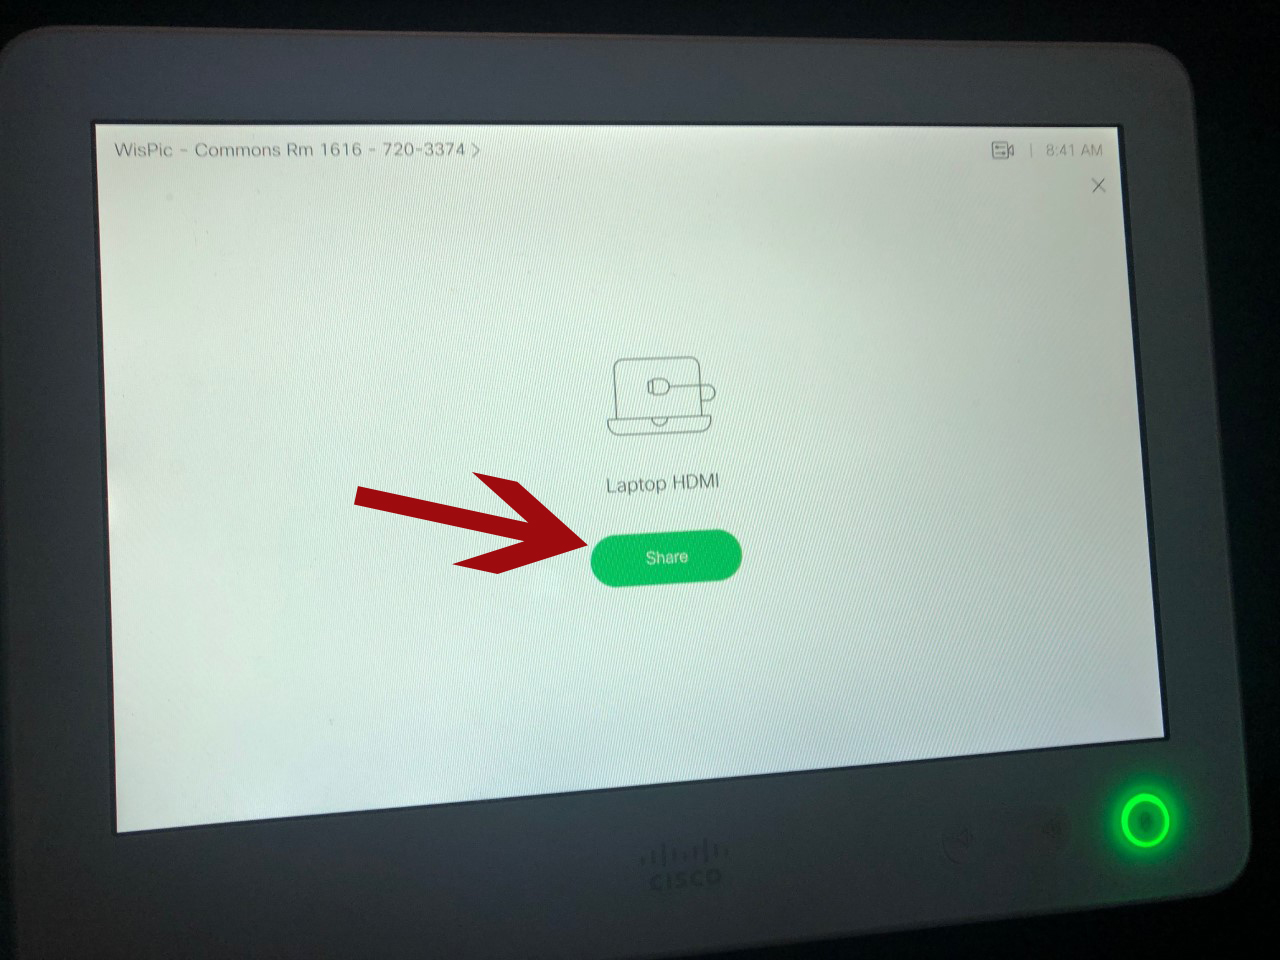
- Plug the HDMI cable into the HDMI port on your laptop.
- If your laptop doesn’t automatically display on the screen, click the “Share” button on the Cisco Interface.
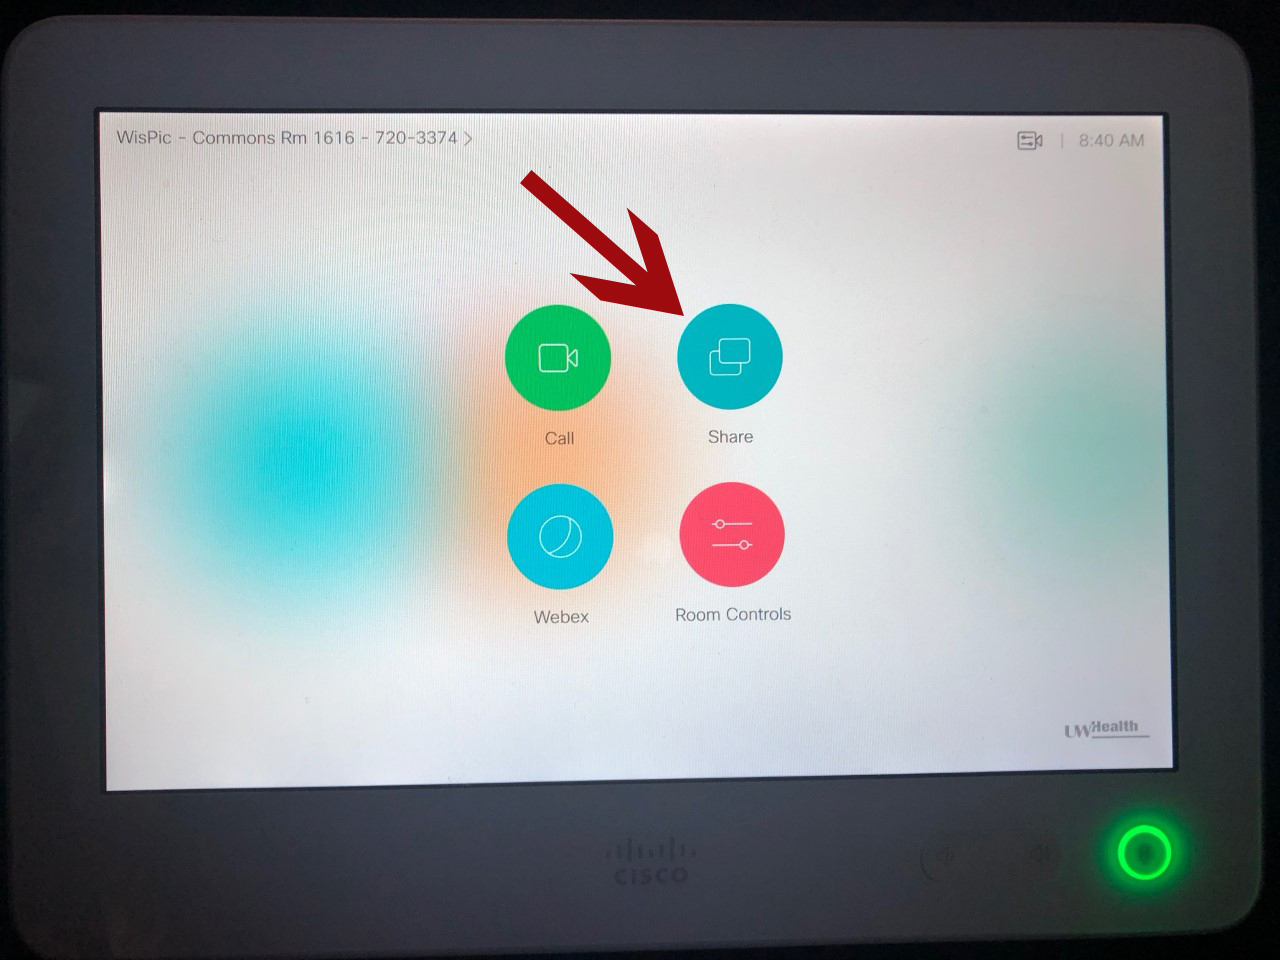
- Then click the “Share” button again and your laptop should start displaying on the projector screen.
Mac Users
- If the projector screen is not yet down, lower it using the control panel on the wall.
- Click the “Room Controls” button on the Cisco Interface on the podium.
- Click the “ON” button to turn the projector on.
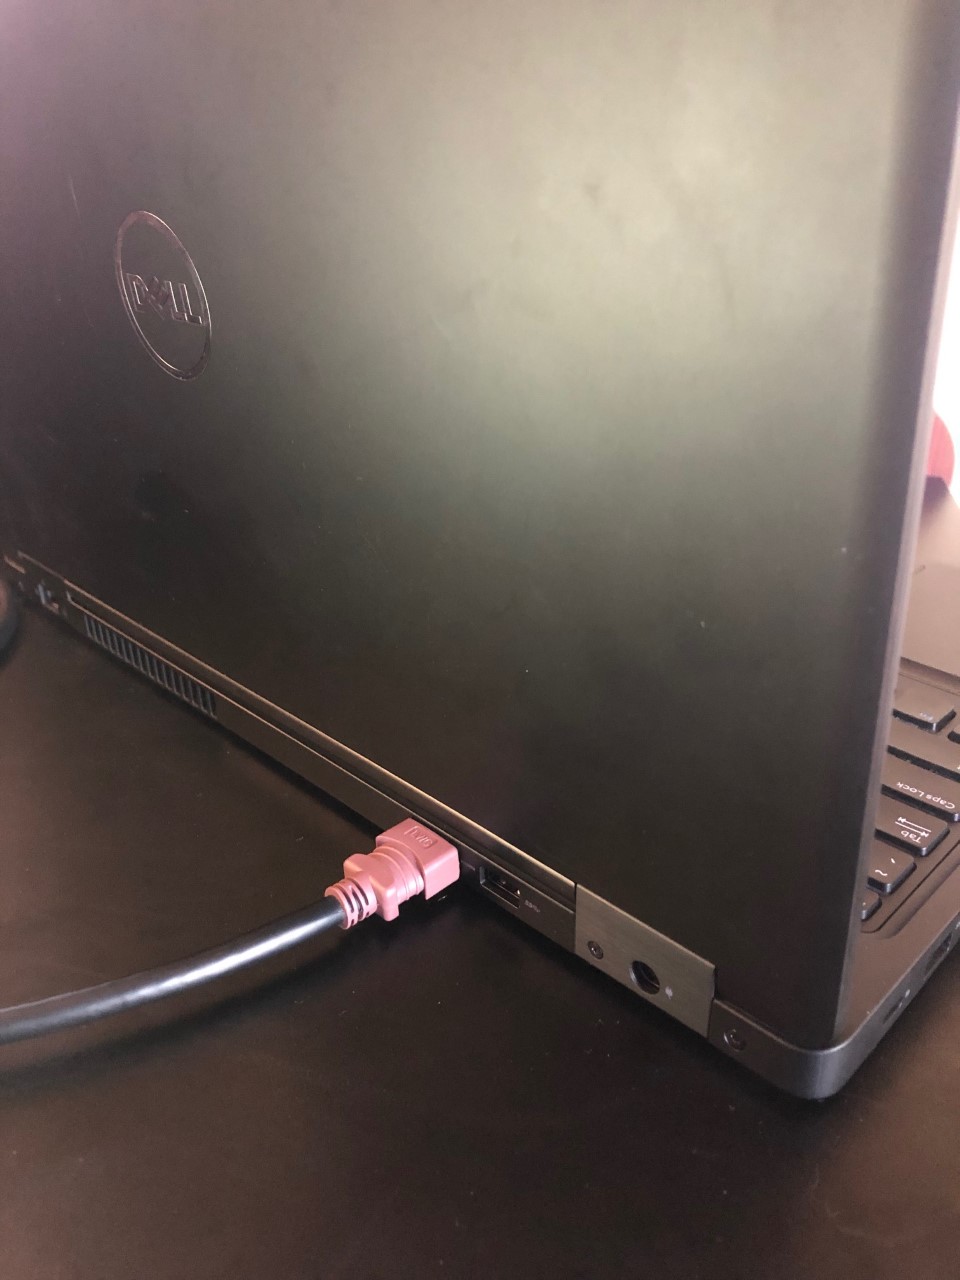
- If your Mac doesn’t have an HDMI port, locate a Thunderbolt to HDMI converter and plug it into your Mac’s Thunderbolt port (if you can’t locate one in the room, come down to Room 1202 and get one from the WisPicIT staff).

- Plug the HDMI cable into the Thunderbolt to HDMI converter.

- If your laptop doesn’t automatically display on the screen, click the “Share” button on the Cisco Interface.
- Then click the “Share” button again and your laptop should start displaying on the projector screen.