Printer Map
Important Note: WiFi users must be connected to our departmental VPN in order to print to the printers below.
 *Click to Enlarge*
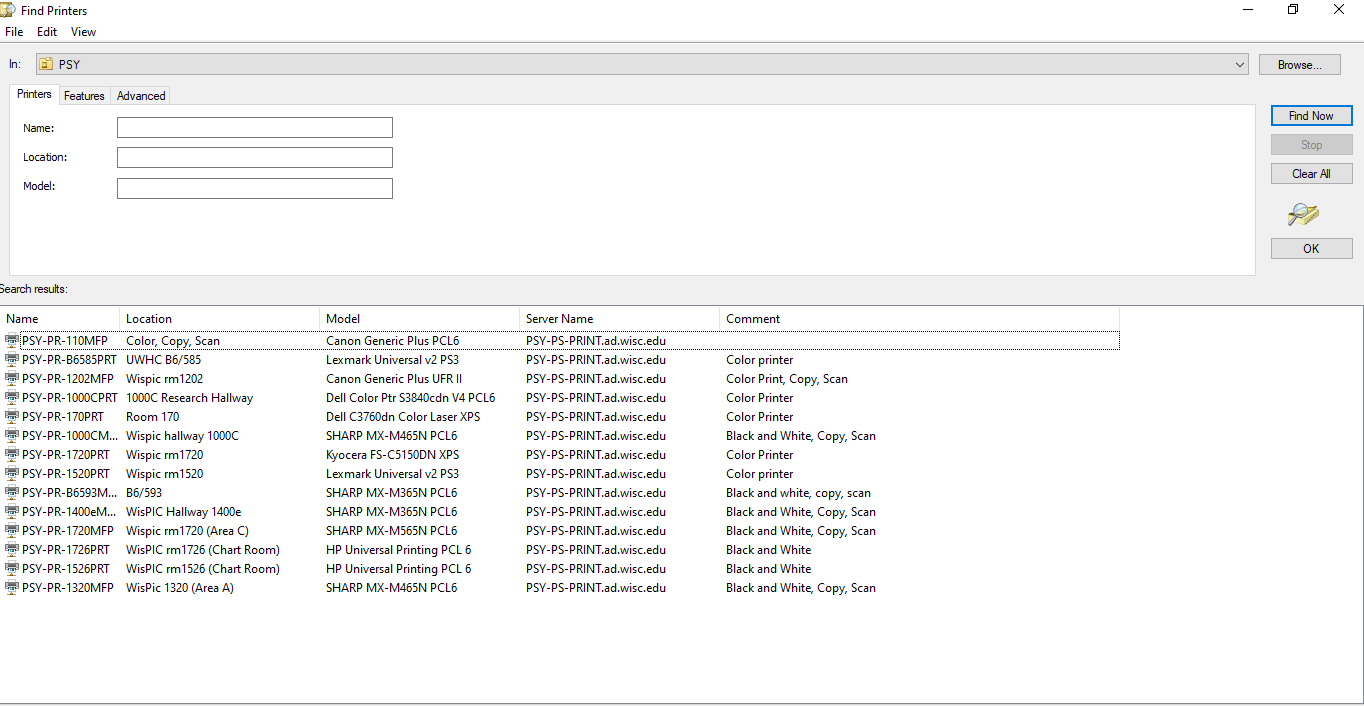
List of Common Printers
| wdt_ID | Name | Location | Make | Model | Media |
|---|---|---|---|---|---|
| 1 | PSY-PR-110MFP | Room 110 (HERI) | Canon | C5535 | Color |
| 2 | PSY-PR-1000CMFP | Hallway 1000C (HERI) | Canon | iR-ADV C3935 | Color |
| 3 | PSY-PR-1202MFP | Room 1202 (Admin Area) | Canon | iR-ADV C3835 | Color |
| 4 | PSY-PR-1320MFP | Room 1320 (Area A ) | Canon | iR-ADV C3935 | Color |
| 5 | PSY-PR-1400EMFP | Hallway 1400E | Canon | iR-ADV C3935 | Color |
| 7 | PSY-PR-1526PRT | Room 1526 (Chart Room) | HP | 2055dn | Black and White |
| 8 | PSY-PR-1720MFP | Room 1720 (Area C) | Canon | iR-ADV C3935 | Color |
| 10 | PSY-PR-1726PRT | Room 1726 (Chart Room) | HP | 2055dn | Black and White |
| 11 | PSY-PR-170PRT | Room 170 (HERI) | Dell | C3760DN | Color |
| 13 | PSY-PR-1000CPRT | Hallway 1000C (HERI) | Dell | S3840CDN | Color |
| Name | Location | Make | Model | Media |
Install Printer
Important: WiFi users must connect to our SMPH VPN prior to sending a print job to a printer.
This is an accordion element with a series of buttons that open and close related content panels.
Adding Printer on Windows
- Click on the Start button in the bottom left corner of the screen (the windows icon for Windows 10).
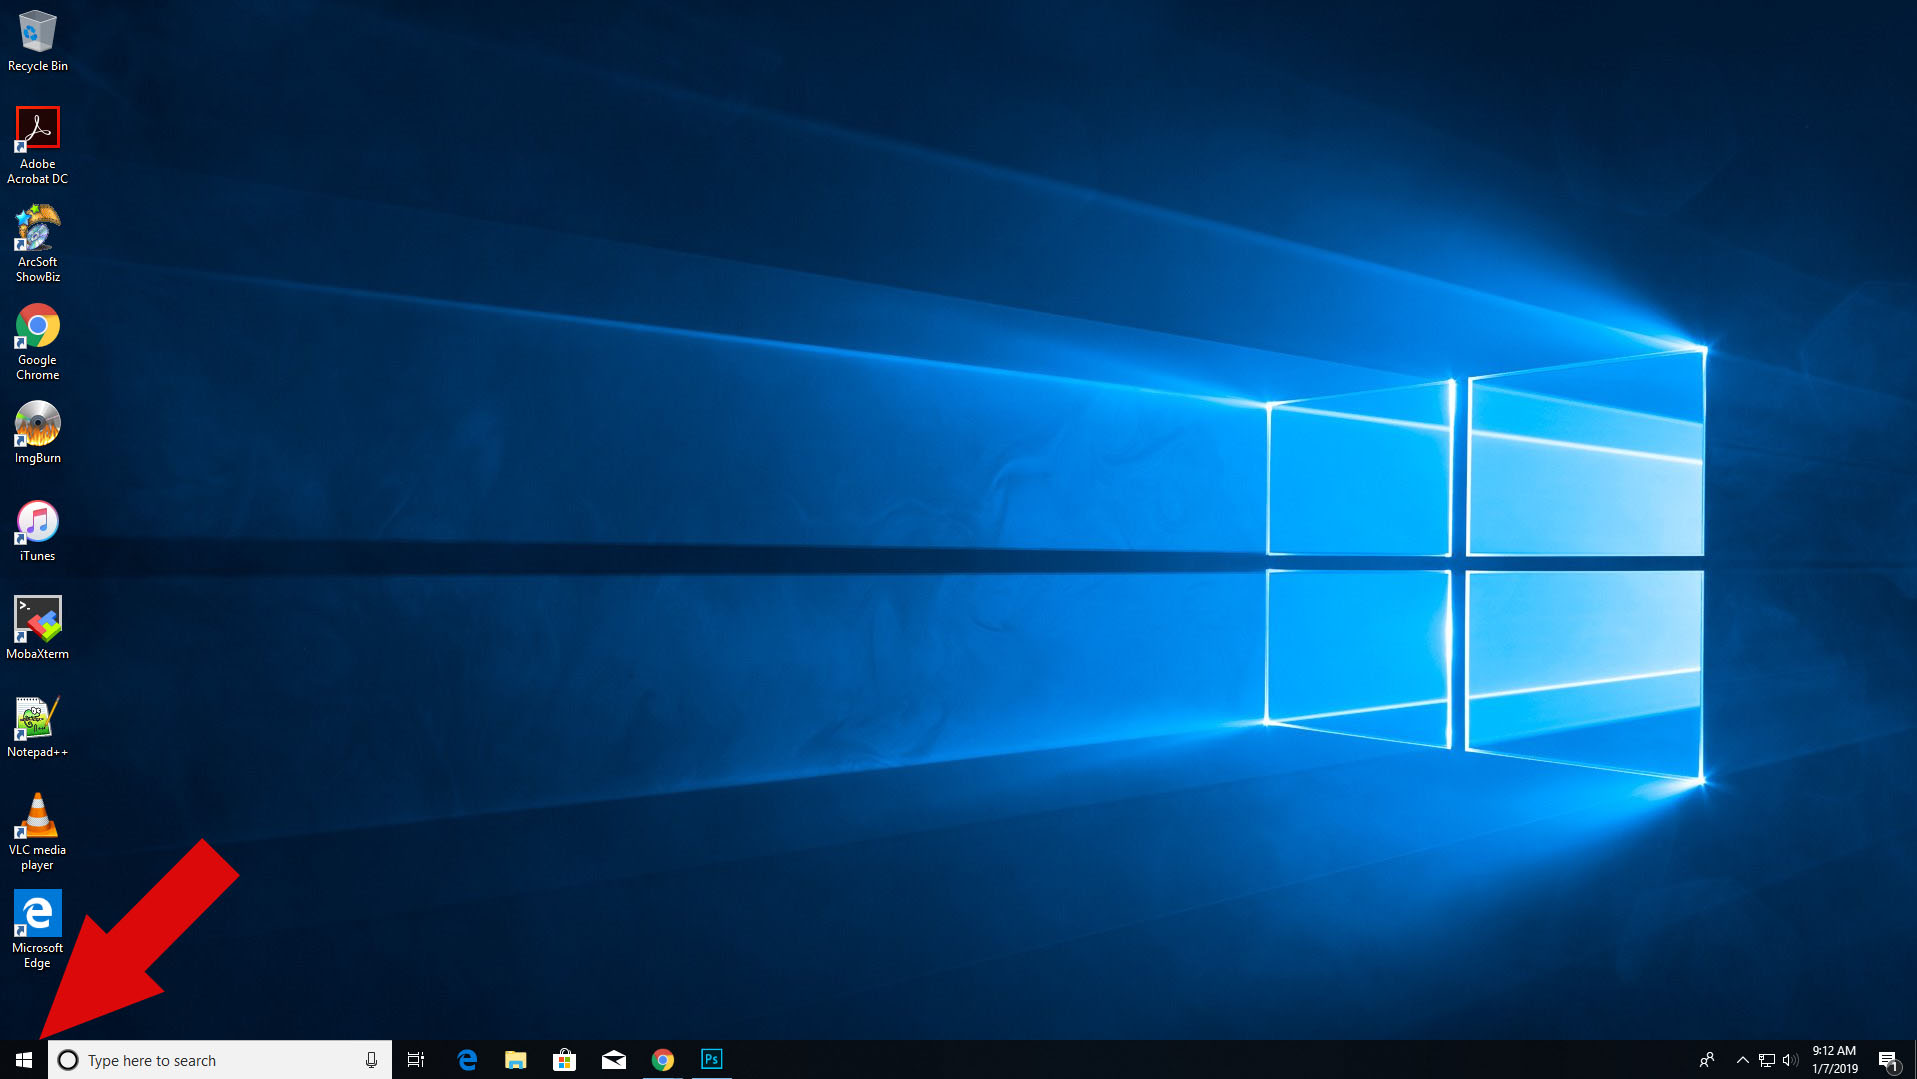
- Open the Printers and Scanners by typing it in at the bottom.
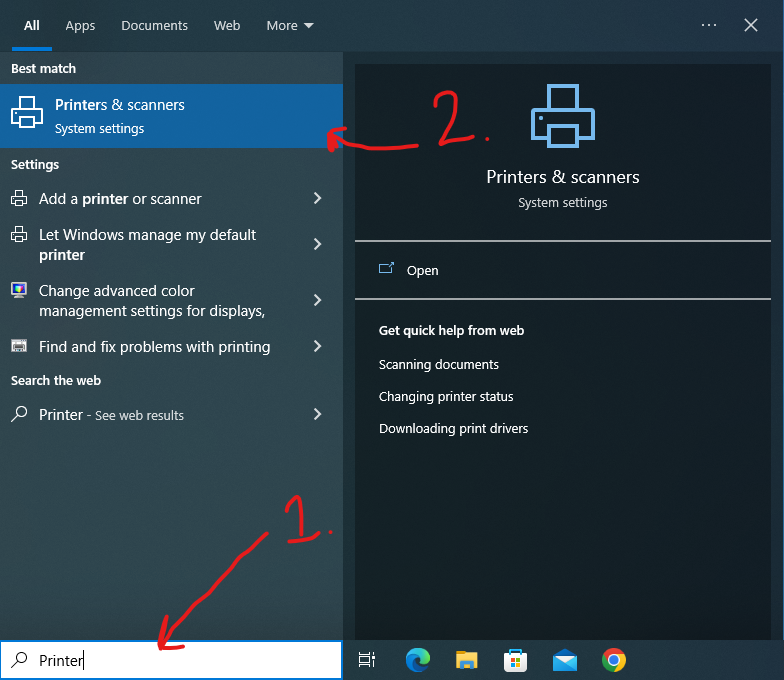
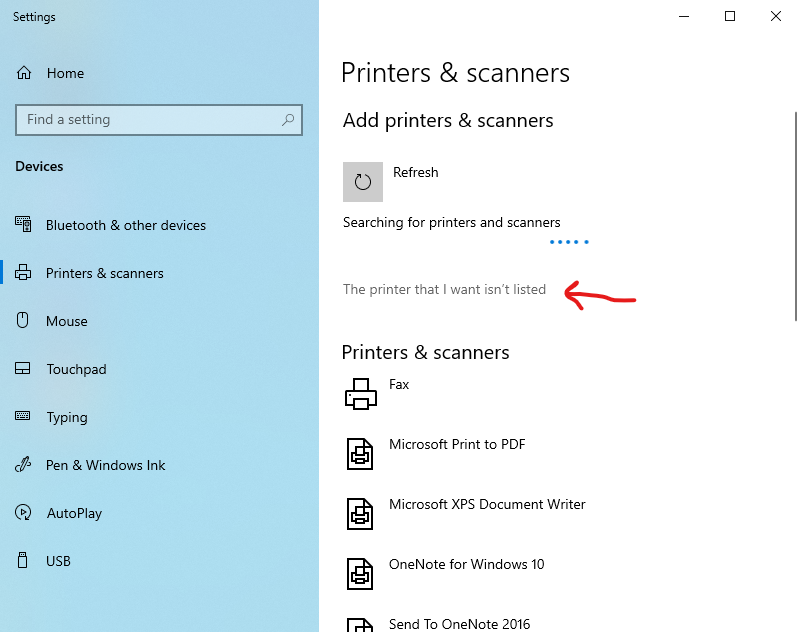
- Click on Add a Printer or Scanner

- After a little loading, you should be able to click on The Printer I want isn’t listed.
- Doing that should give you this screen, where you will select Find a printer in the directory, based on location or feature Select that, and than Next
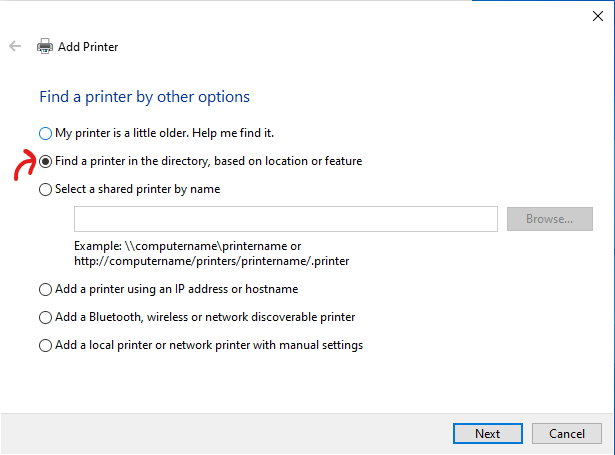
- A list of available printers will begin to populate. Find the name of the printer you wish to install from the list, and just double-click it to install it.
Adding Printer on macOS
Copy & Email Print
This is an accordion element with a series of buttons that open and close related content panels.
How to Add Email to Address Book
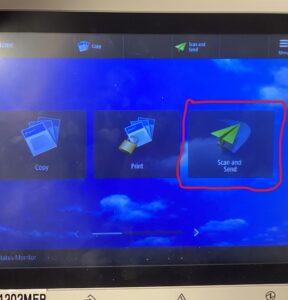
- Tap Scan and Send
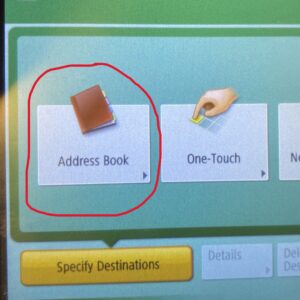
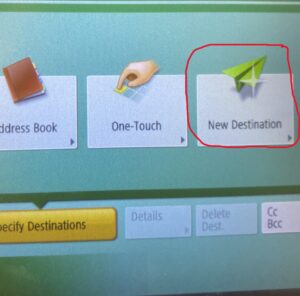
2. Tap Address Book
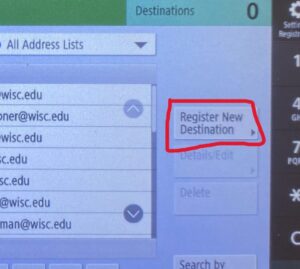
3. Click on Register New Destination
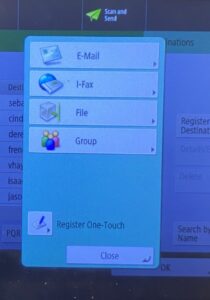
4. Type in email and press OK
5. Select your email from Address Book and press OK
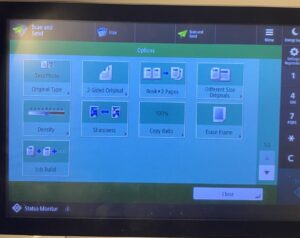
6. Choose what format to send your scan
7. Choose how you’d like it to scan and press START
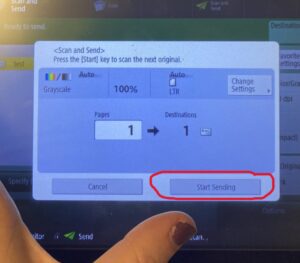
8. Once all pages have scanned press START SENDING
How to Make a Copy
- Press Copy
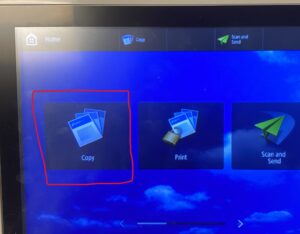
2. Press Start
How to Scan and Send to Email
- Press Scan and Send
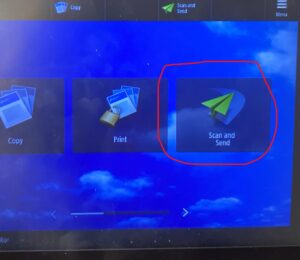
2. Press New Destination
3. Select Email and type it in
4. Press Start
5. Select Start Sending
Release Print Job
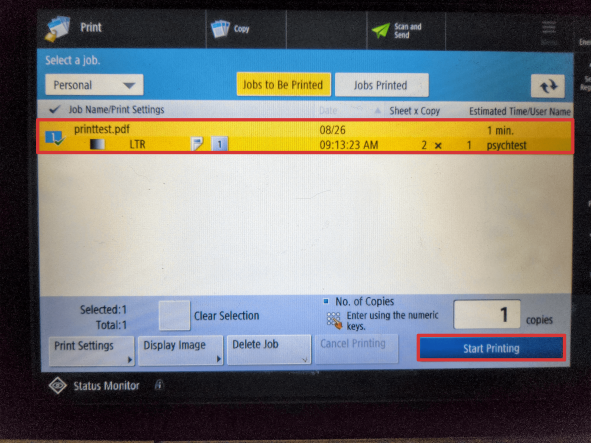
HOW TO RELEASE A PRINT JOB FROM A CANON MFP
- Tap Print

- Select your print job
- Tap Start Printing


Scanning to USB
Before You Start Scanning
Note: If you feel more comfortable using a personal drive you’ll need to follow the formatting instructions. But if your ok with using a shared USB flash drive already set up for scanning we have one available at our IT Helpdesk.
WARNING: Formatting a flash drive or external USB hard drive will erase all information currently being stored.
- Verify that your USB flash drive is formatted with exFAT (FAT32 will also work but is not recommended due to the maximum file-size limitation of 4 GB).
- Windows:
On Windows you will need to right click the drive you want to format from within File Explorer and click format. Then select the File System dropdown box and click on exFAT. You can leave all the other settings as is and click start to begin the formatting process. - MacOS:
On MacOS you will need to open disk utility, select the drive, and click the erase button. Make sure to select either exFAT (or FAT32 if necessary) in the dropdown before clicking the format button.
- Windows:
- Make sure that the multifunction printer you’re scanning from has a USB port on it. The USB port is usually located on the side or front of the printer.
Canon:
Note: You can print files from a flash drive by selecting the print option and the PDF file you want to print.
-
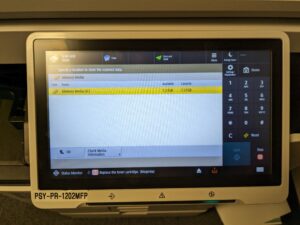
- When you plug in a flash drive with a compatible filesystem you’ll see a popup message asking if you want to scan or print:

- When you tap the scan button a screen asking for a location to store scanned data will appear:
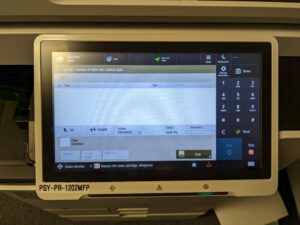
- Tap on the flash drive icon to set the storage location and when the new window appears showing the contents of the flash drive tap the scan button to open the scanning window:
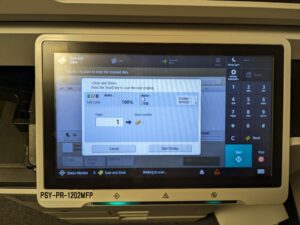
- You’ll be greeted with a similar screen to the copy screen, except this screen is for saving PDF files. The name of the file you want to create will need to be entered in before you tap the start button (the text box to do so is at the bottom of the window). There are also some other options you can set that apply to the PDF file (the default options will work just fine for general use):

- After the printer has finished scanning files you’ll need to tap the “start storing” button to store the PDF on the USB flashdrive:
- You should now see the PDF you just scanned in the list of files on the drive:
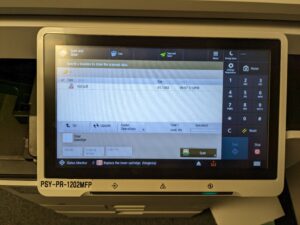
- It is highly recommended that you eject the drive from the printer before disconnecting it. To eject the drive you will need to tap the eject button (the arrow below the scan button). In the “select memory media to remove” menu select the USB device from the list and tap the remove button to fully eject it. After the drive has been fully ejected it should return to the home screen and you can safely remove that USB device from the printer.
- When you plug in a flash drive with a compatible filesystem you’ll see a popup message asking if you want to scan or print: