Background Information
Workspace ONE (formerly known as Airwatch) is a Mobile Device Management (MDM) system. Our department uses this technology to manage devices remotely–especially mobile devices like tablets and laptops. This technology allows our IT team to configure security settings, manage updates, install applications, and perform many other management tasks. The goal of this tool is to keep department assets in good software health while they are moving around networks outside of our building.
If you currently have a department-owned computer that does not have this software installed, please follow the steps below for the type of computer you have, either Windows or macOS. If you are unsure whether you have this software installed, please check for the application with the following procedure.
Check Workspace One Enrollment
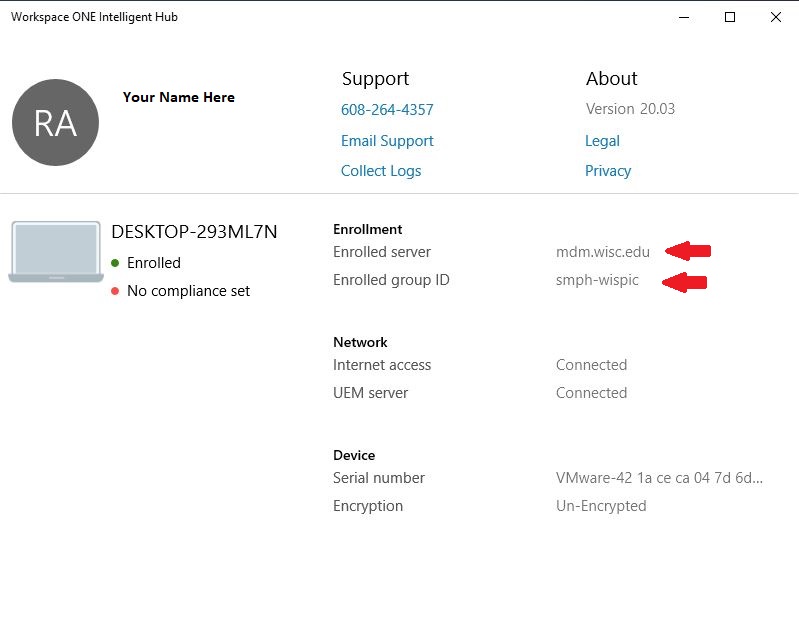
To check whether Workspace One Intelligent Hub is already installed and enrolled for Psyhciatry on your Windows computer, open the Start menu and search for Workspace One Intelligent Hub.![]()
If the application is not there, then you don’t have the application installed and will need to go through the steps below. If it is installed, open it and verify that “mdm.wisc.edu” is the Enrolled server and “smph-wispic” is the Enrolled group ID. If that checks out, then you are already enrolled in the MDM and do not need to take further action.
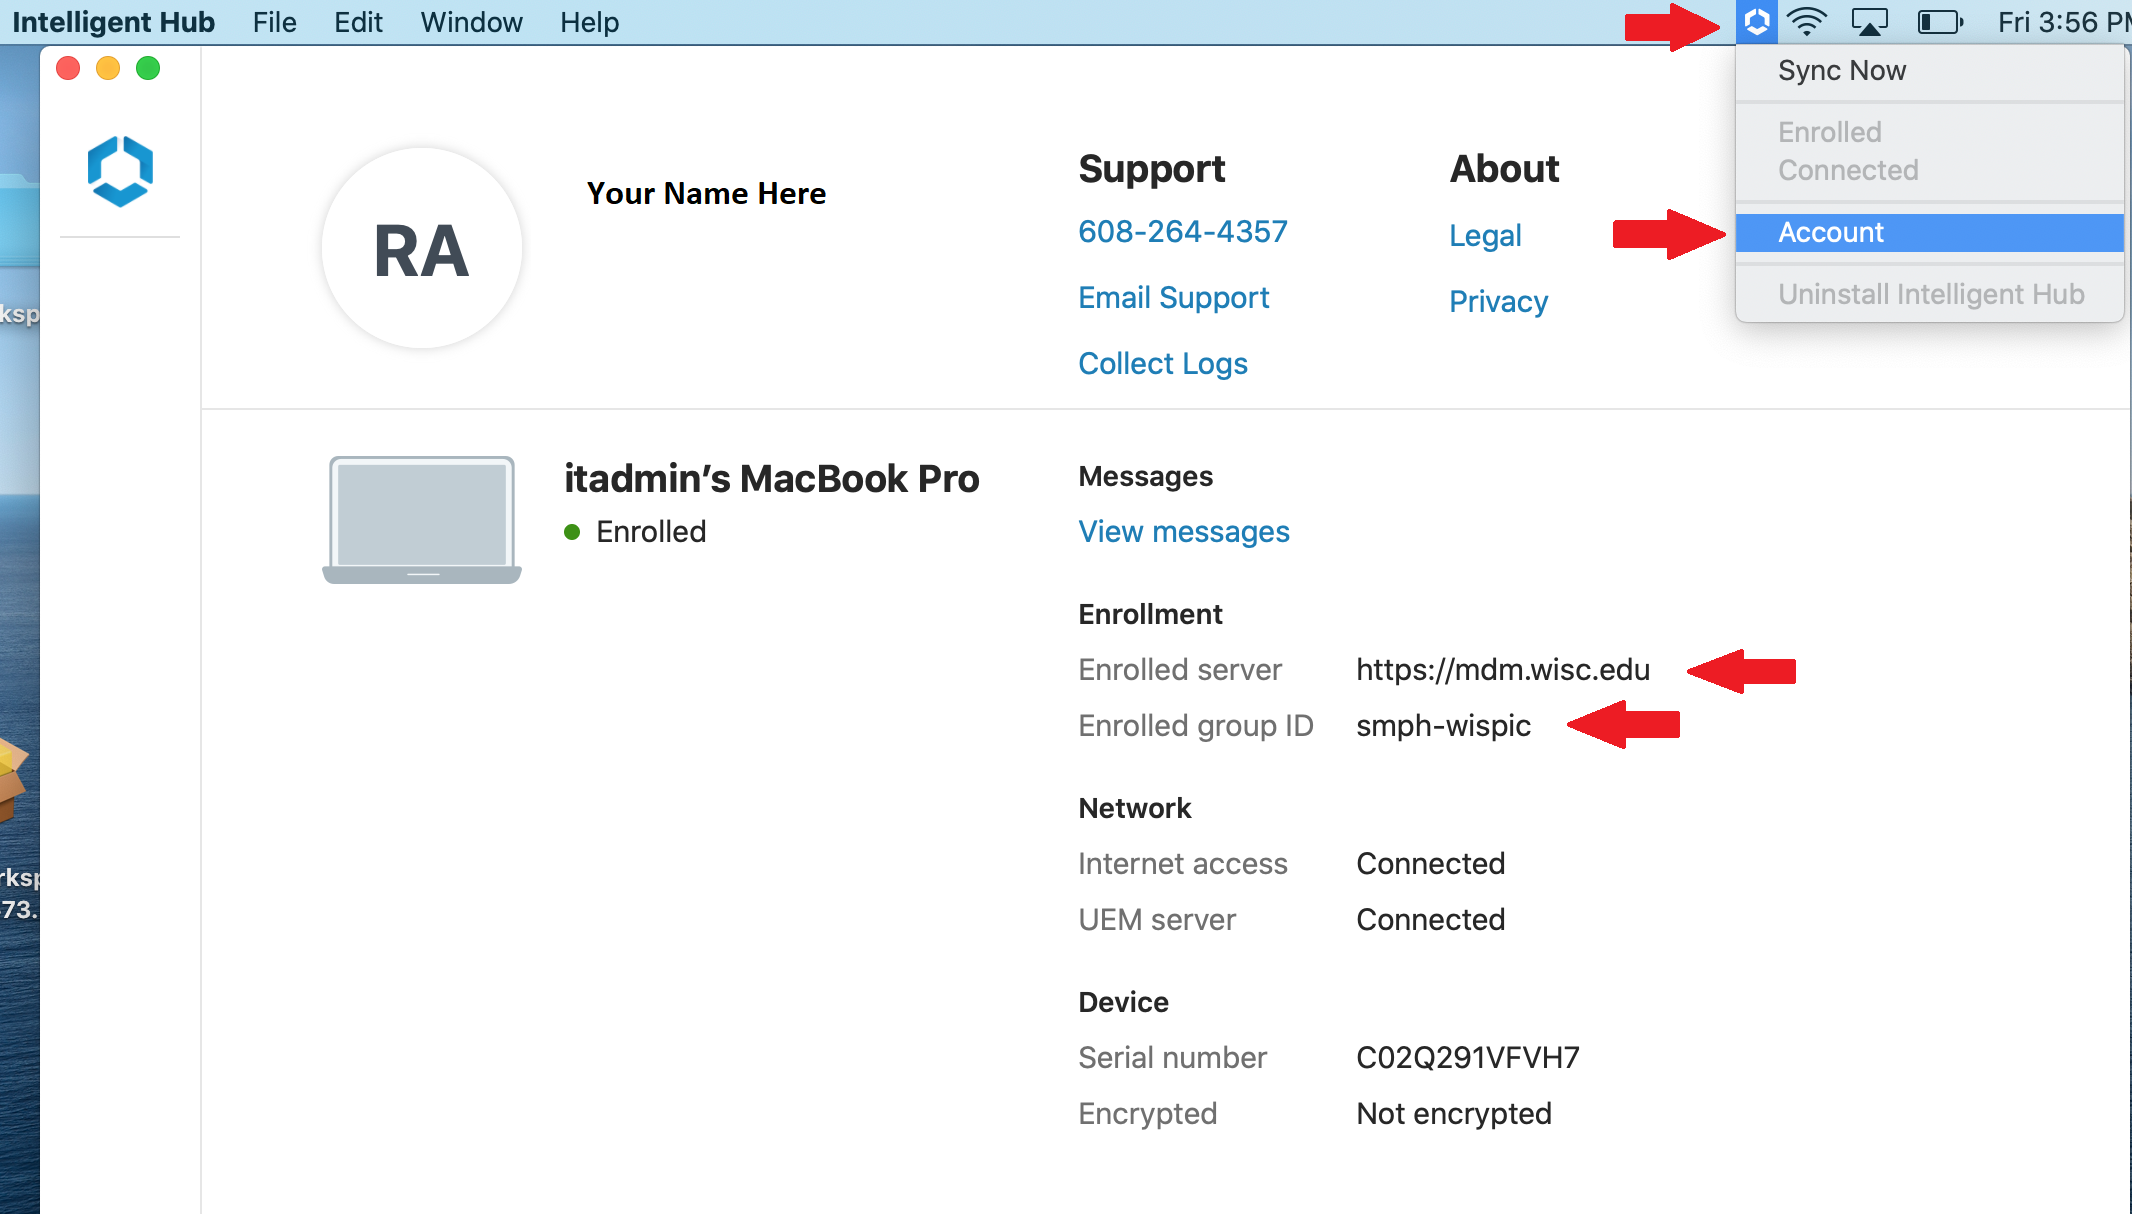
Look at your menu bar in the top-right corner of your screen. If you see the Intelligent Hub icon there then you have the agent installed. ![]() Click it and select “Account” to open the details. If you see “https://mdm.wisc.edu” for the Enrolled Server and “smph-wispic” for the Enrolled group ID, then you are already enrolled.
Click it and select “Account” to open the details. If you see “https://mdm.wisc.edu” for the Enrolled Server and “smph-wispic” for the Enrolled group ID, then you are already enrolled.
If you do not see the Intelligent Hub icon in the menu, you might still have it installed. Press command + spacebar to open a Spotlight Search. Type “Workspace One Intelligent Hub” to see if an application appears. If so, open it and you should see the same image as above. If not, then you don’t have it installed and need to go through the steps below.
Install Workspace One
How to install Workspace ONE Intelligent Hub (aka Airwatch) on Windows
(Note: Click on pictures to enlarge.)
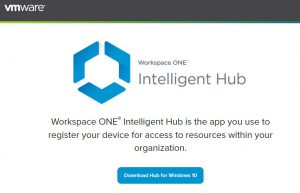
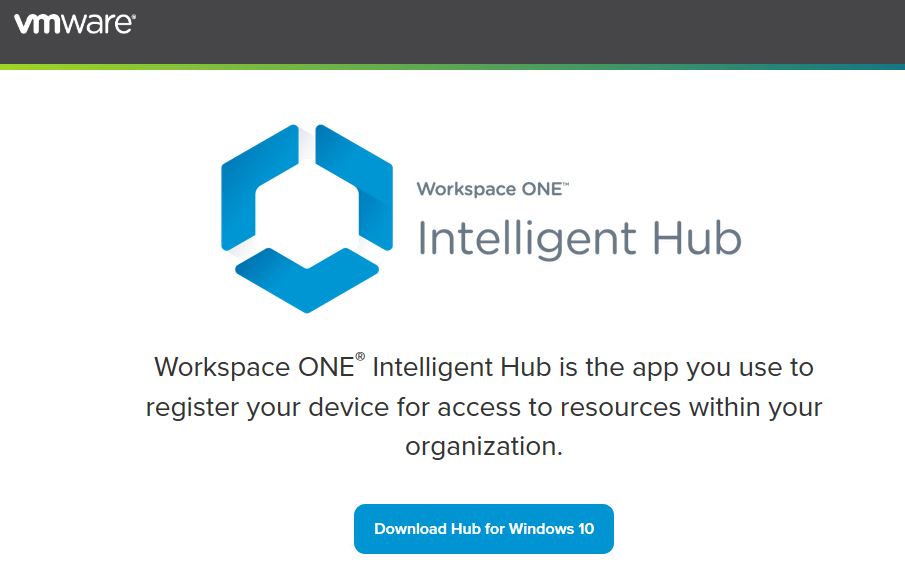
- Download the VMwareWorkspaceONEIntelligentHub installer here: https://getwsone.com/ Click “Download Hub for Windows 10”.
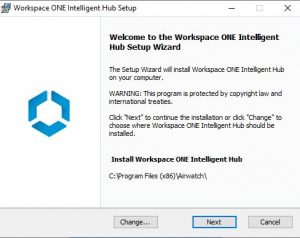
- Run the installer (requires local admin privileges). Click Next.
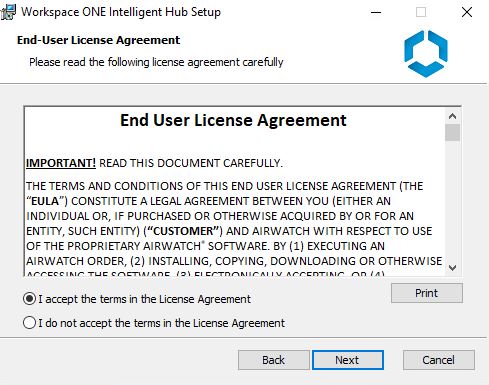
 Read and Accept the End-User License Agreement. Click Next.
 Click Install.
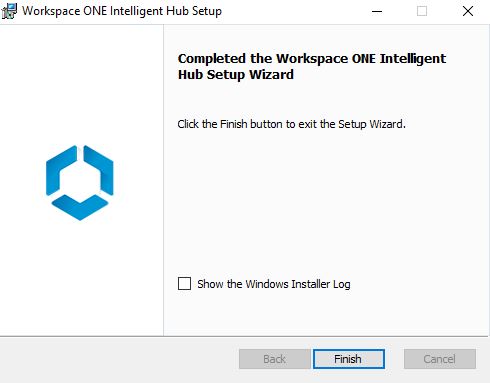
  Click Finish.
- The Enrollment Page should open automatically after 30 seconds or so. If it doesn’t, open the Start menu and search for “WorkspaceONE Intelligent Hub” and open it.
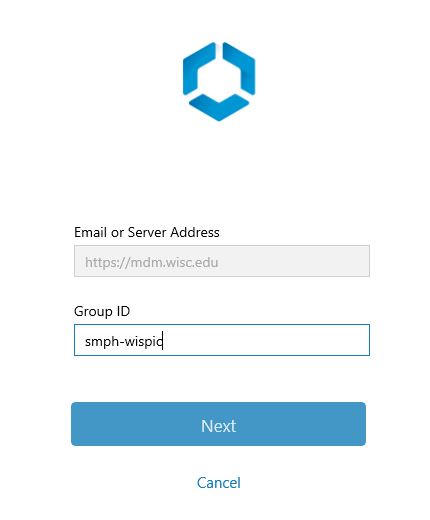
- Enter the following enrollment details:
Email or Server Address: mdm.wisc.edu
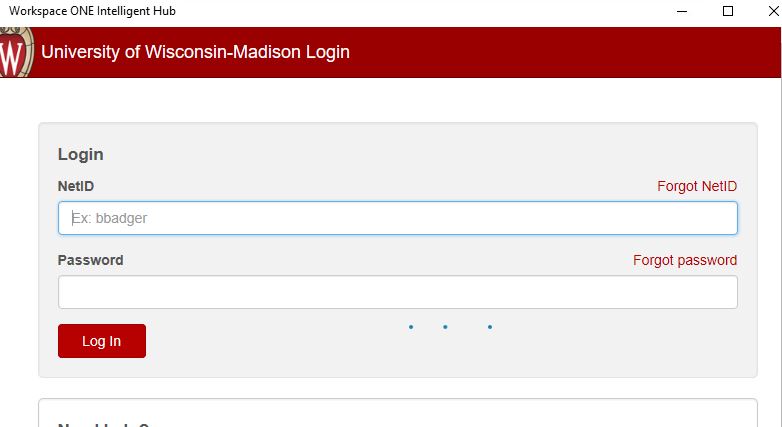
Group ID: smph-wispic You should be redirected to the UW NetID login screen. Please log in with your NetID.
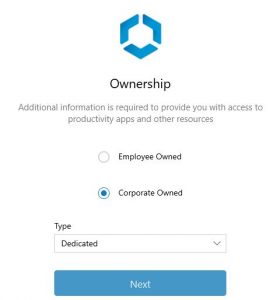
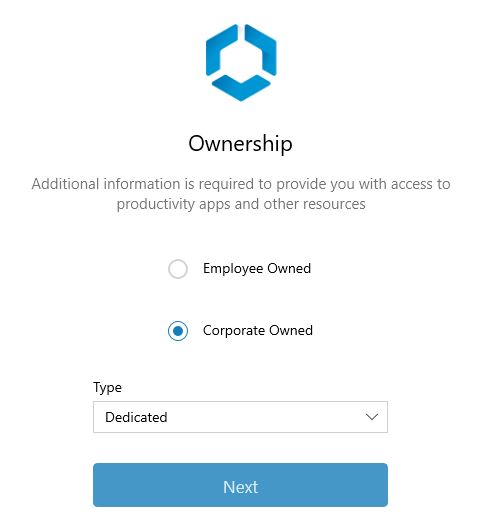
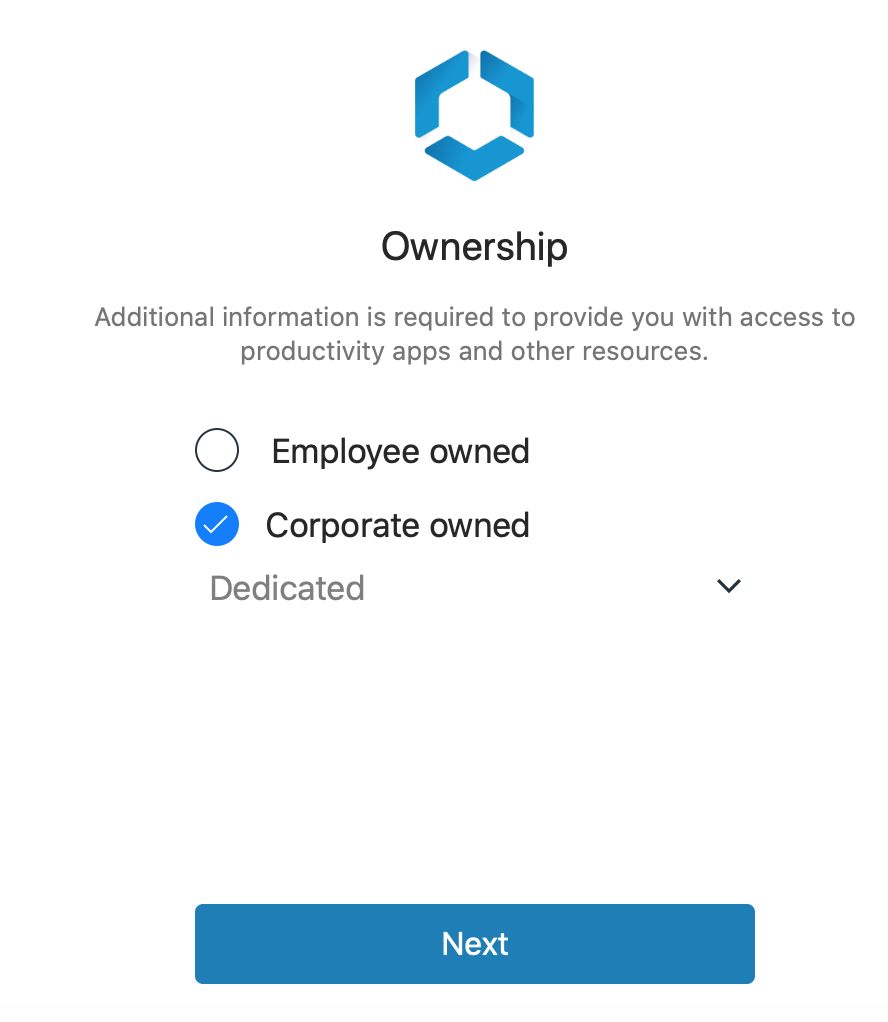
It might take a minute or two for the device to sync with our server and you will see a white screen during this time. Please wait as it will load the next prompt eventually. - Next, select the device ownership classification. If the device is owned by UW, please select Corporate – Dedicated. If the device is owned by you, please select Employee Owned.
- Choose whether you would like to send anonymous data to the company. I suggest choosing “Not Now” if you’re not sure.

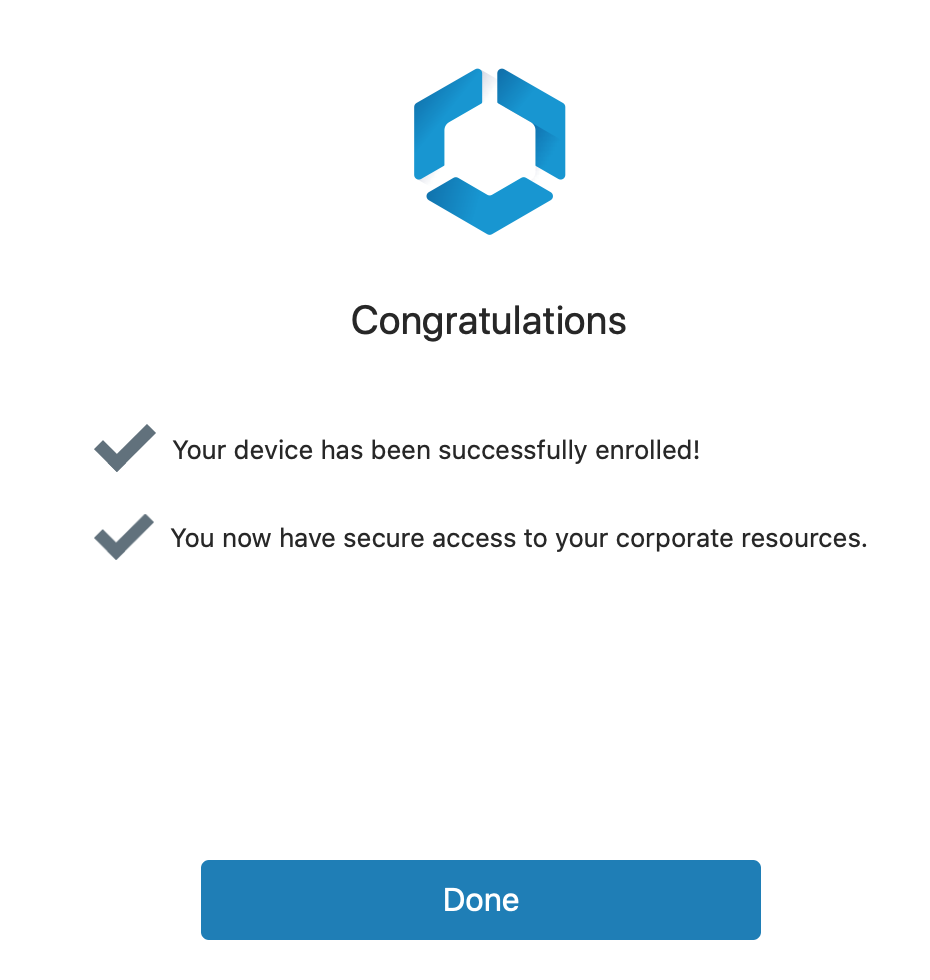
- Once you see the Congratulations screen, you can click Done.
 You will then see a screen listing your username, computer name, and other information about your system. You may close that and you’re all done.


If you have any difficulties with the install or questions about the software, please contact the Psychiatry HelpDesk.
How to install Workspace ONE Intelligent Hub (aka Airwatch) on macOS
(Note: Click on pictures to enlarge.)
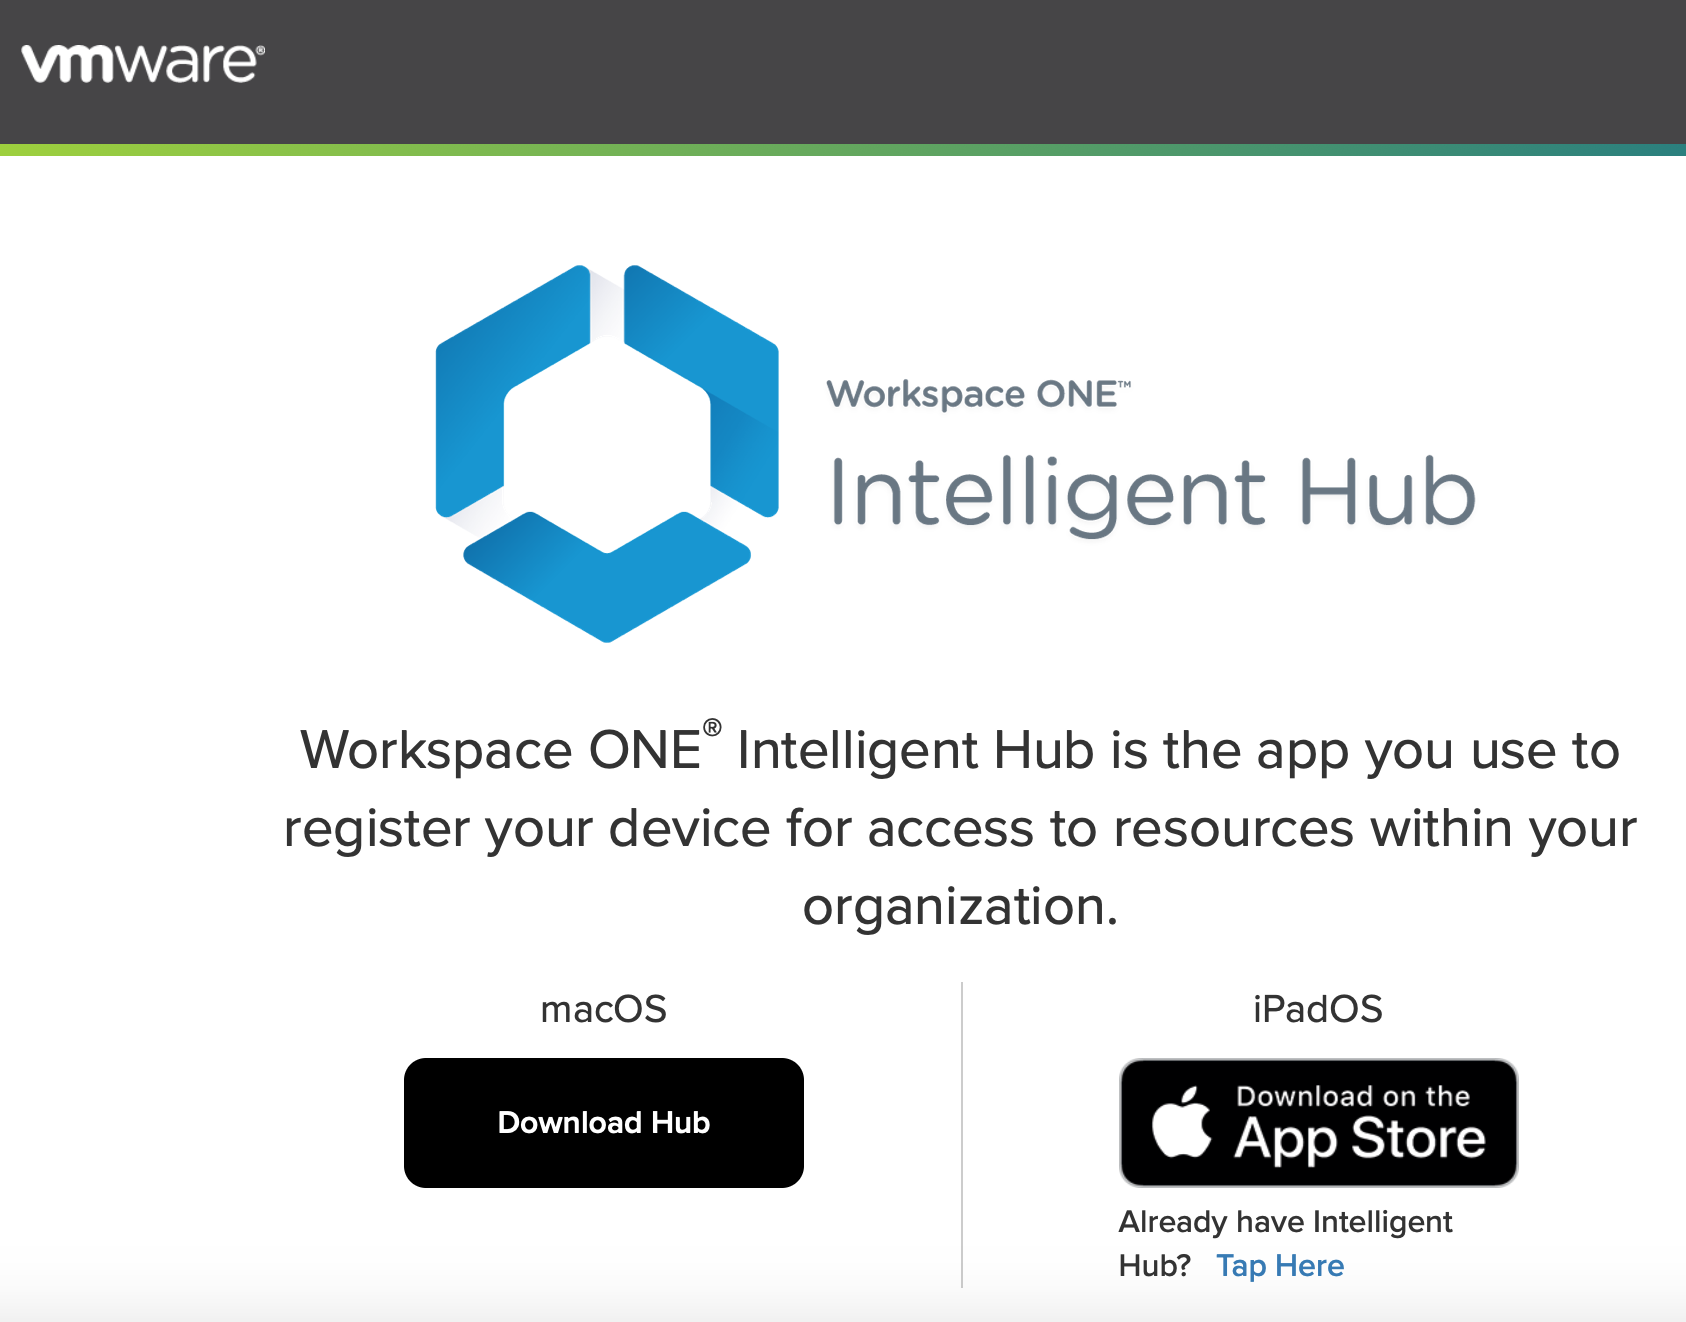
- Download the VMwareWorkspaceONEIntelligentHub installer here: https://getwsone.com/ Click “Download Hub” under macOS.

- Run the installer (requires local admin privileges).
- The Enrollment Page should open automatically. If the Enrollment Page does not automatically appear, click the Intelligent Hub icon in the top menu bar and select Enroll Now.

- Enter the following enrollment details:
Email or Server Address: mdm.wisc.edu
Group ID: smph-wispic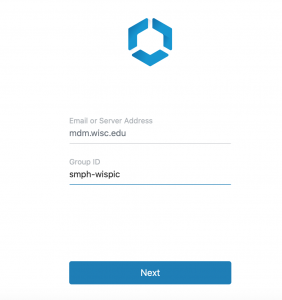 You should be redirected to the UW NetID login screen. Please log in with your NetID.
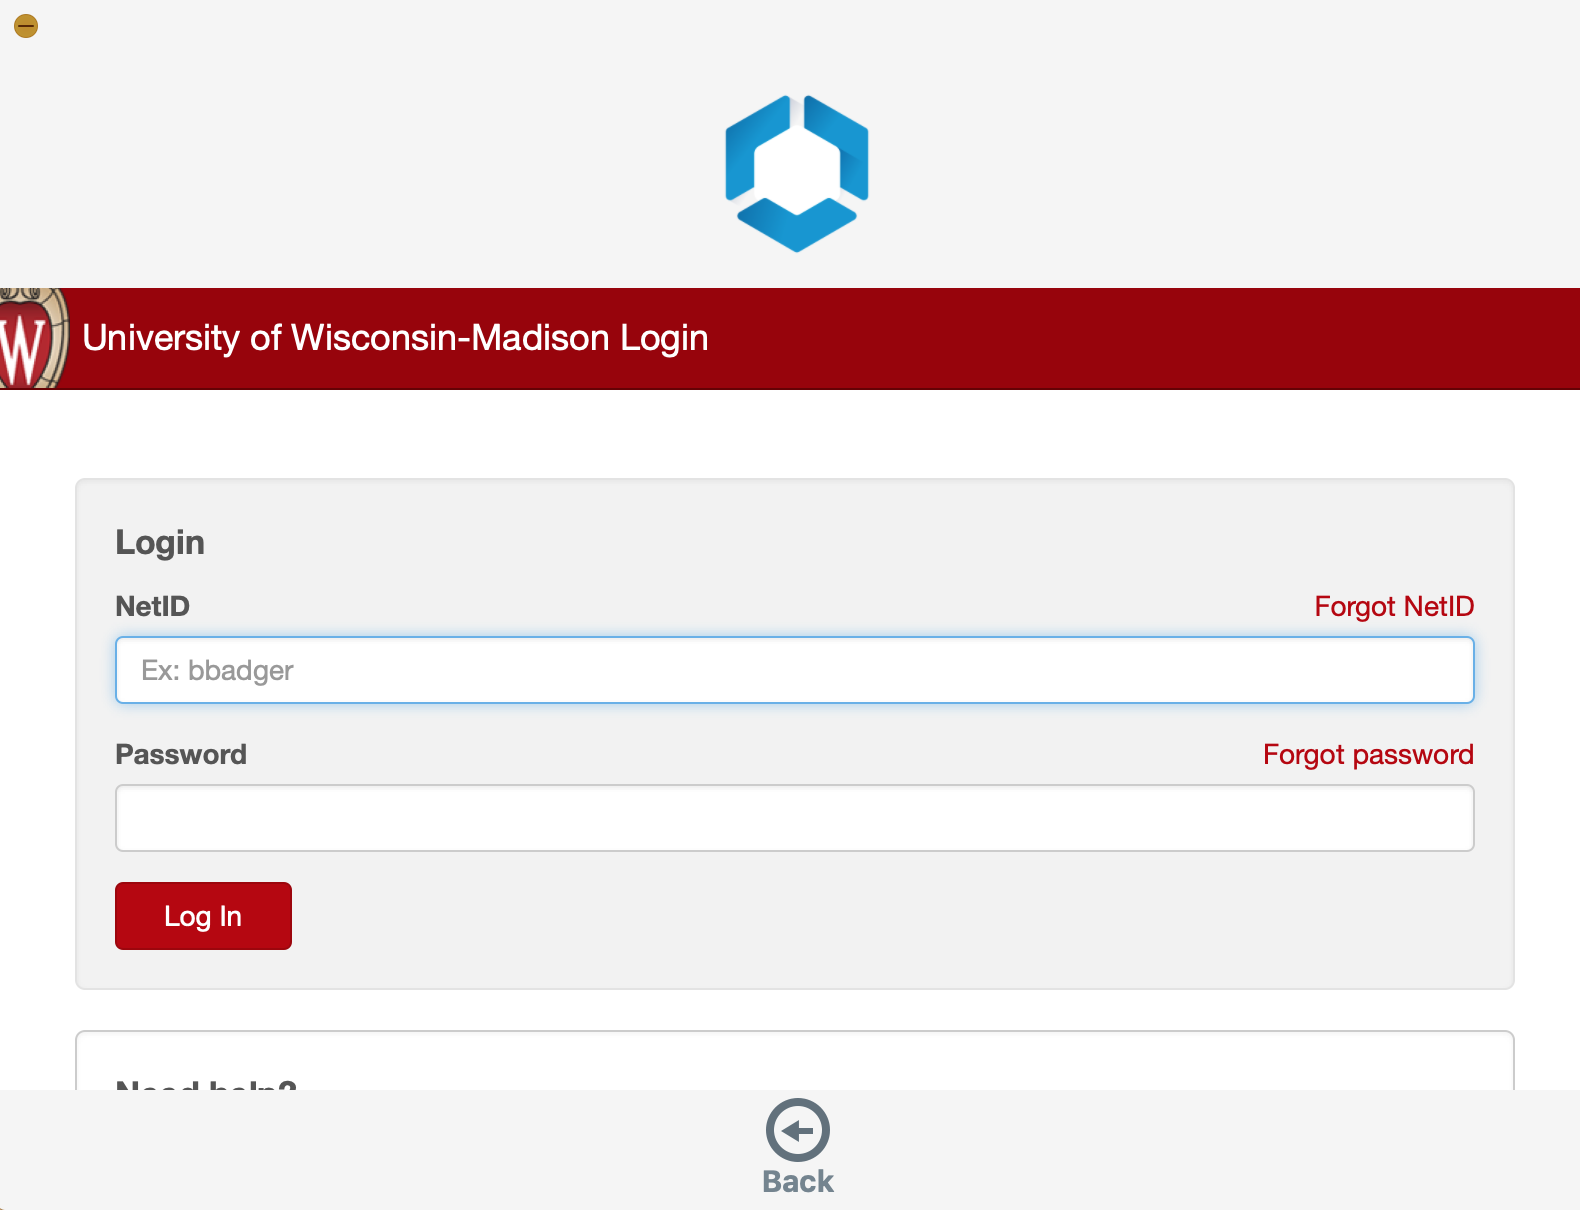
It might take a minute or two for the device to sync with our server and you will see a white screen during this time. Please wait as it will load the next prompt eventually. - Next, select the device ownership classification. If the device is owned by UW, please select Corporate – Dedicated. If the device is owned by you, please select Employee Owned.

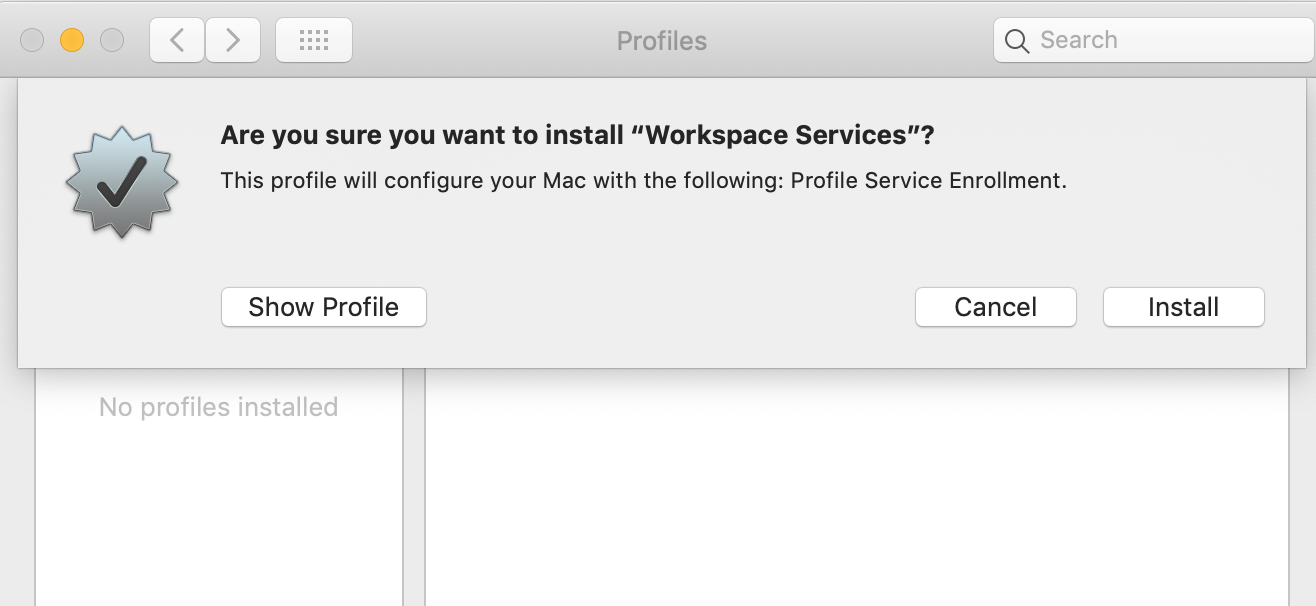
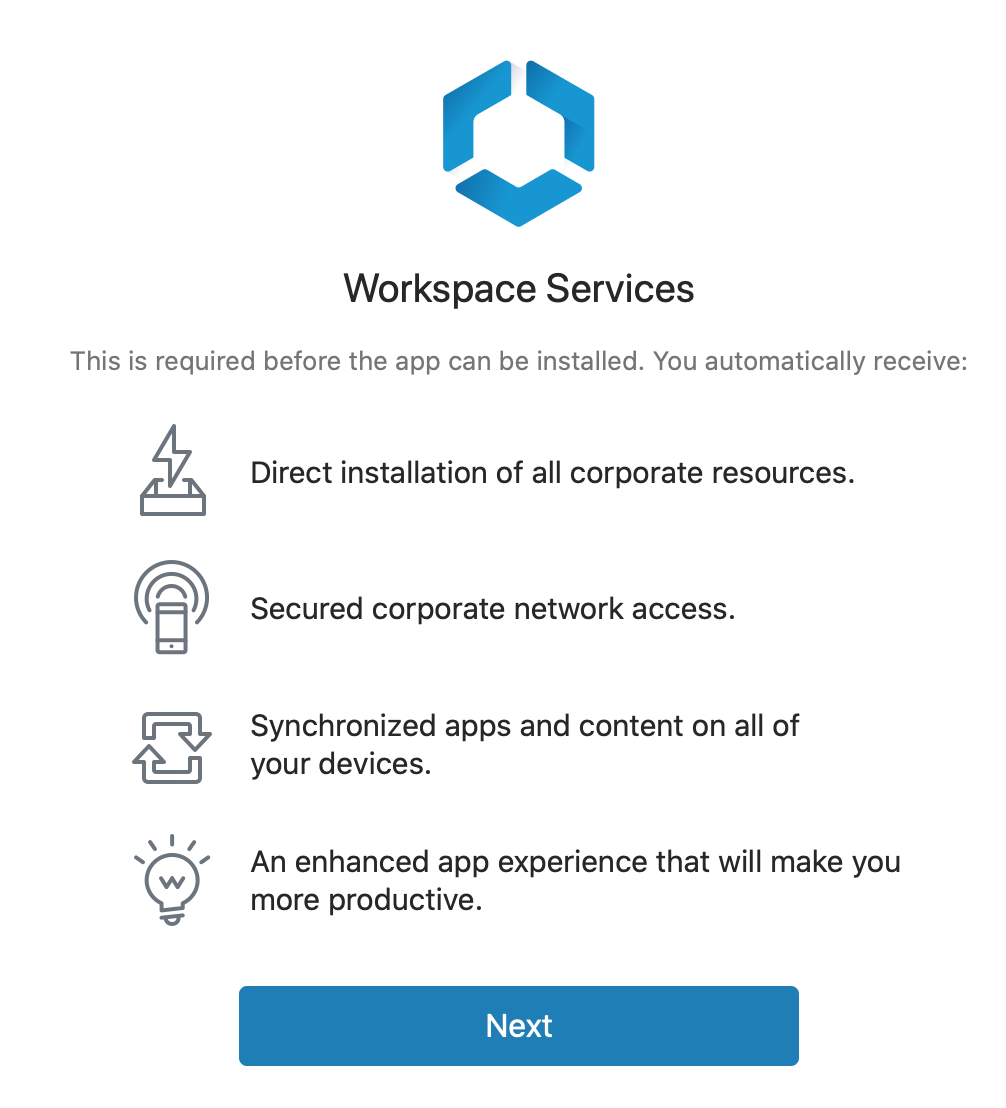
- Click Next at the Workspace Services page.
 You’ll then see the Enabling Device Management screen. Wait for the progress to finish.
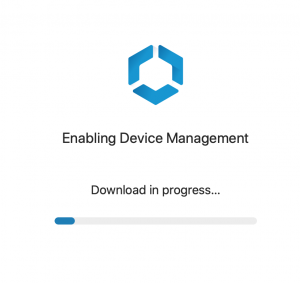
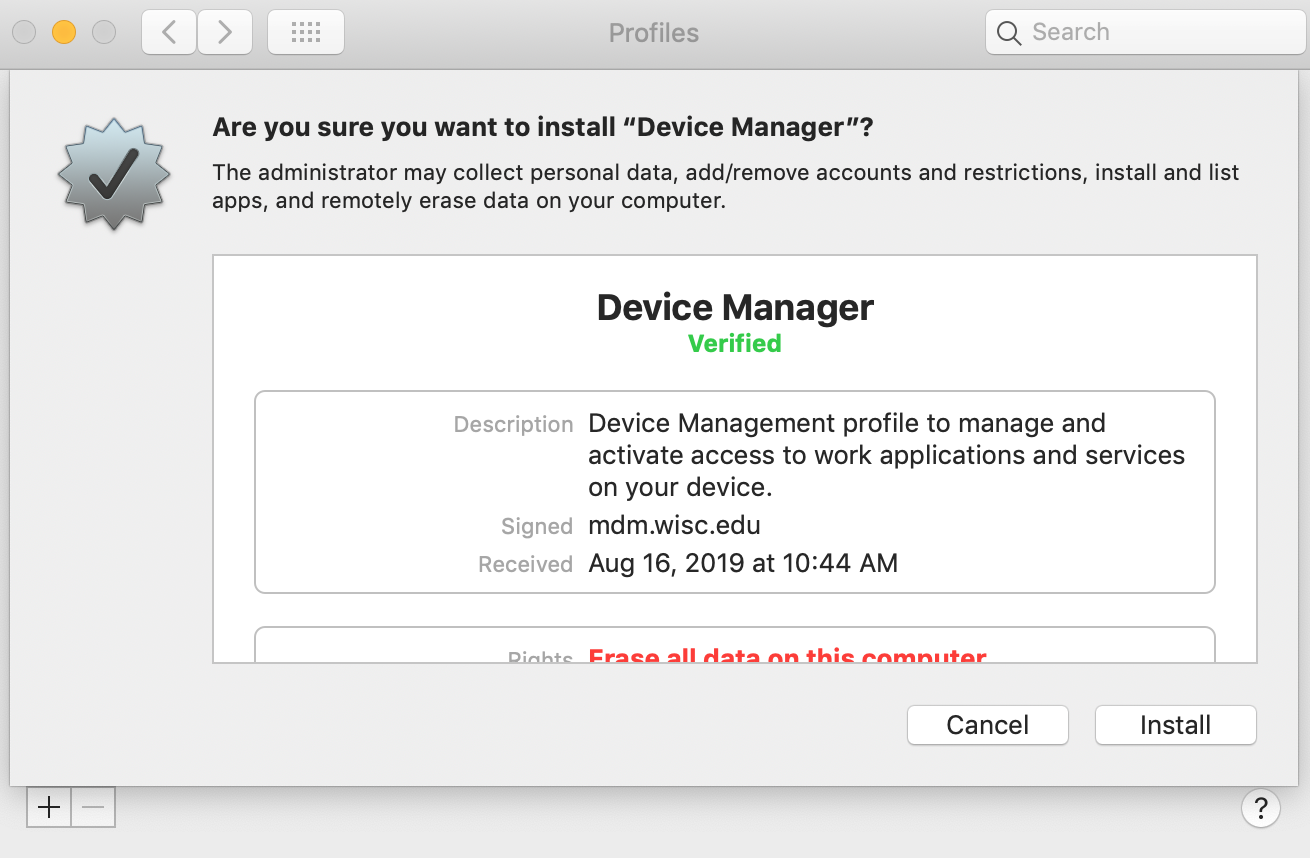
- Choose Install at the next prompt.
- Confirm the profile install by clicking Install again. It will then prompt for your computer admin account password to install the profile. Notice you can review the permissions this profile will grant to the Psychiatry IT staff.
- Once you see the Congratulations screen, you can click Done.

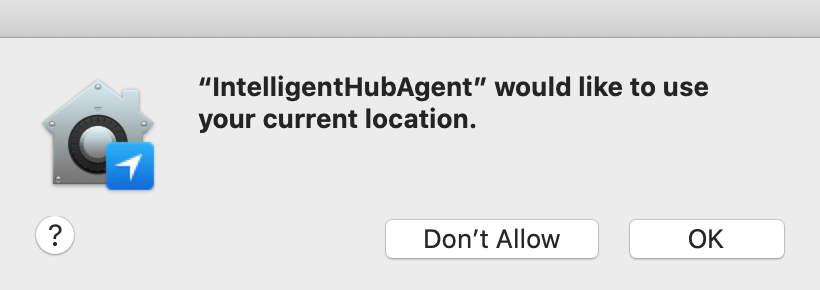
- You will see a prompt to allow location access. Please click “OK” if this is a department-owned laptop. This allows us to track the device if it is lost or stolen.
 After clicking “OK,” it will show you the Security & Privacy page within System Preferences. You’ll see that IntelligentHubAgent is checked for Location Services. Simply close this screen. You might see a few notifications asking you to allow Hub to send notifications or perform other operations. Please click allow if they appear.


If you have any difficulties with the install or questions about the software, please contact the Psychiatry HelpDesk.