Joining a Meeting
This is an accordion element with a series of buttons that open and close related content panels.
Joining a Meeting through Desktop Application
- Start by opening your Cisco Webex application
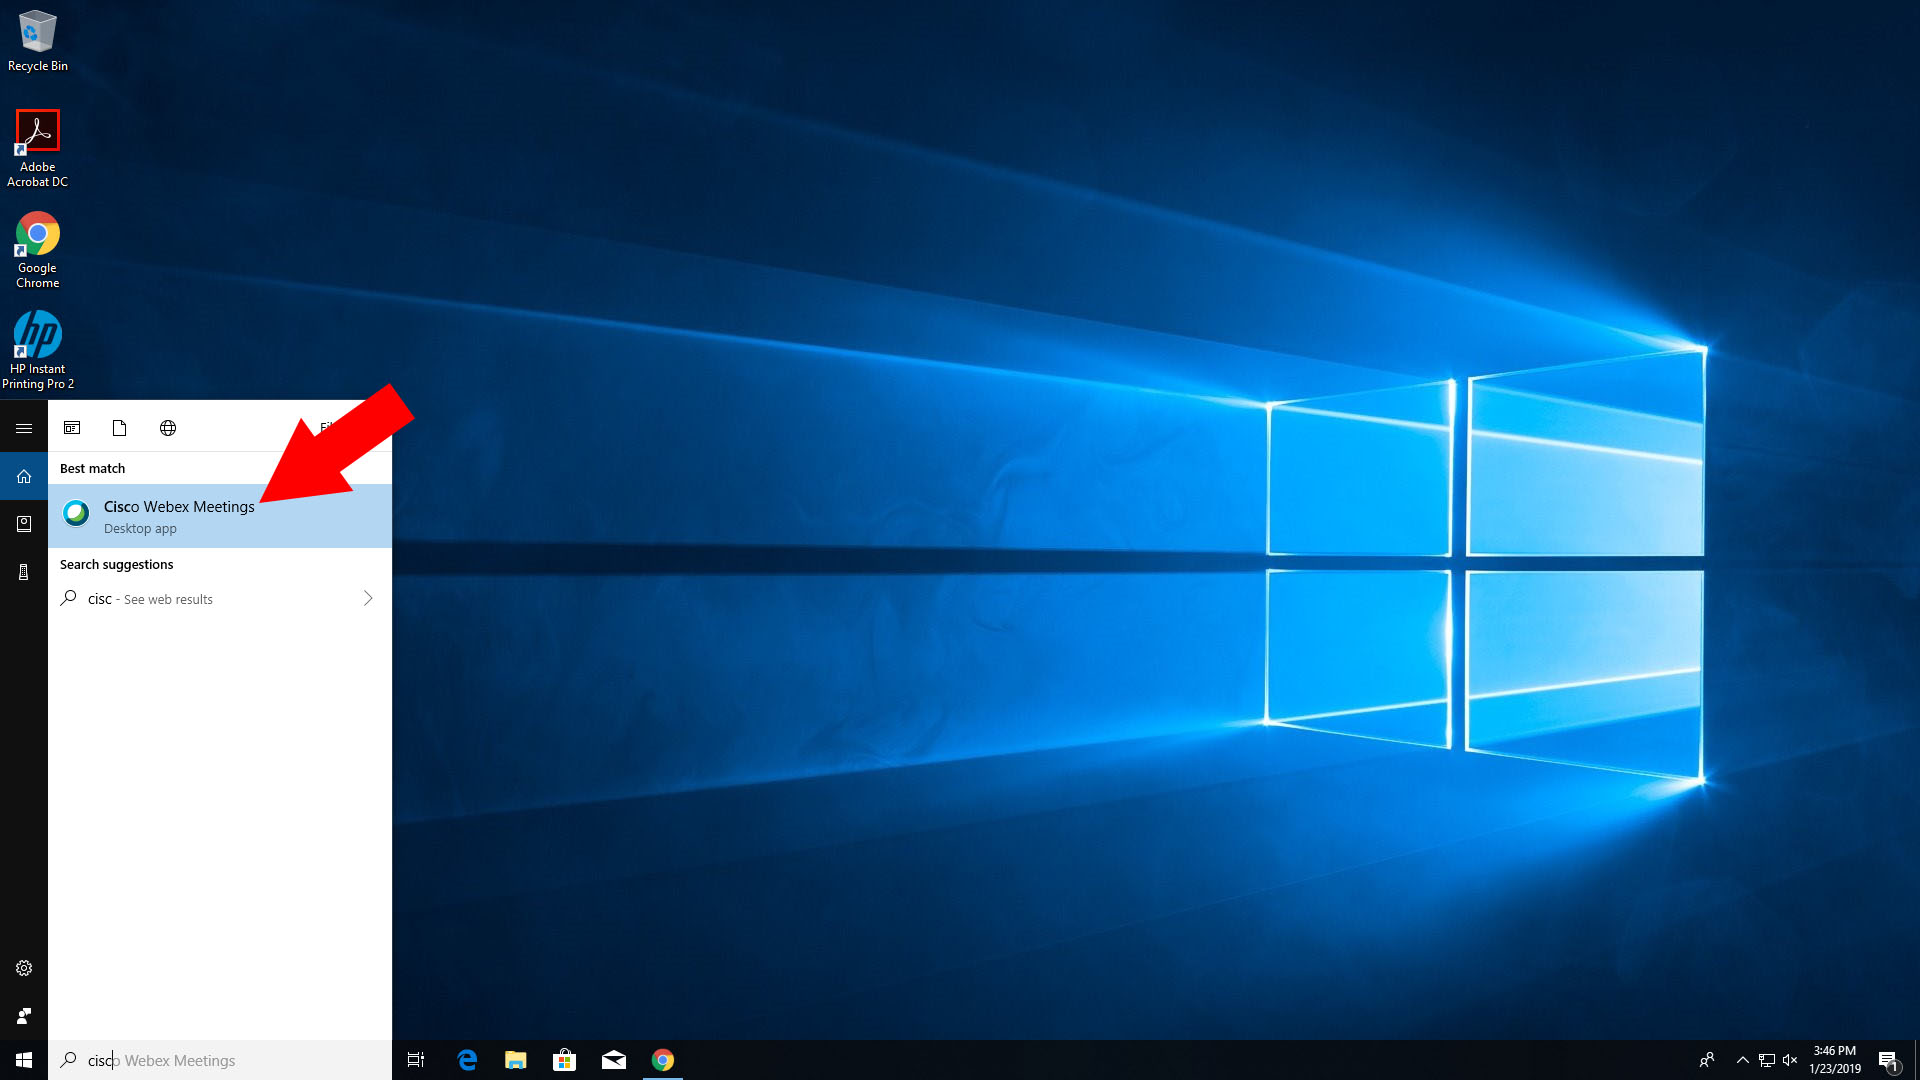
- Enter the hosts Personal Room ID or link into the “Join Meeting” box, then hit enter

Joining a Meeting through the Plug-In/Website
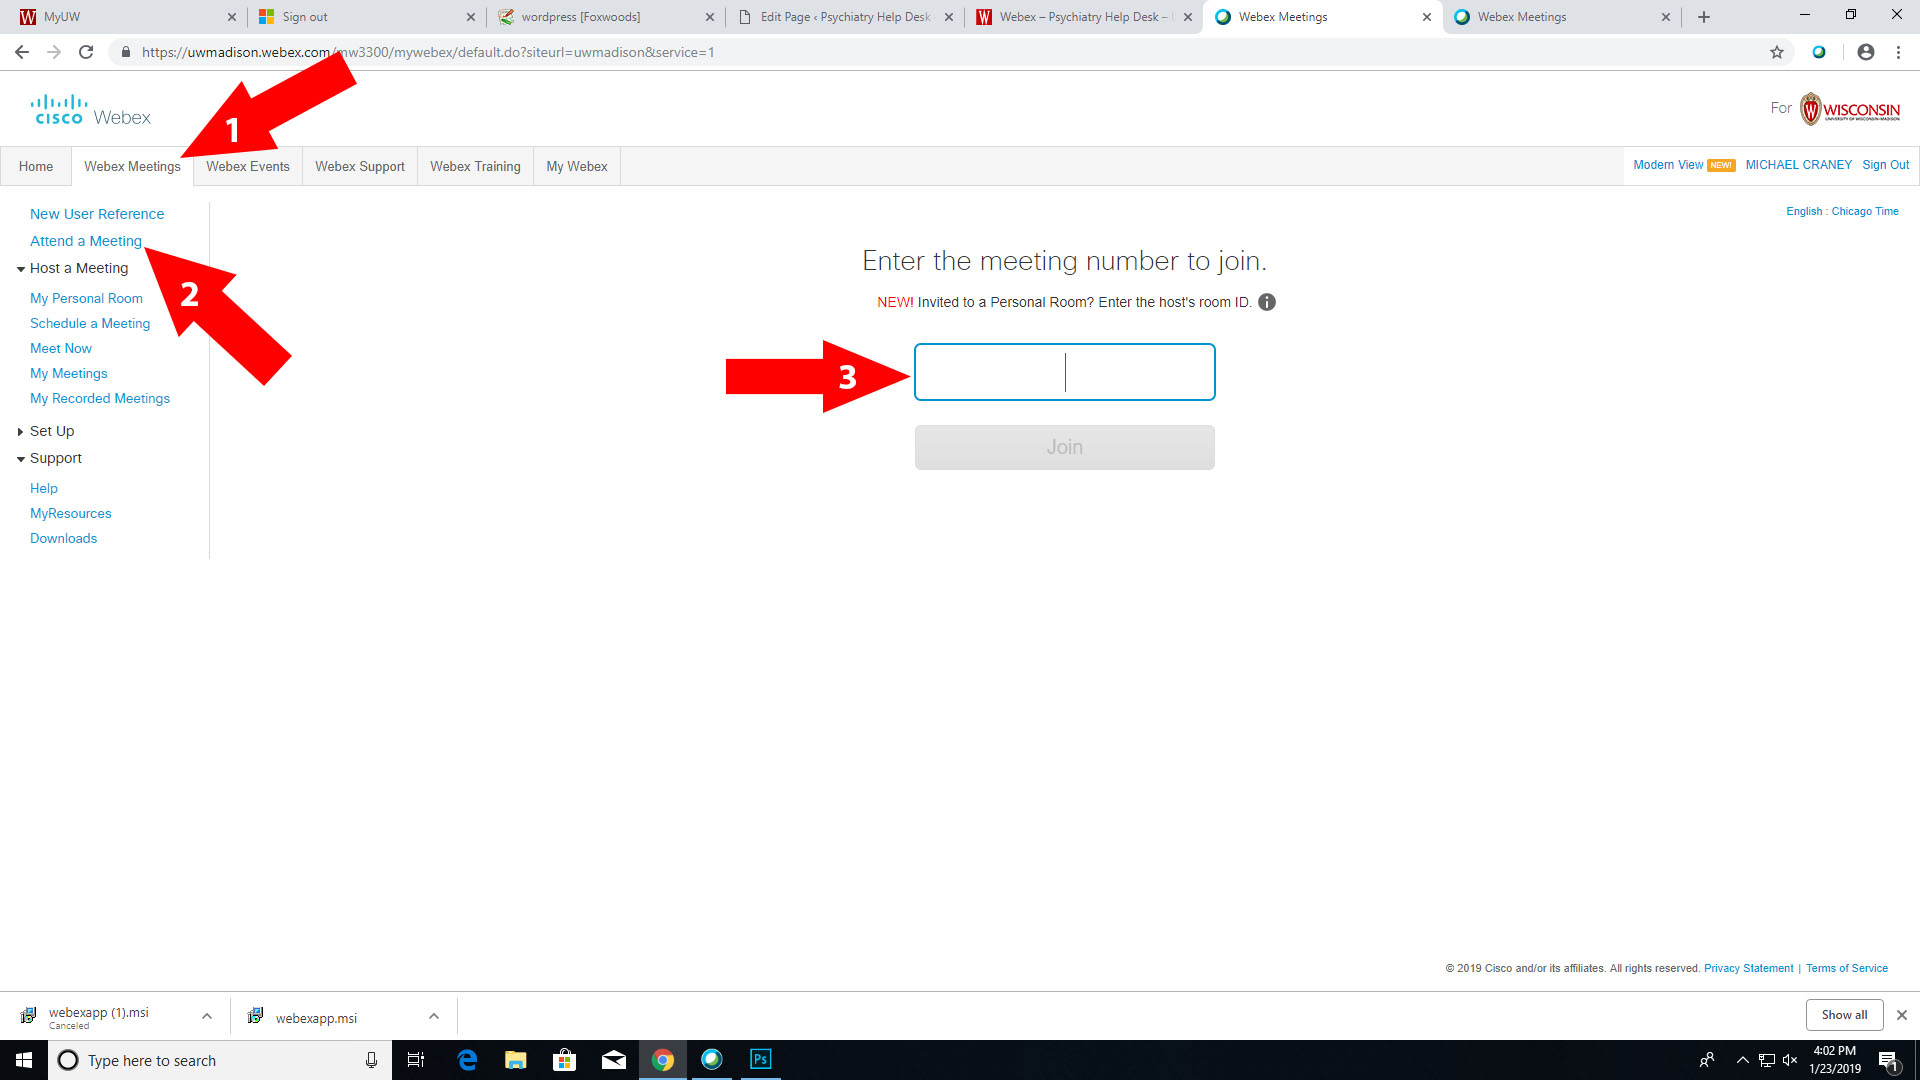
- Follow this link to the Webex site
Then:
- Click on the Webex Meetings tab
- Next, click the “Attend a Meeting” option from the left most column
- Finally, enter the hosts Personal Room ID or link into the “Join Meeting” box, then hit enter
Share Screen/Content
This is an accordion element with a series of buttons that open and close related content panels.
How to Share Content
Please view Cisco’s documentation here:
https://help.webex.com/en-us/5ddww5/Share-Content-in-Cisco-Webex-Meetings-and-Cisco-Webex-Events
Important note for macOS users
If you find that your sharing button is greyed out  , you need to enable Screen Recording for Cisco Webex. Here are the steps:
- On your Mac, choose Apple menu

- Select Screen Recording.
- Select the checkbox next to an app to allow it to record your screen.Deselect the checkbox to turn off access for that app.
https://support.apple.com/guide/mac-help/control-access-to-screen-recording-on-mac-mchld6aa7d23/mac
It should look something like this:
Hosting a Meeting
Note: The instructions are pretty similar for both the Modern View and Classic View. The only difference is the appearance. We have included both for convenience.
This is an accordion element with a series of buttons that open and close related content panels.
Modern View
- Go to https://uwmadison.webex.com and click sign in.
- Enter you your wisc.edu email address. You may be prompted to enter your Net ID.

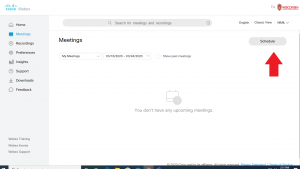
- Click on Meetings on the left side of the window.
- Click Schedule towards the top right area of your window.
-
- You don’t have to change the password
- The duration is only the expected length of the meeting, it will only end when the host ends it.
- Email addresses entered in the Attendees field will receive invitation emails and reminders for the meeting
-
The other option is to check “Send a copy of the invitation to me” which sends you an invitation to be forwarded to attendees.Please click on “Change audio conference” and change “Entry and exit tone” to No ToneFill out the meeting information and click Schedule.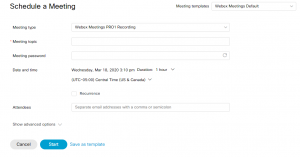 Notes:
- It is recommended to add a password for security purposes
- The duration is only the expected length of the meeting, it will only end when the host ends it.
- Email addresses entered in the Attendees field will receive invitation emails and reminders for the meeting
- The other option is to check “Send a copy of the invitation to me” which sends you an invitation to be forwarded to attendees.
- Default setting is set so that there is no tone when an individual enters and exits the meeting
- Under Show advanced options you can find more options to adjust
- For additional information visit: DoIT’s guide on Webex Meetings
Classic View
- Go to https://uwmadison.webex.com and click Sign In.

- Enter you your wisc.edu email address. You may be prompted to enter your Net ID.

- Click on the Webex Meetings tab at the top and select Schedule a Meeting

- Fill out the details for the meeting and click Start
Notes:
- You don’t have to change the password
- The duration is only the expected length of the meeting, it will only end when the host ends it.
- Email addresses entered in the Attendees field will receive invitation emails and reminders for the meeting
- The other option is to check “Send a copy of the invitation to me” which sends you an invitation to be forwarded to attendees.
- Please click on “Change audio conference” and change “Entry and exit tone” to No Tone
- For additional information visit: DoIT’s guide on Webex Meetings
Recording a Meeting
This is an accordion element with a series of buttons that open and close related content panels.
Instructions for Recording Webex Meeting
- You must be the host of the meeting in order to be able to record it!
- Once you are hosting a meeting and it has started, you will find these options at the bottom of the window. The option highlighted with a red arrow is the button that will bring up the recording menu.

- In the recording menu, click on “Record” once you are ready to begin recording. Upon clicking record, a message will play to the host and all attendees stating “This meeting is being recorded.”
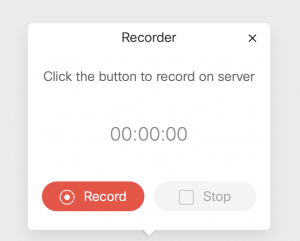
- If you would like to pause the recording at any time, there will be a new Pause option available in the recording menu. Once you are done recording, open the recording menu again and click on Stop.
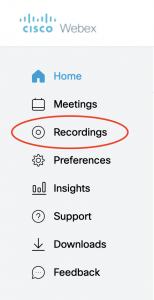
- Once you have ended the recording, it will be uploaded and available in your WebEx account. The recordings can be accessed by navigating to uwmadison.webex.com and clicking Recordings on the front page. Please note, the recording may take a few minutes to upload and become available.
Setting up Webex in the Commons Room
This is an accordion element with a series of buttons that open and close related content panels.
UW-Madison Webex
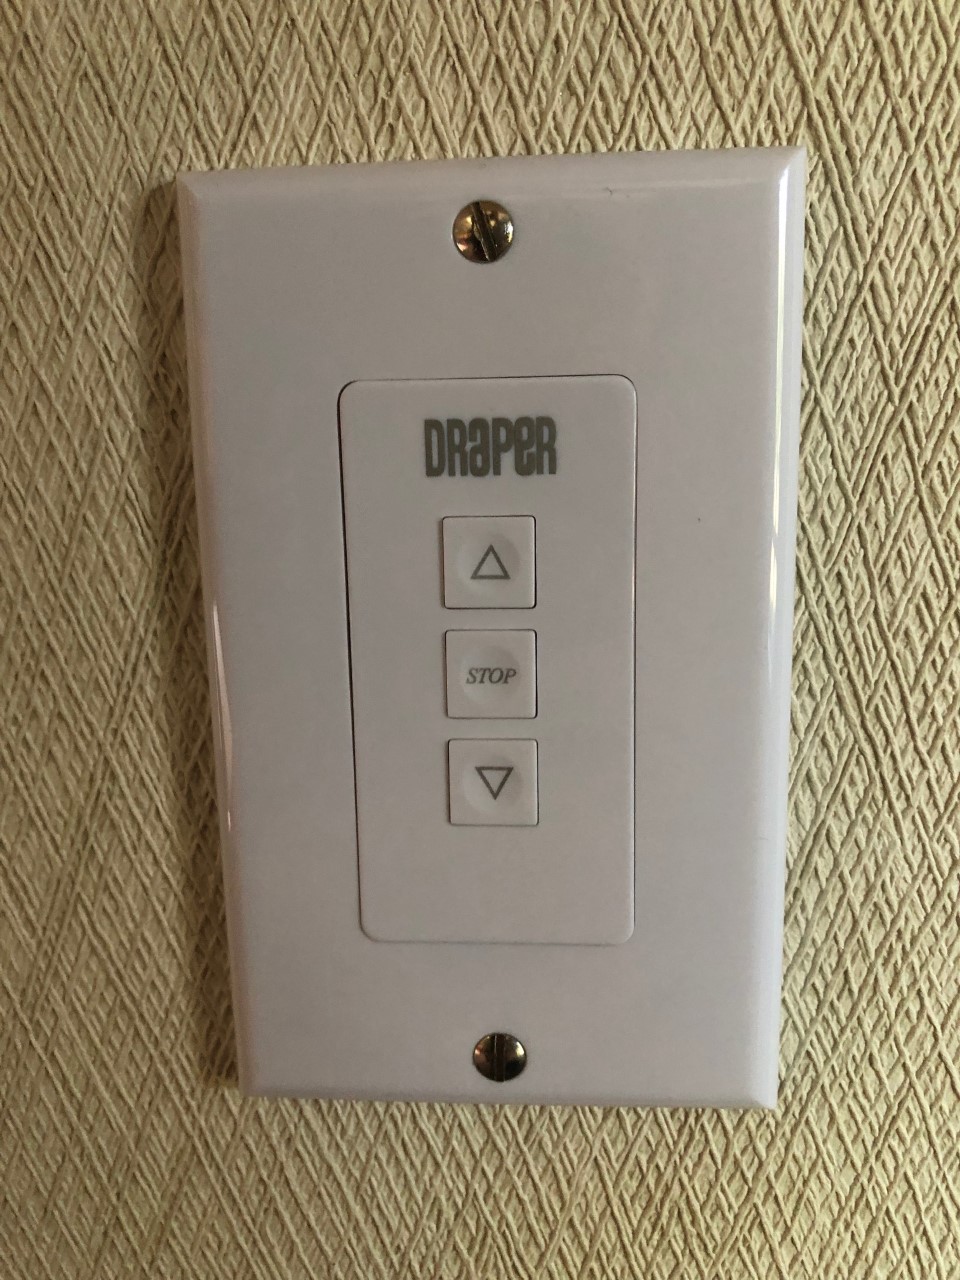
- Lower the Projector Screen with the Control Panel on the Wall
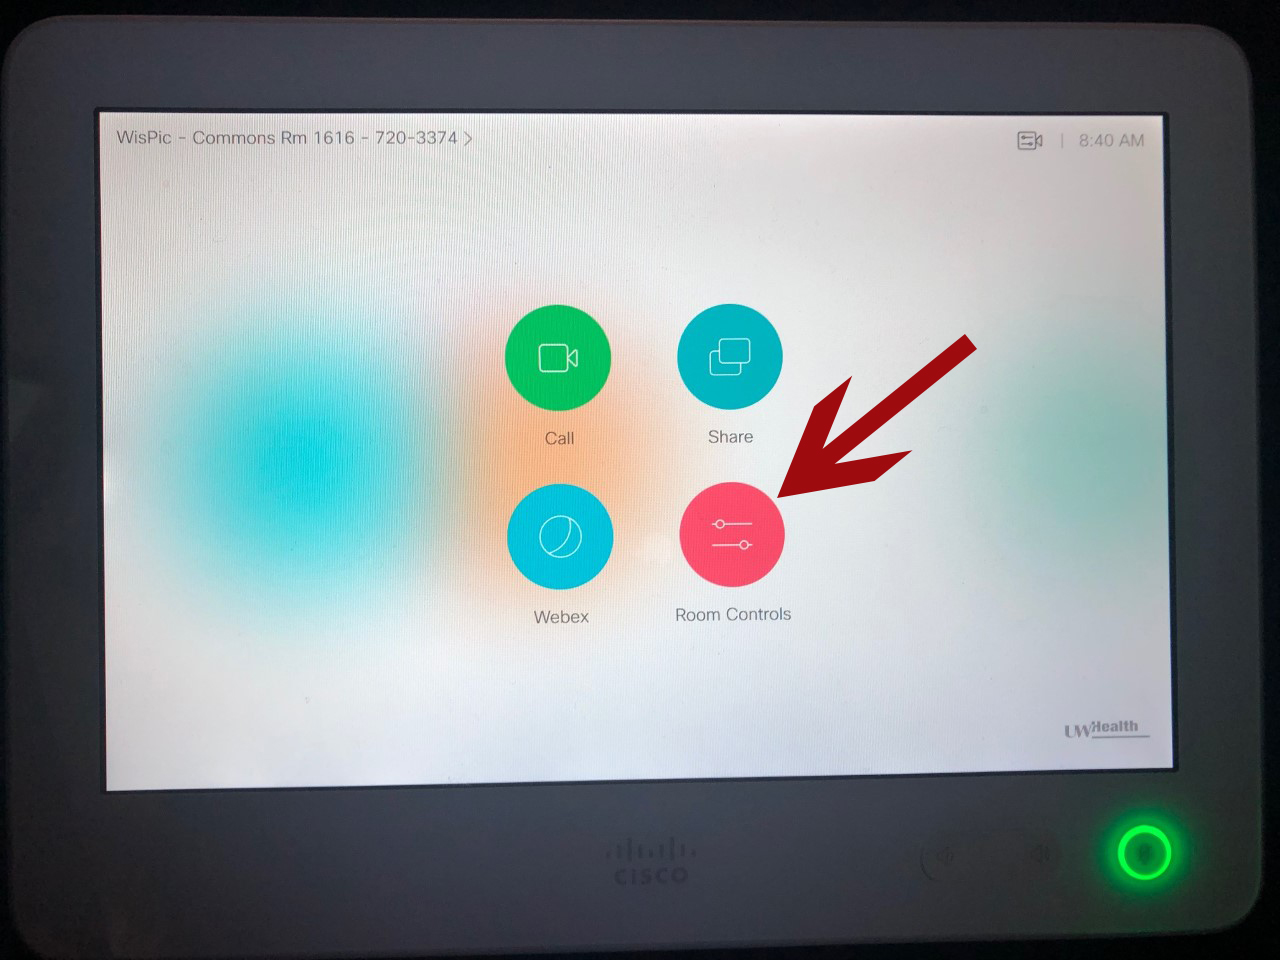
- On the Cisco Interface on the podium, click Room Controls
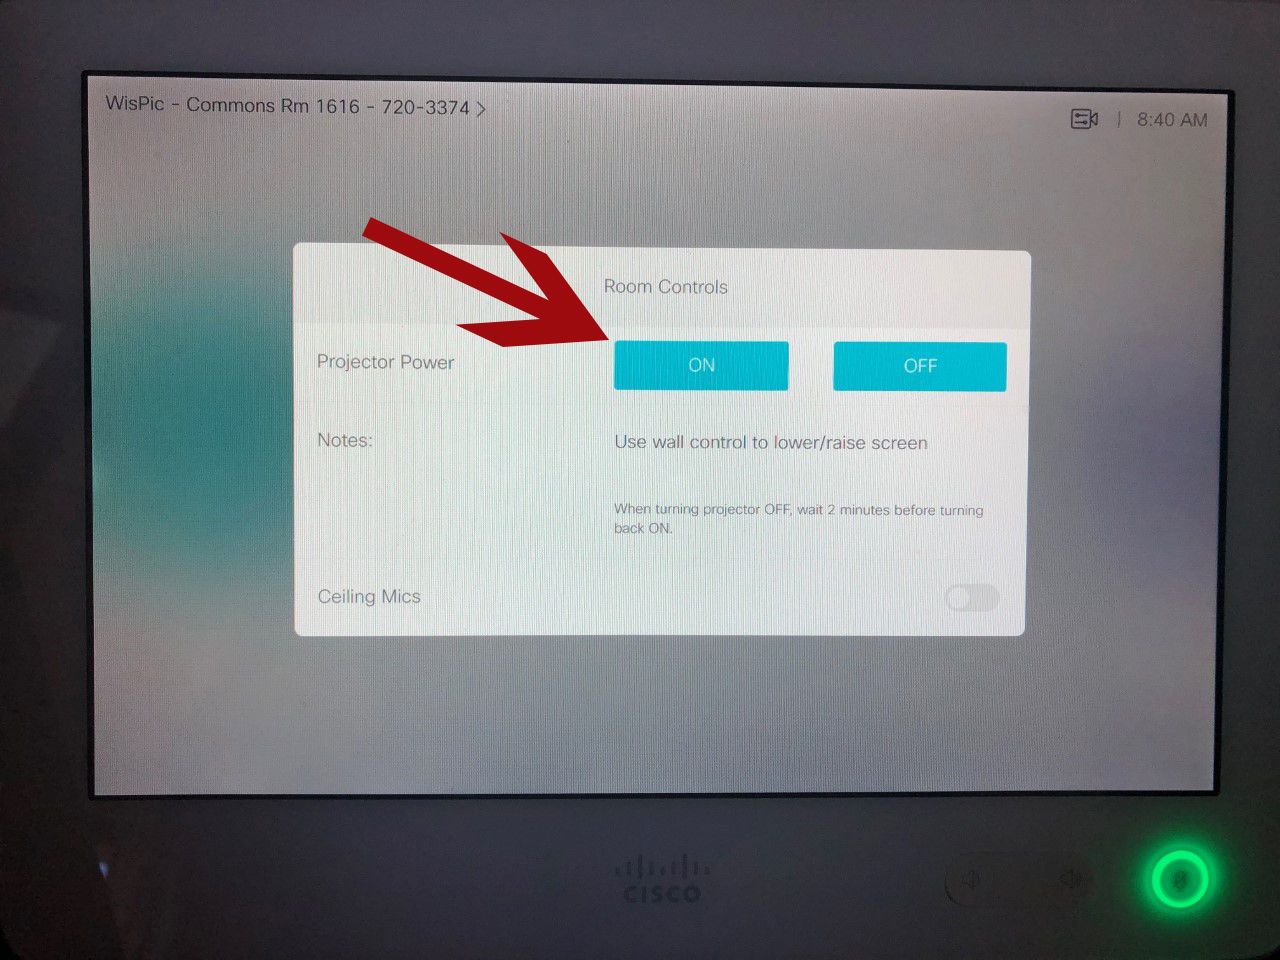
- Select ON from Project Power
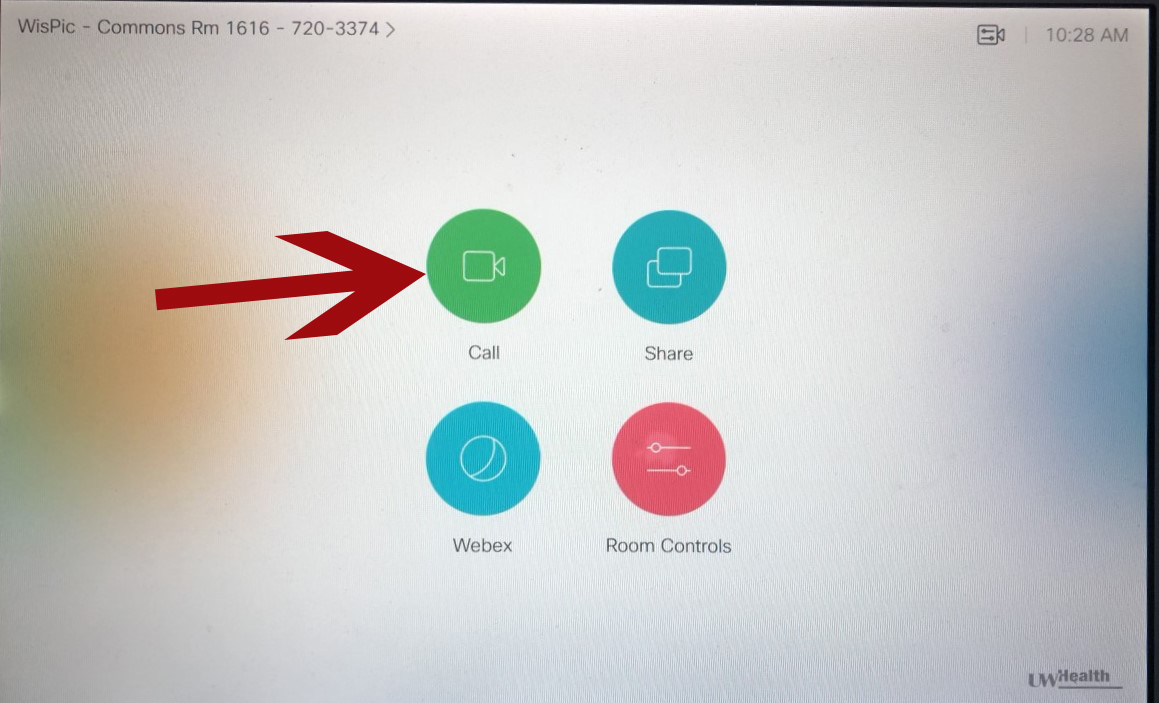
- Navigate back to the home screen, select Call
- Tap on the Search or Dial bar
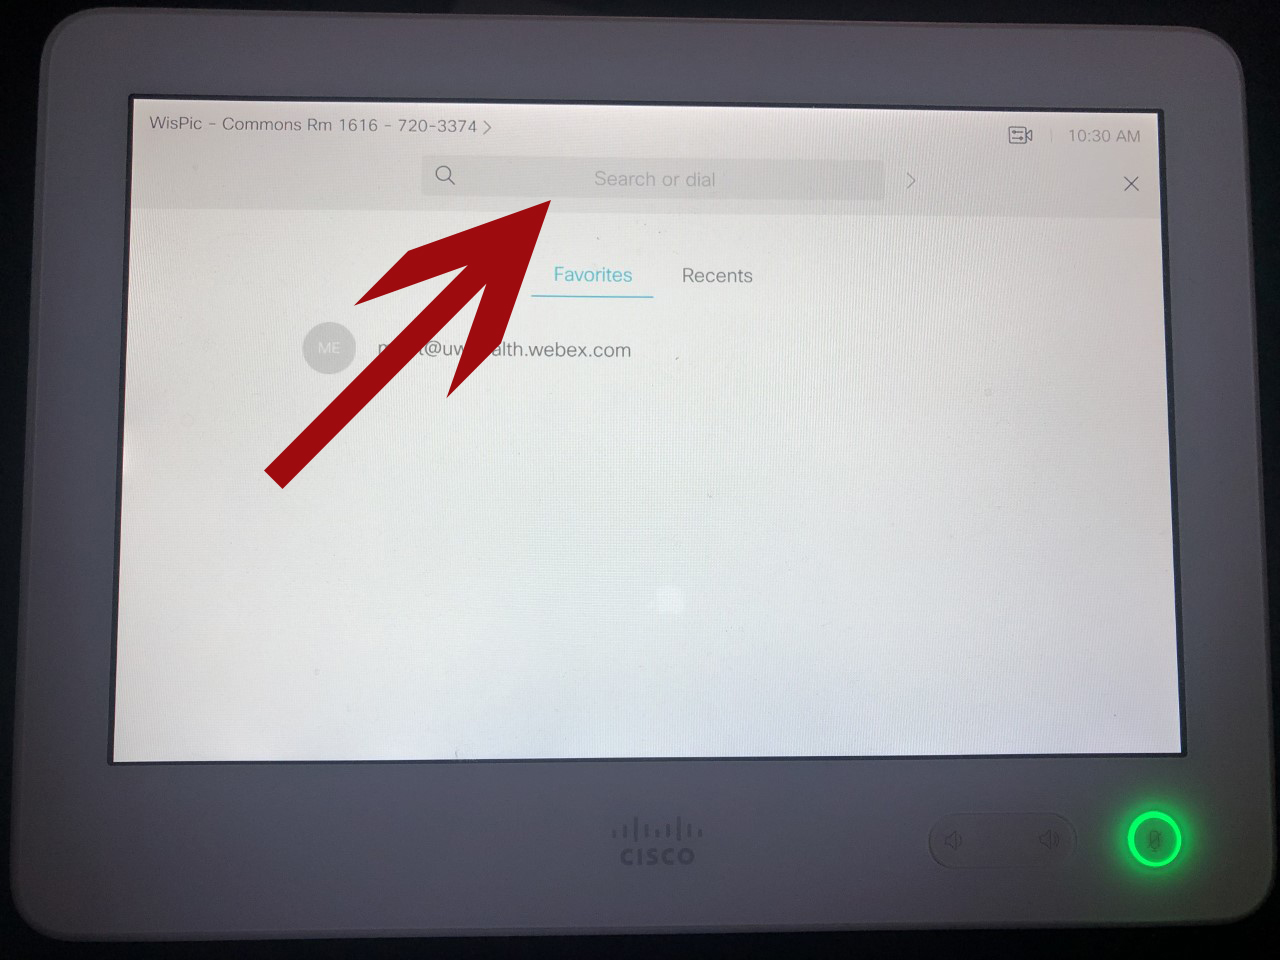
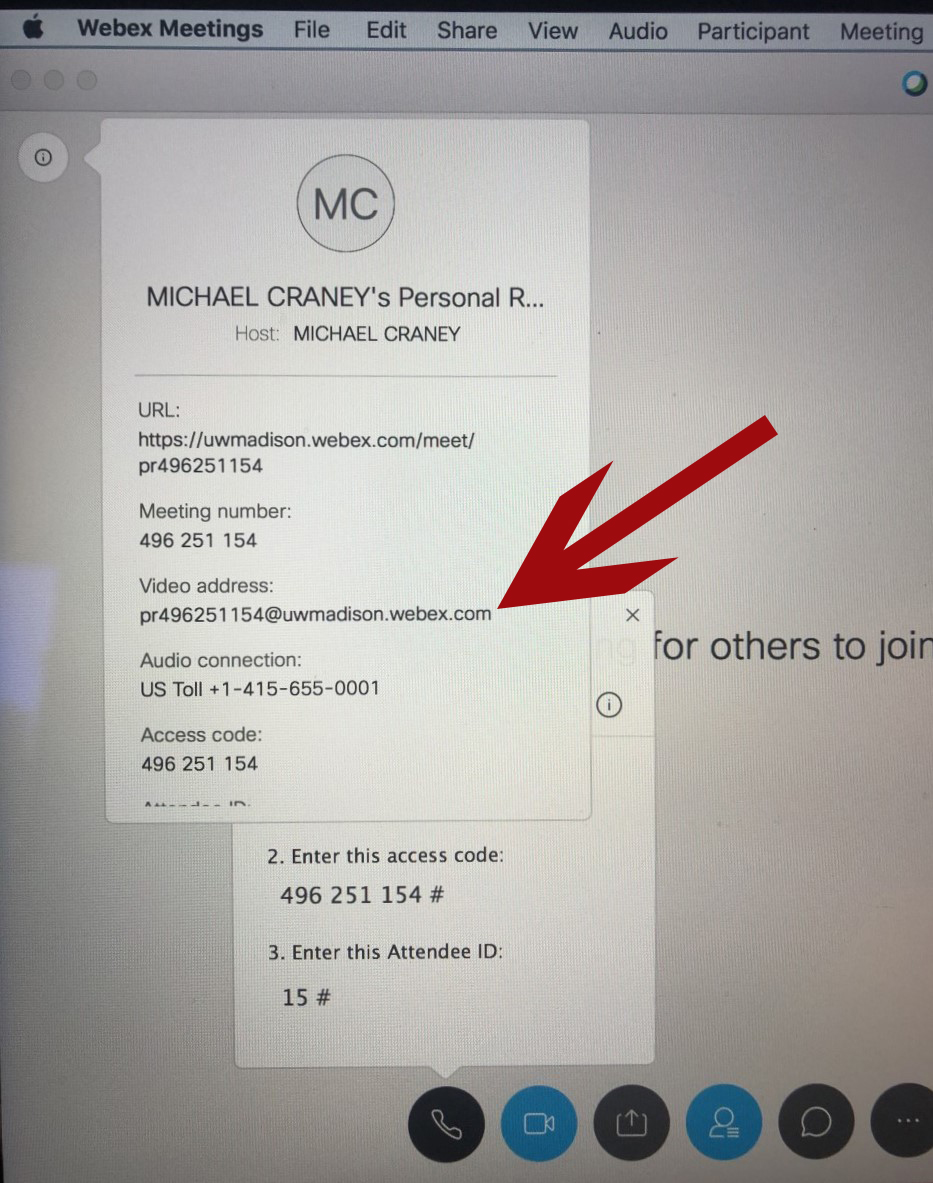
- Locate the Video Address for your meeting, this can be found on the host email message or through the information button on the Webex client. It should be along the lines of something@uwmadison.webex.com
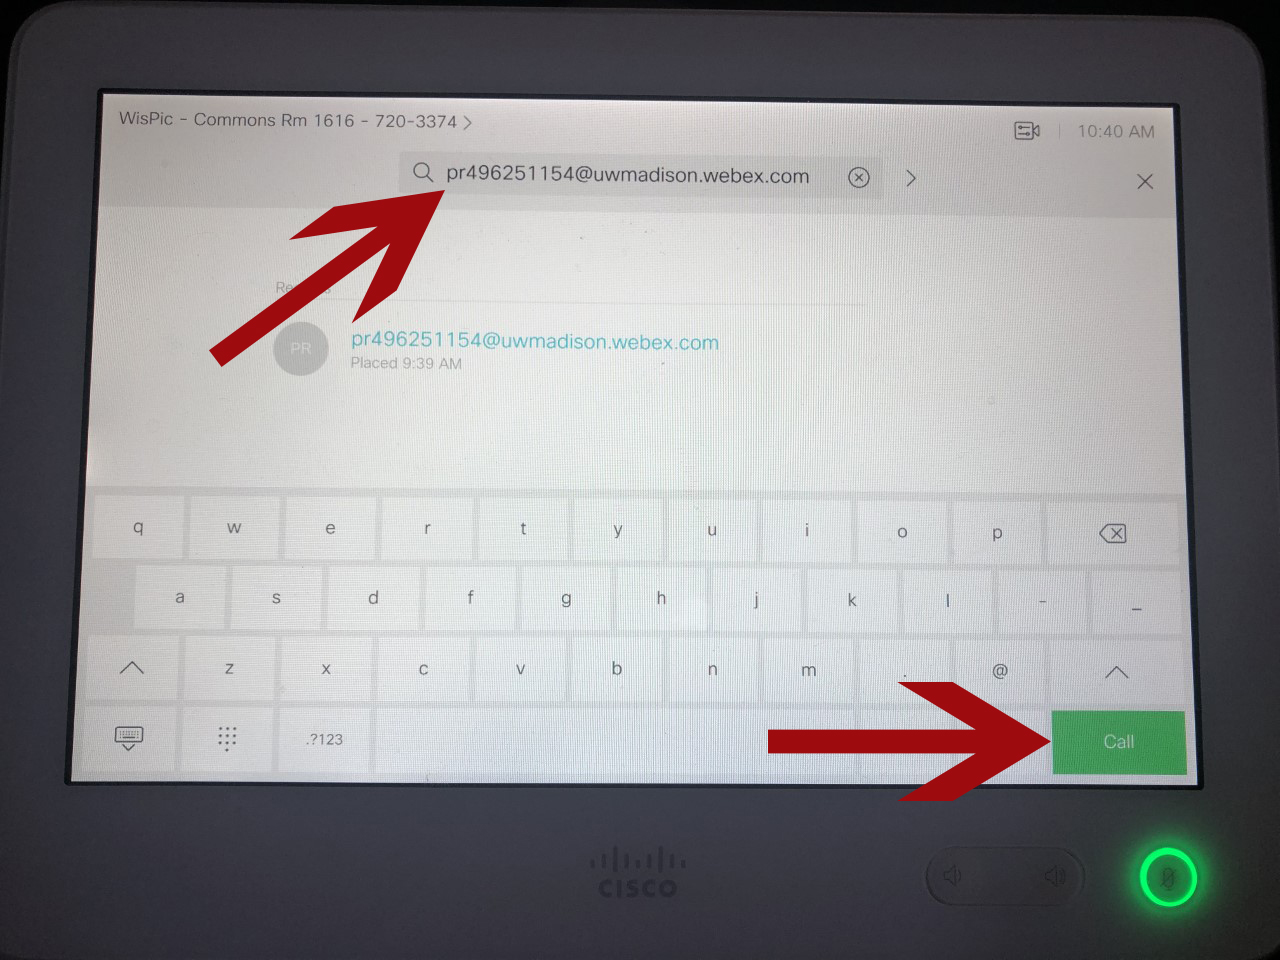
- Enter the full Video Address in the Search or Dial bar and click Call
- Power on the Microphone by holding the power button (Please be sure to power it back off when you are finished)
![]()
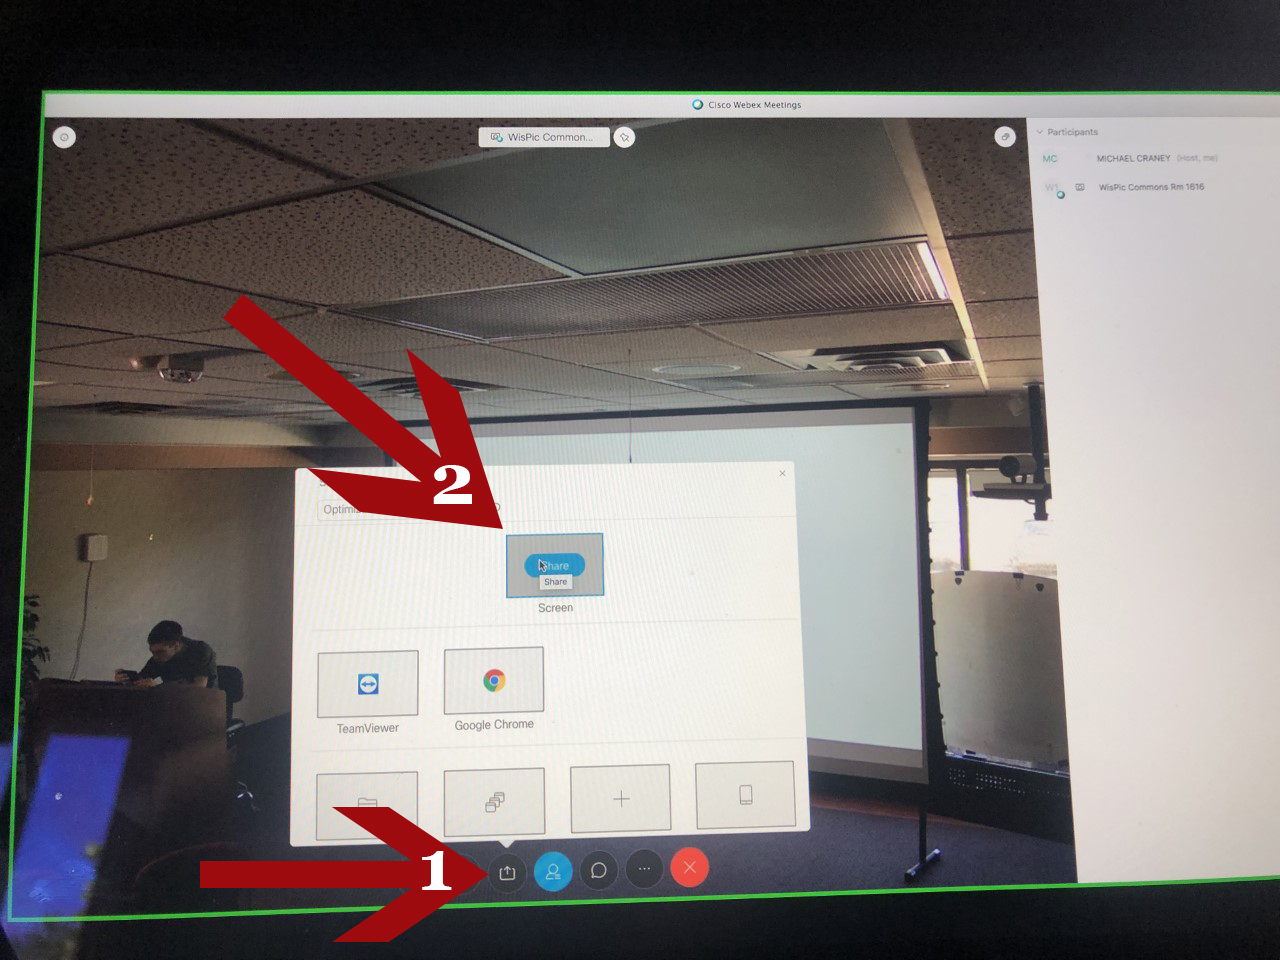
- If you are presenting slides, open them up on your computer and select the Share button on the bottom of the Cisco Webex Application, then select share on the screens tab
- On the Cisco Webex Interface, select the Screen Modification tab on the top right
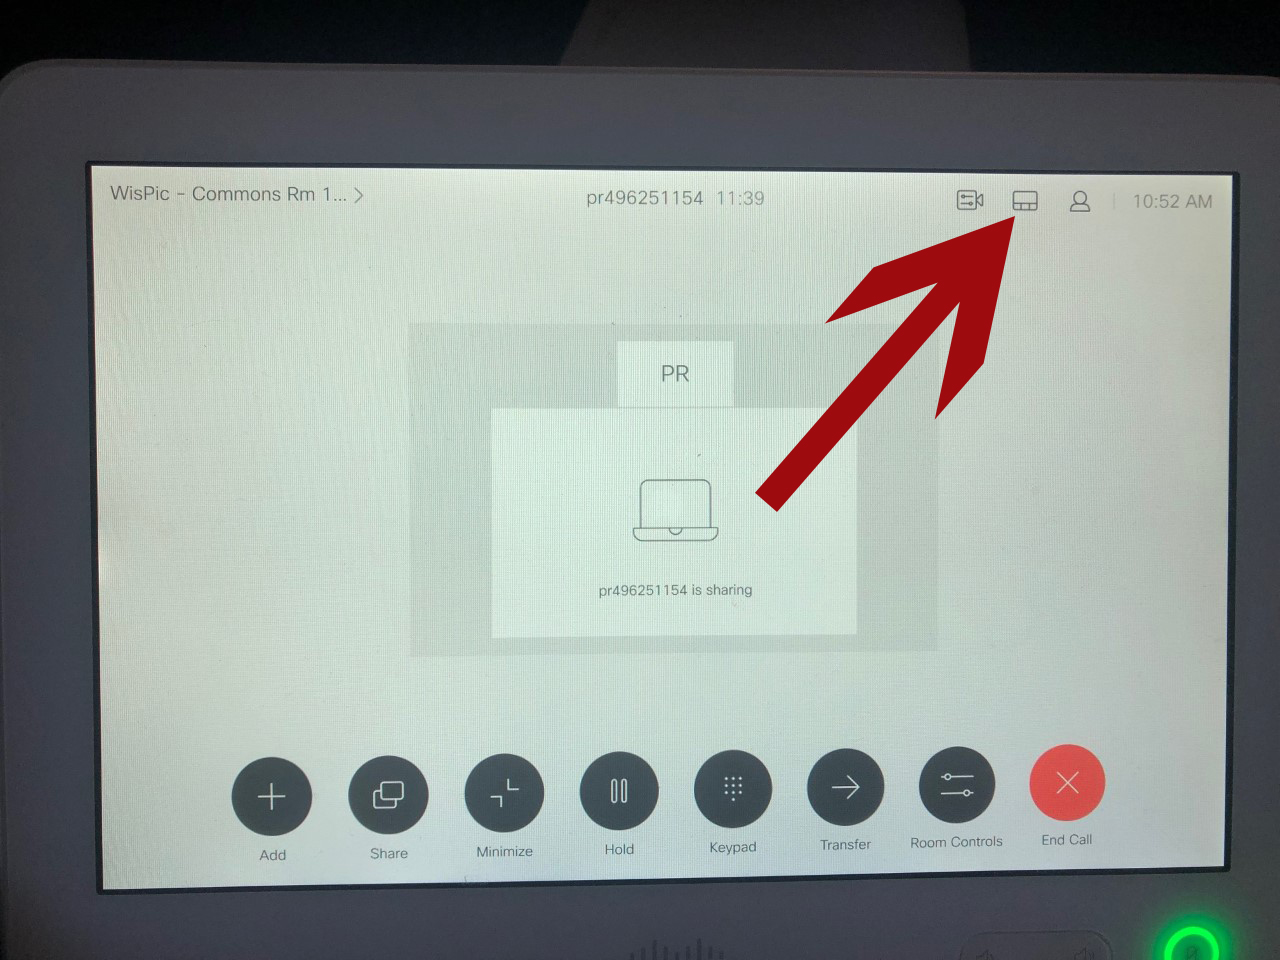
- Select Single
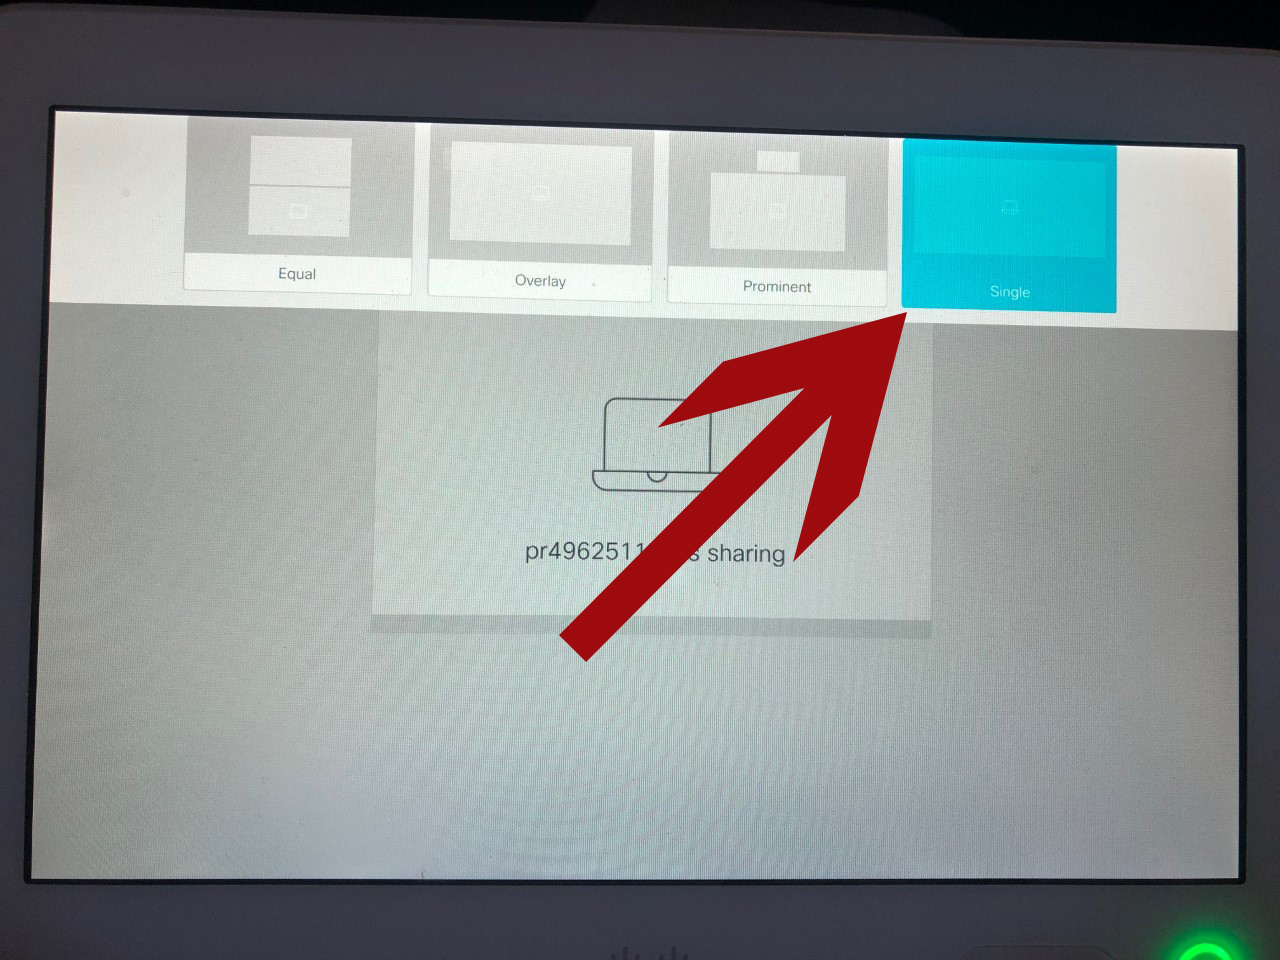
Your meeting should be set-up, but if you’re having any difficulties feel free to contact the help desk staff. If you’d like to add video feed of you talking on the podium, read below.
UW-Health Webex
- Lower the Projector Screen with the Control Panel on the Wall

- On the Cisco Interface on the podium, click Room Controls

- Select ON from Project Power

- Navigate back to the home screen, select Webex
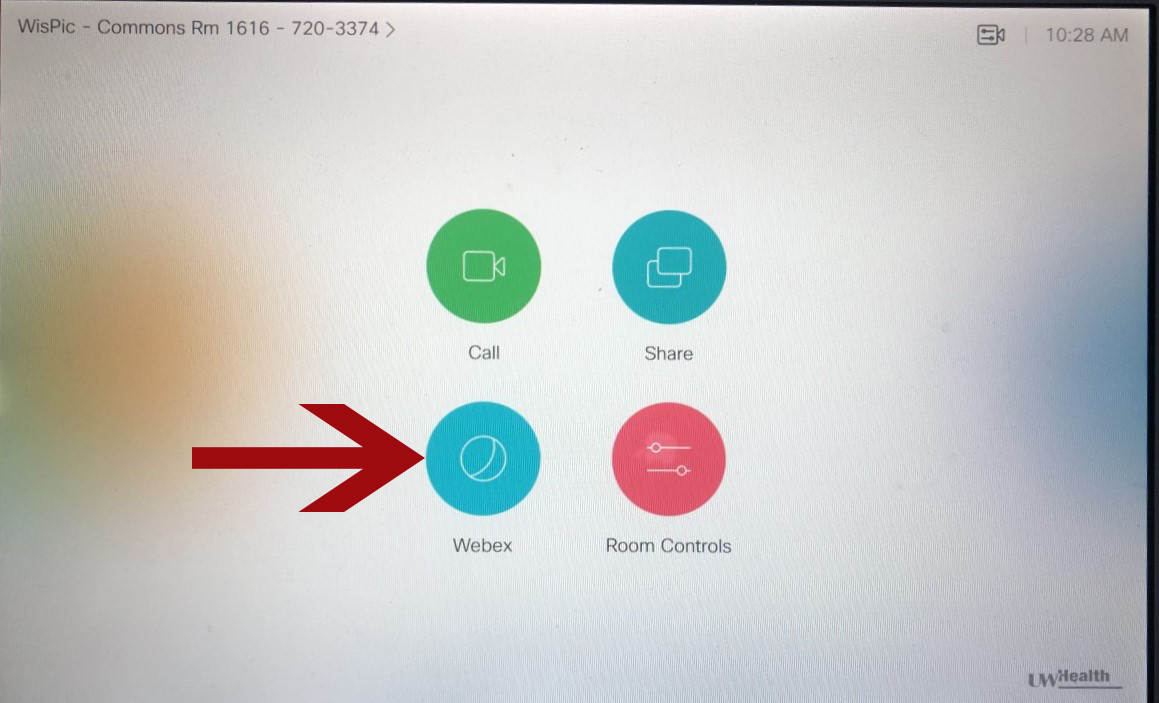
- Click on Keypad, then enter your meeting number followed by #
- Power on the Microphone by holding the power button (Please be sure to power it back off when you are finished)
![]()
- If you are presenting slides, open them up on your computer and select the Share button on the bottom of the Cisco Webex Application, then select share on the screens tab

- On the Cisco Webex Interface, select the Screen Modification tab on the top right

- Select Single

Your meeting should be set-up, but if you’re having any difficulties feel free to contact the help desk. If you’d like to add video feed of you talking on the podium, read below.
Ending a Meeting
- Select End Call
- Click on Room Controls and select OFF for Projector Power
- Turn off the Microphone
- Use the Control Panel on the wall to put the screen back up


