TEST TEST TEST
Form Used for Unique Testing of Form Notifications
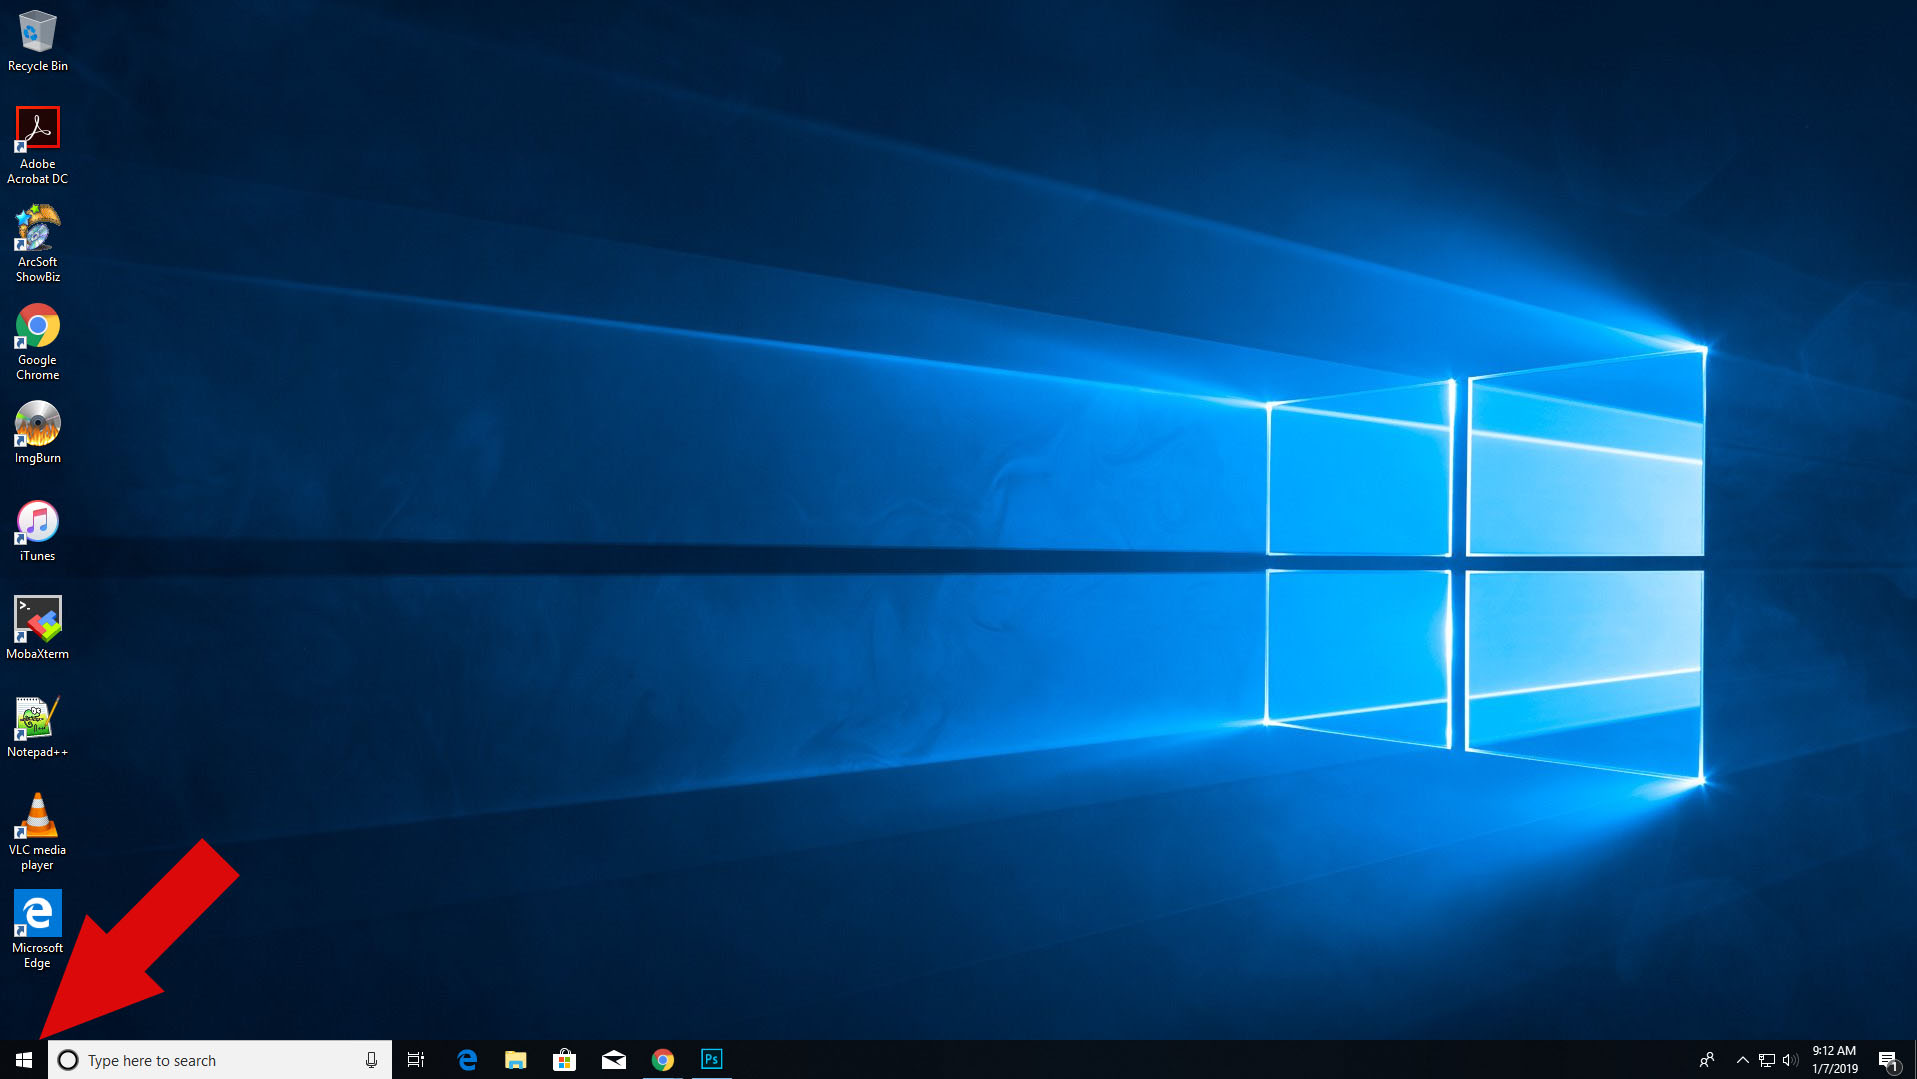
- Click on the Start button in the bottom left corner of the screen (the windows icon for Windows 10).
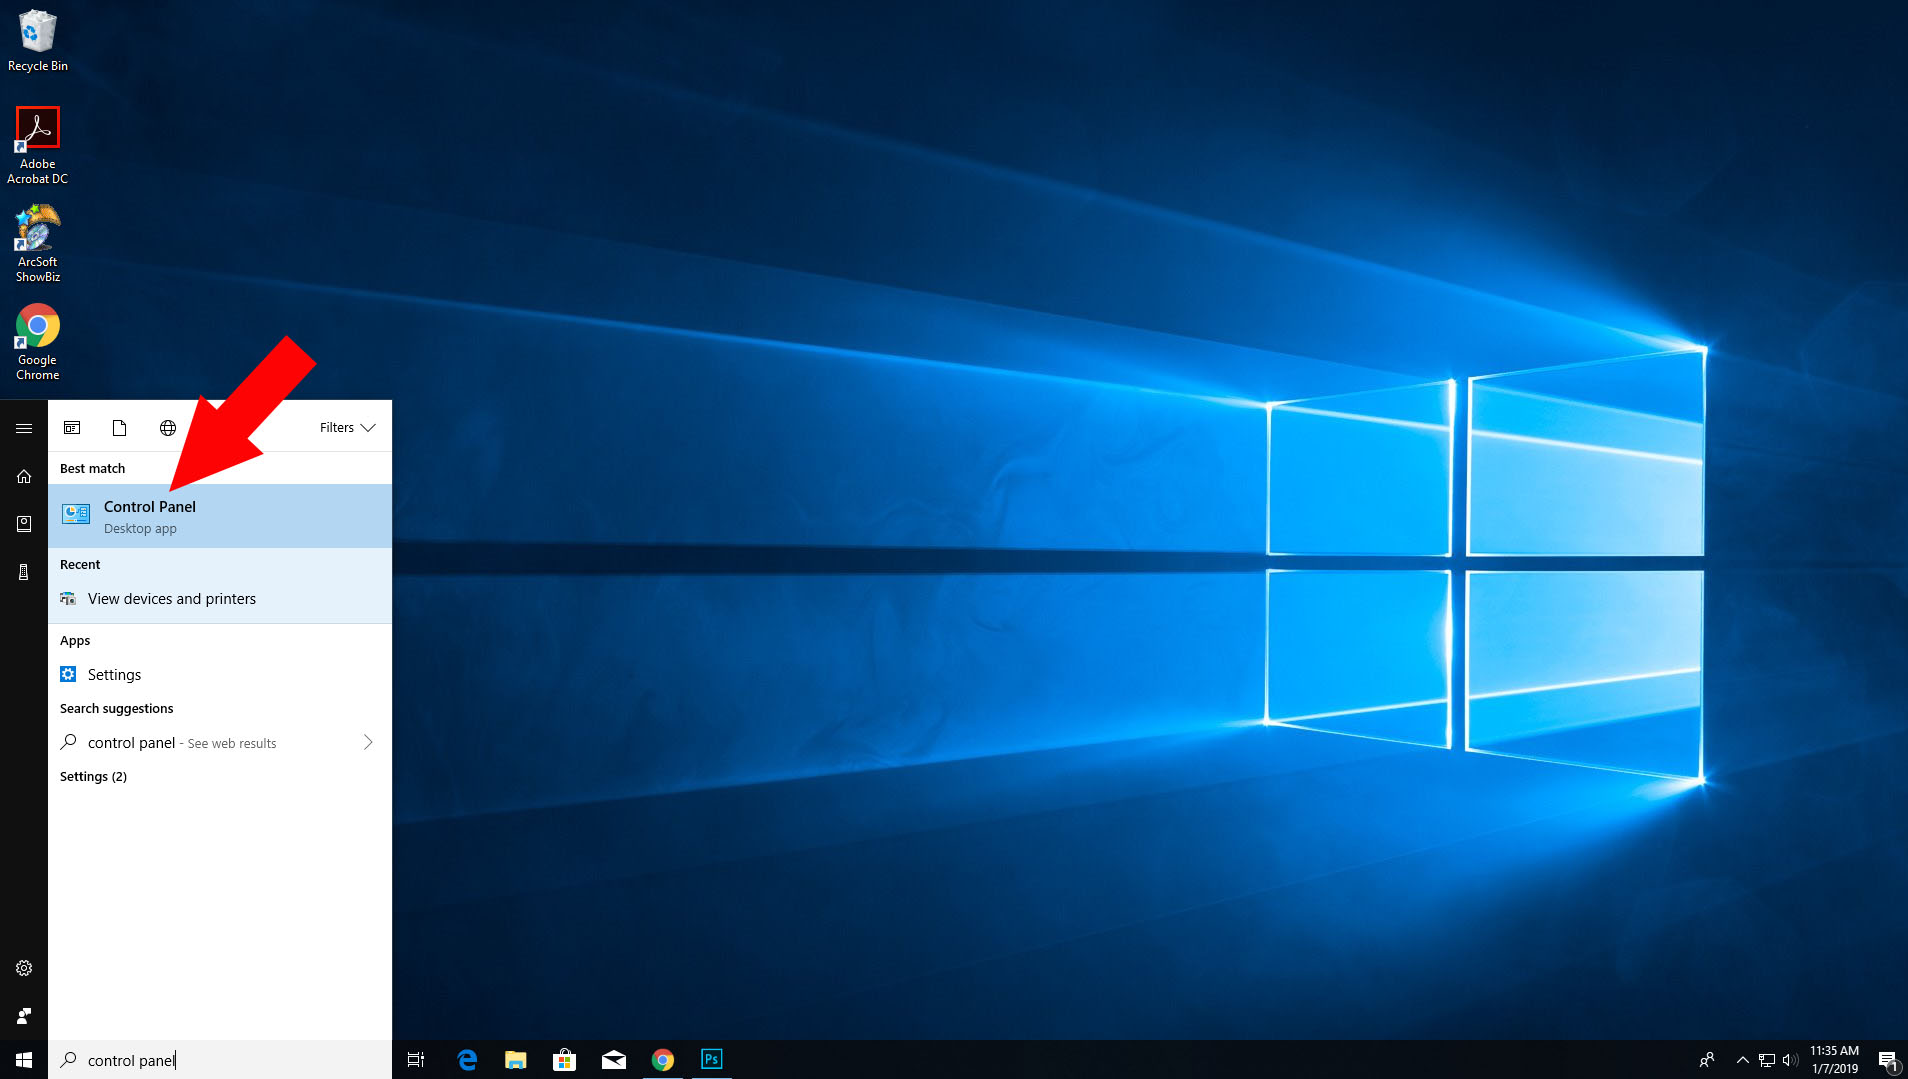
- Open the Control Panel (on Windows 10 begin typing Control Panel and select it from the menu).
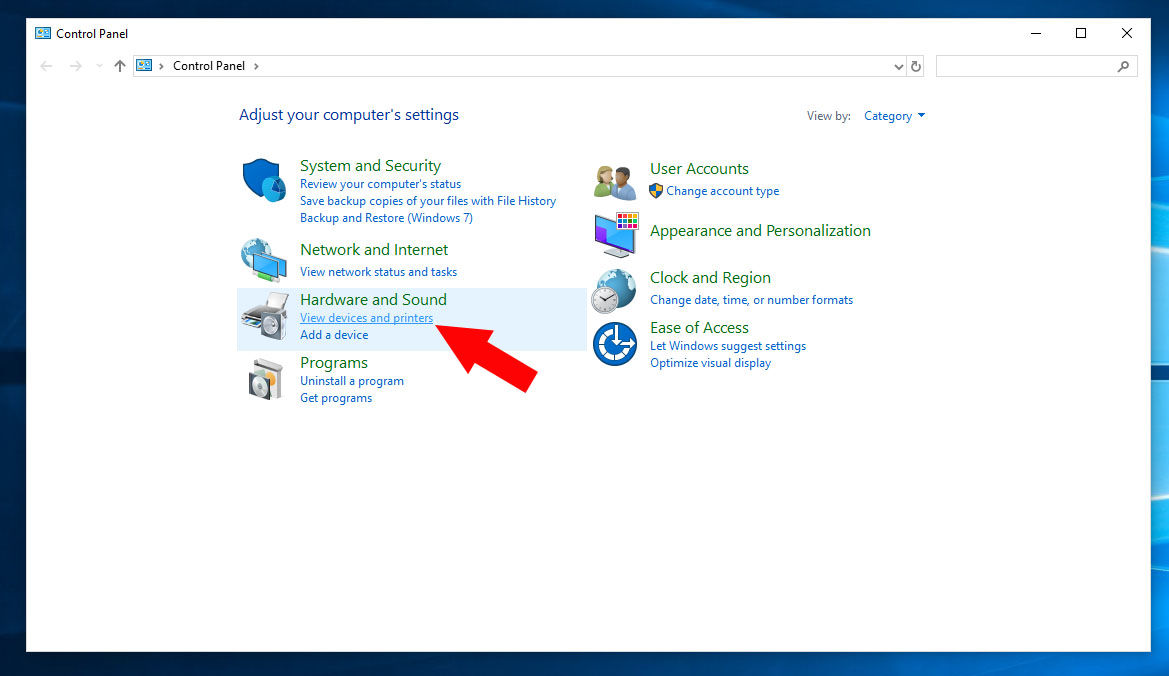
- Click on Devices and Printers (or View Devices and Printers).
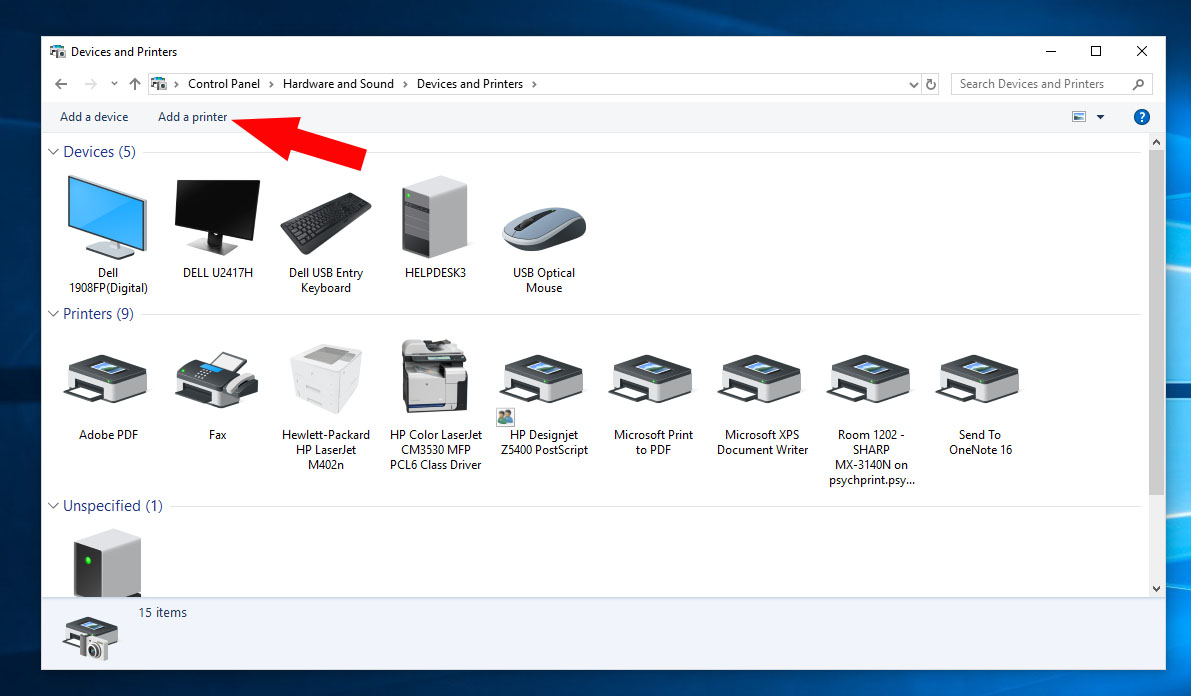
- In the top bar, select Add a Printer.
- (Optional) If given the option, choose to Add a Network Printer or if the computer is connected via USB, choose to Add a Local Printer.
- A list of available printers will begin to populate. Find the name of the printer you wish to install from the list, select the printer and click next.
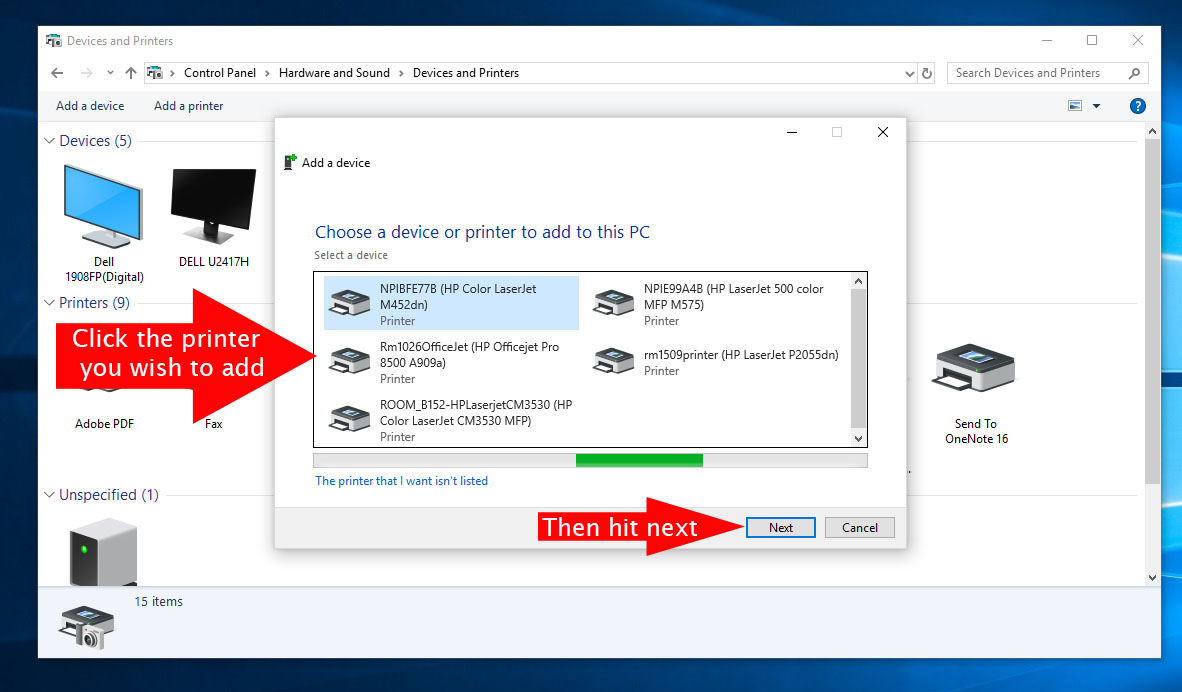
- The printers driver will automatically install. If the driver doesn’t install, please contact the Help Desk so we can assist you in finding the proper driver.
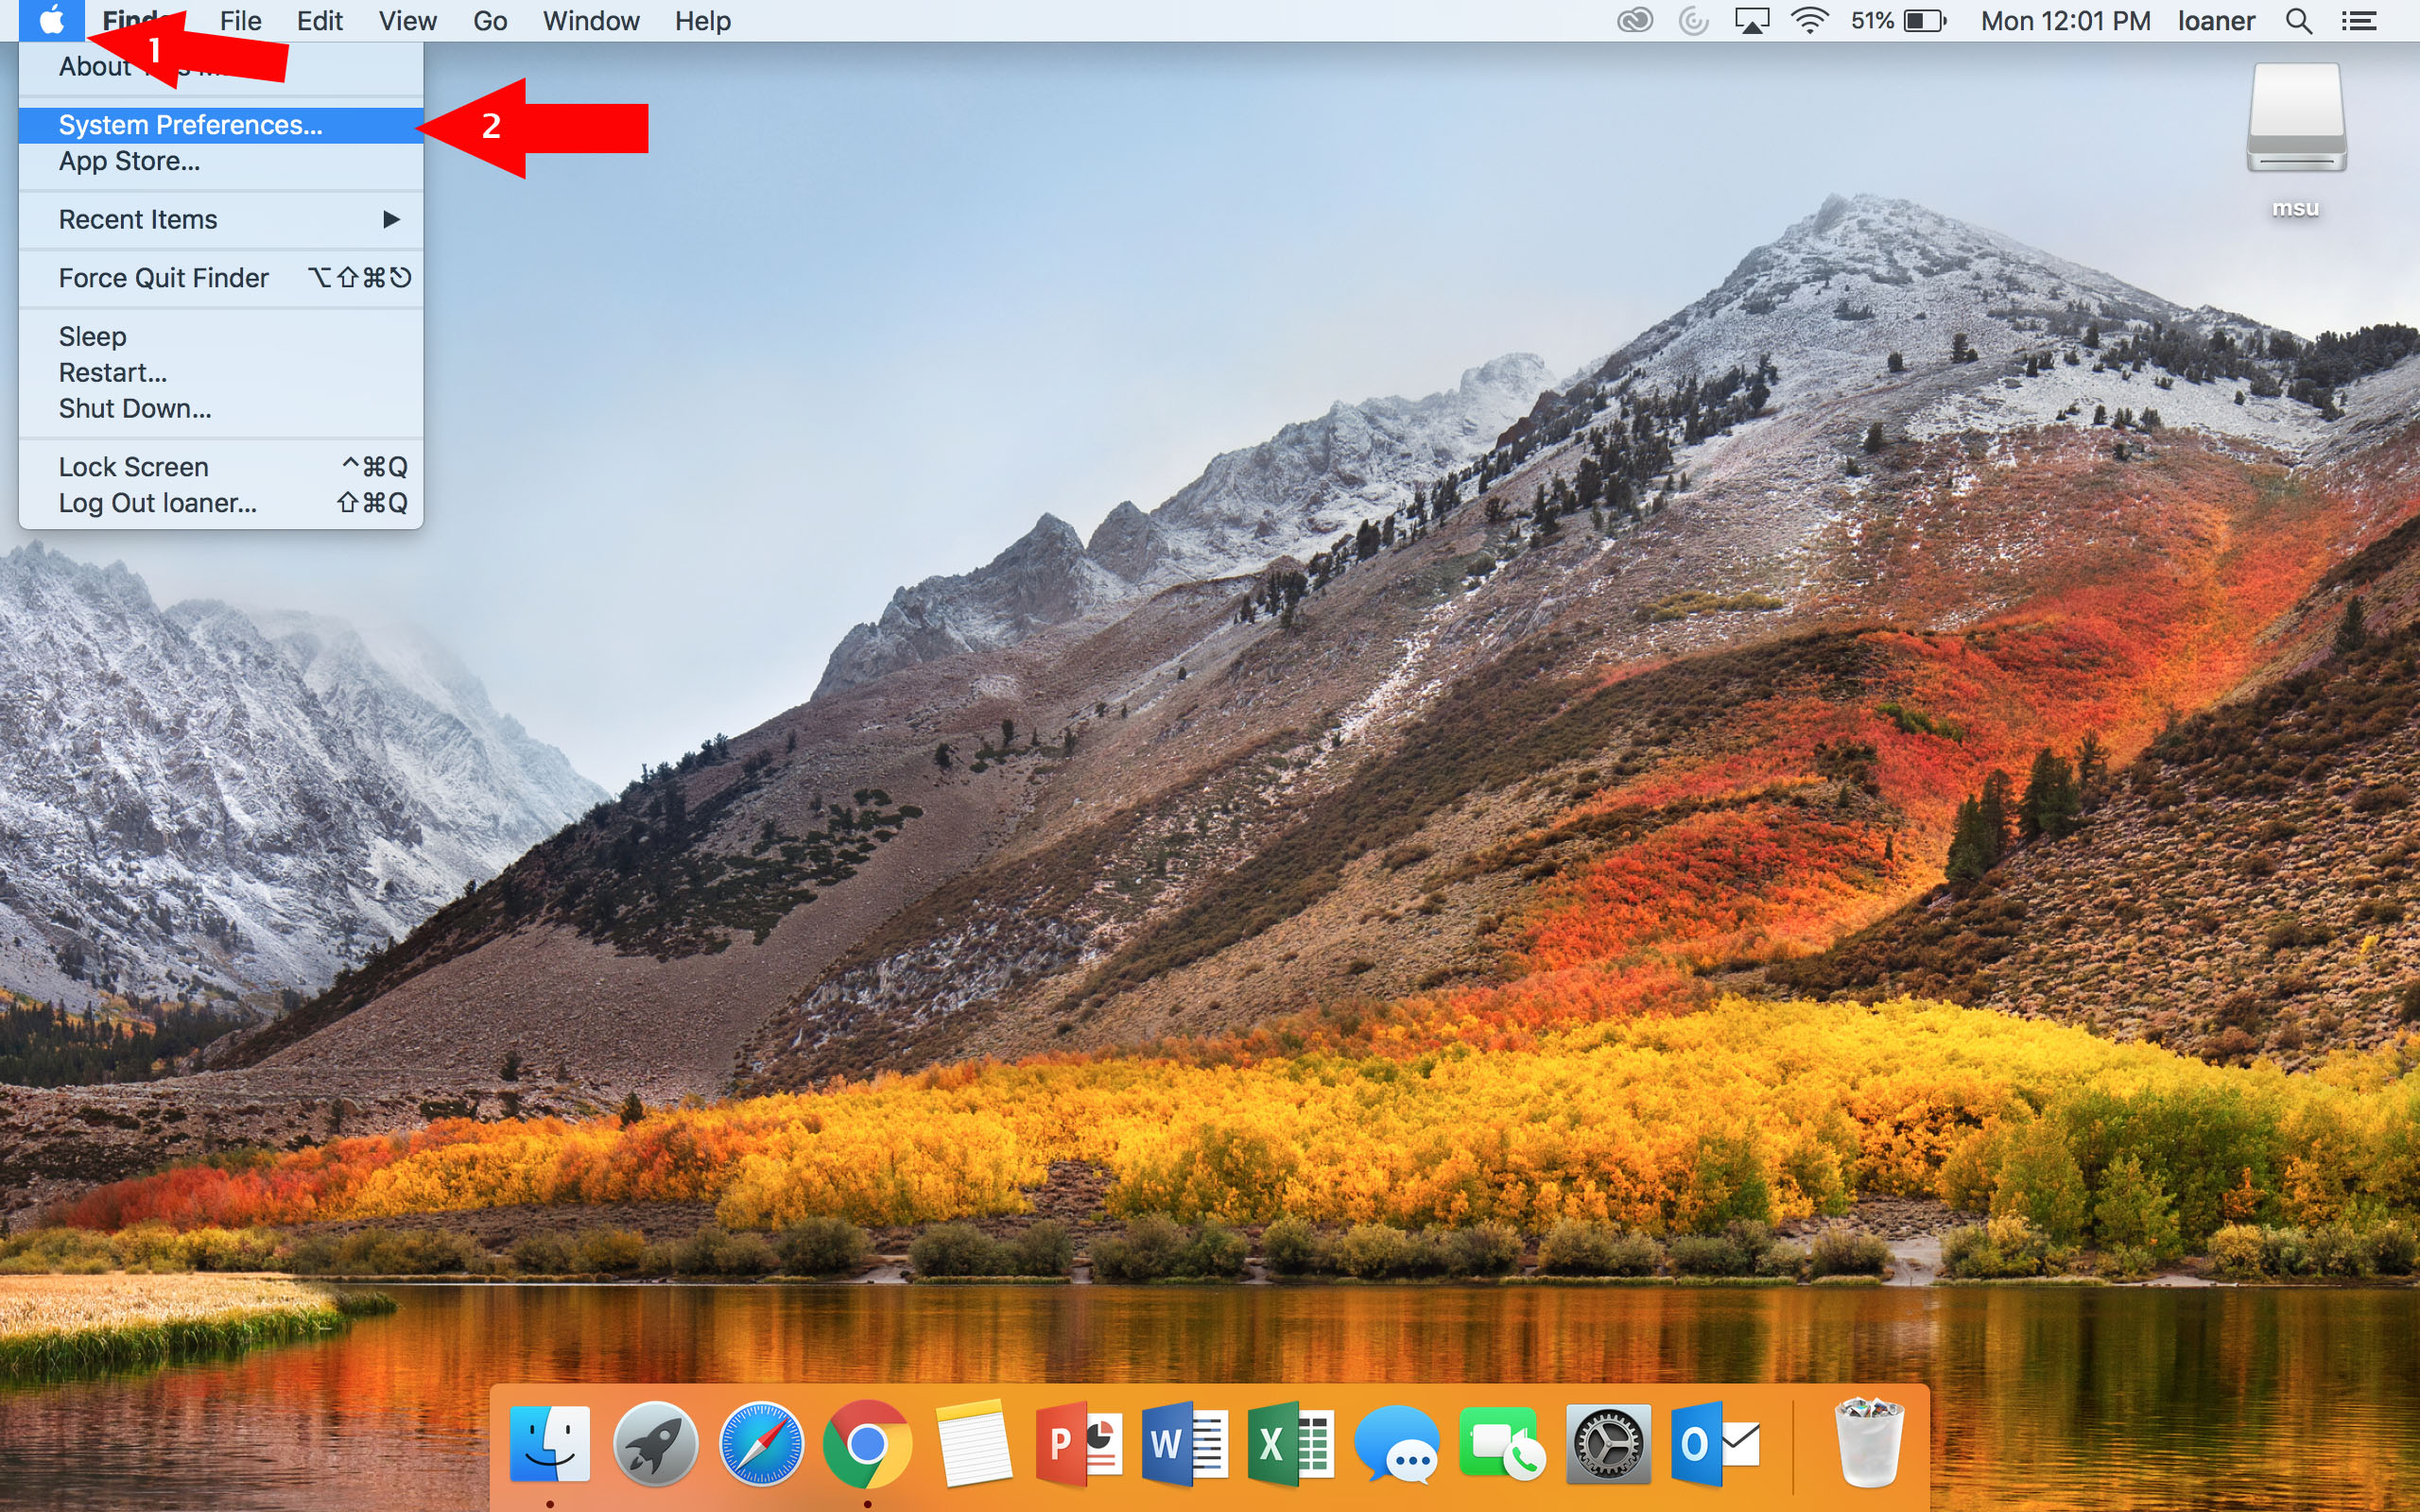
- Click on System Preferences from the system tray.
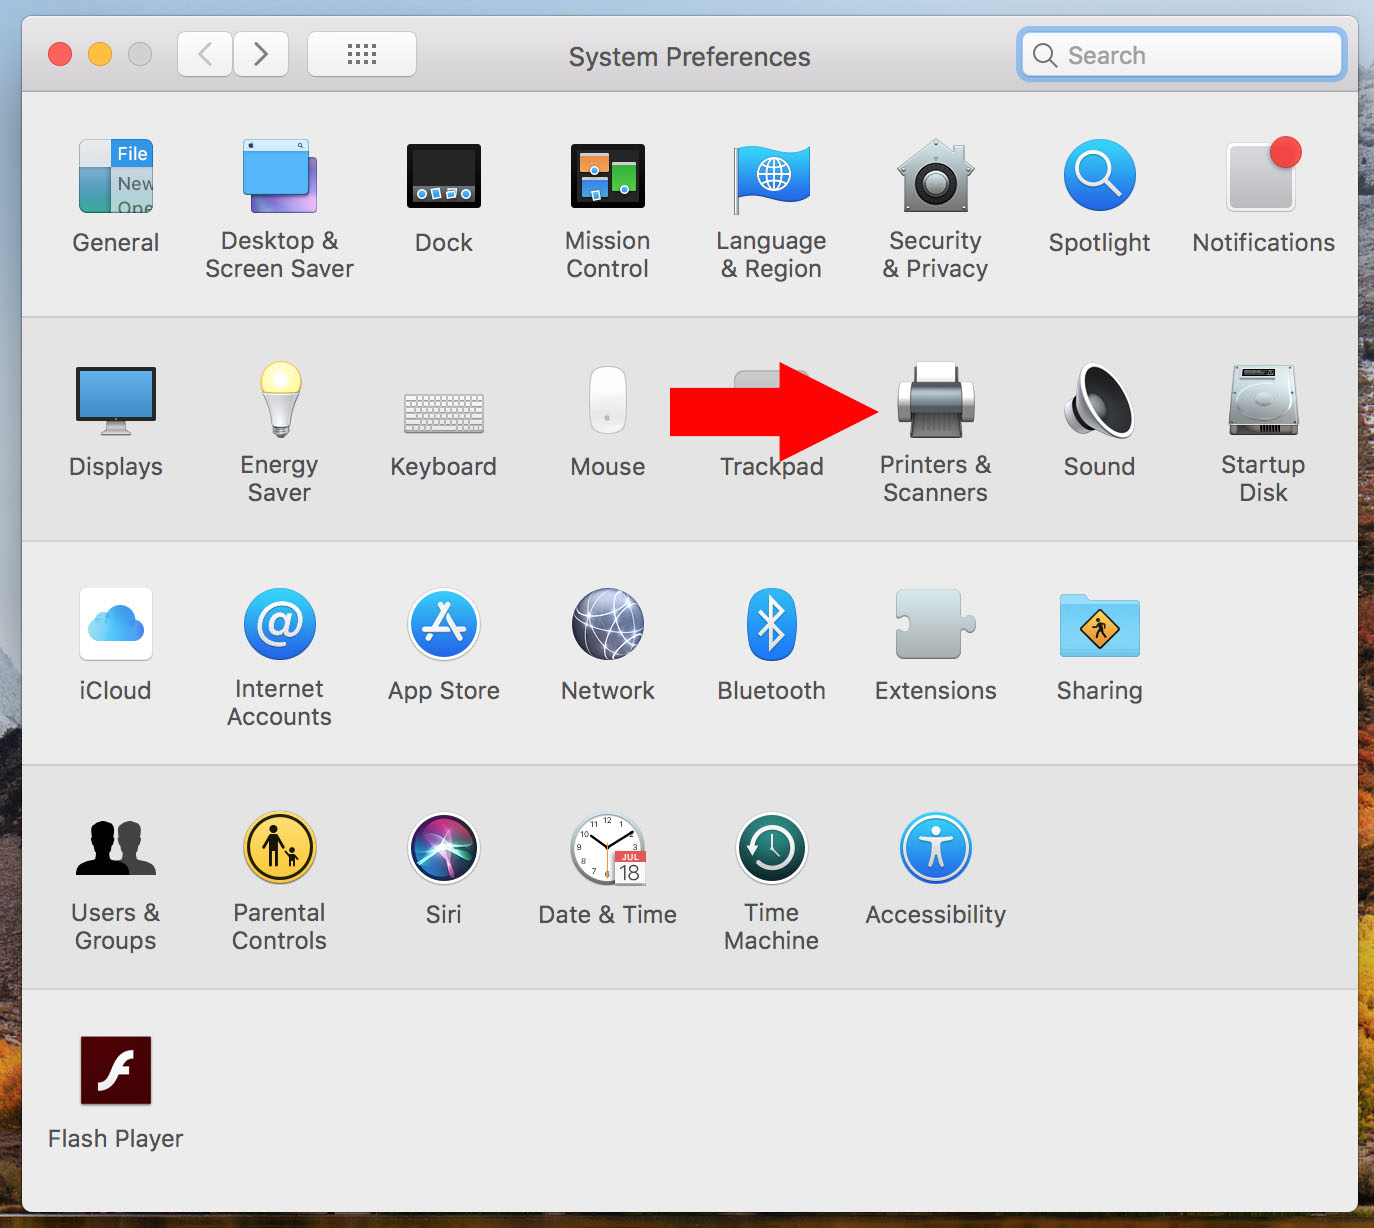
- Click on Printers & Scanners. Note: you might have to click on the lock to allow making changes.
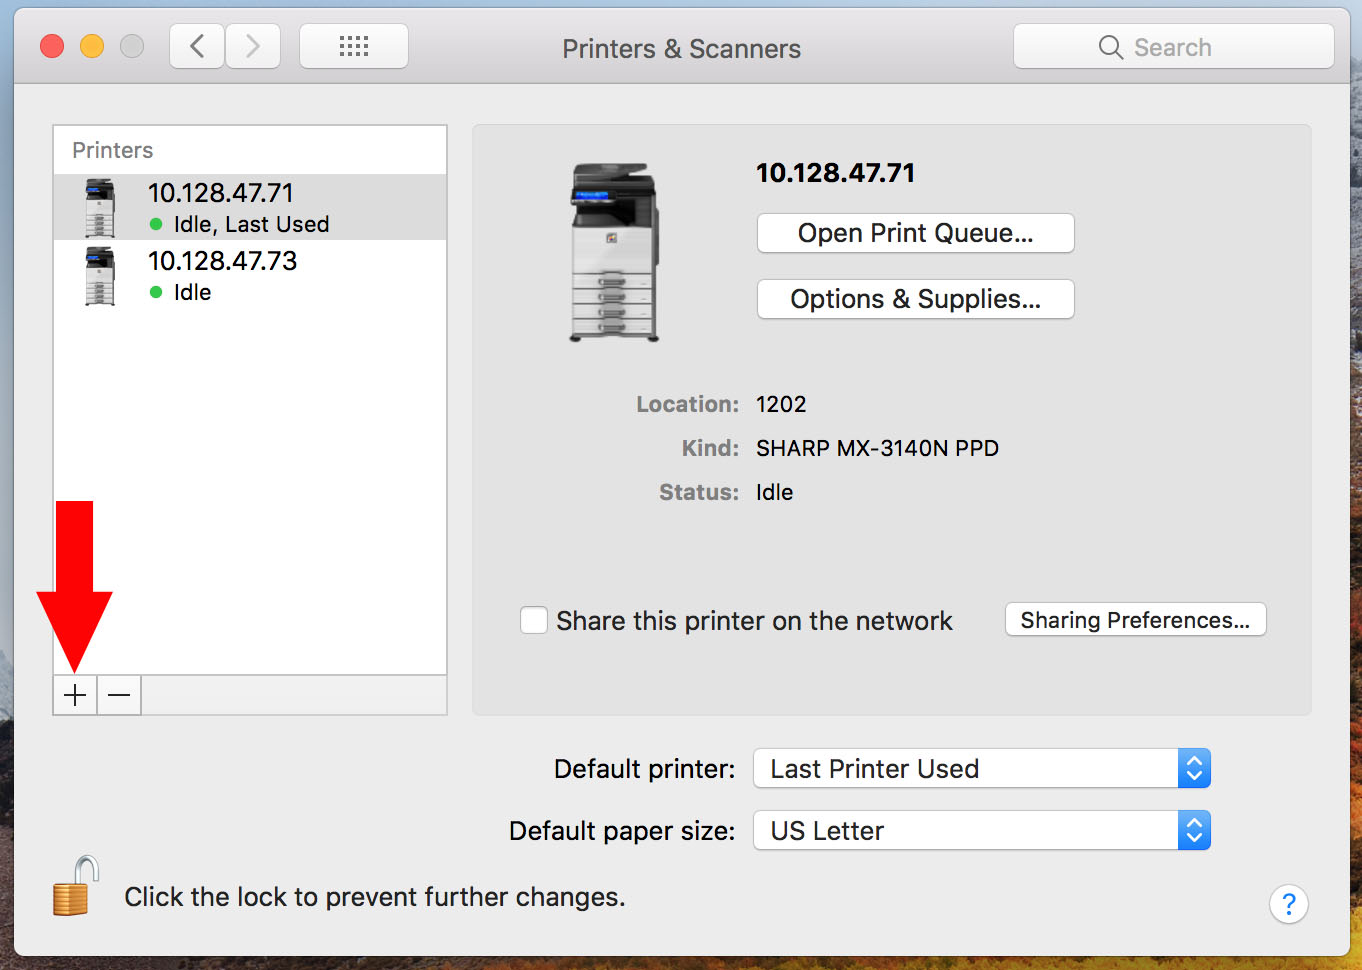
- Find the + in the bottom left corner of the window that pops up.
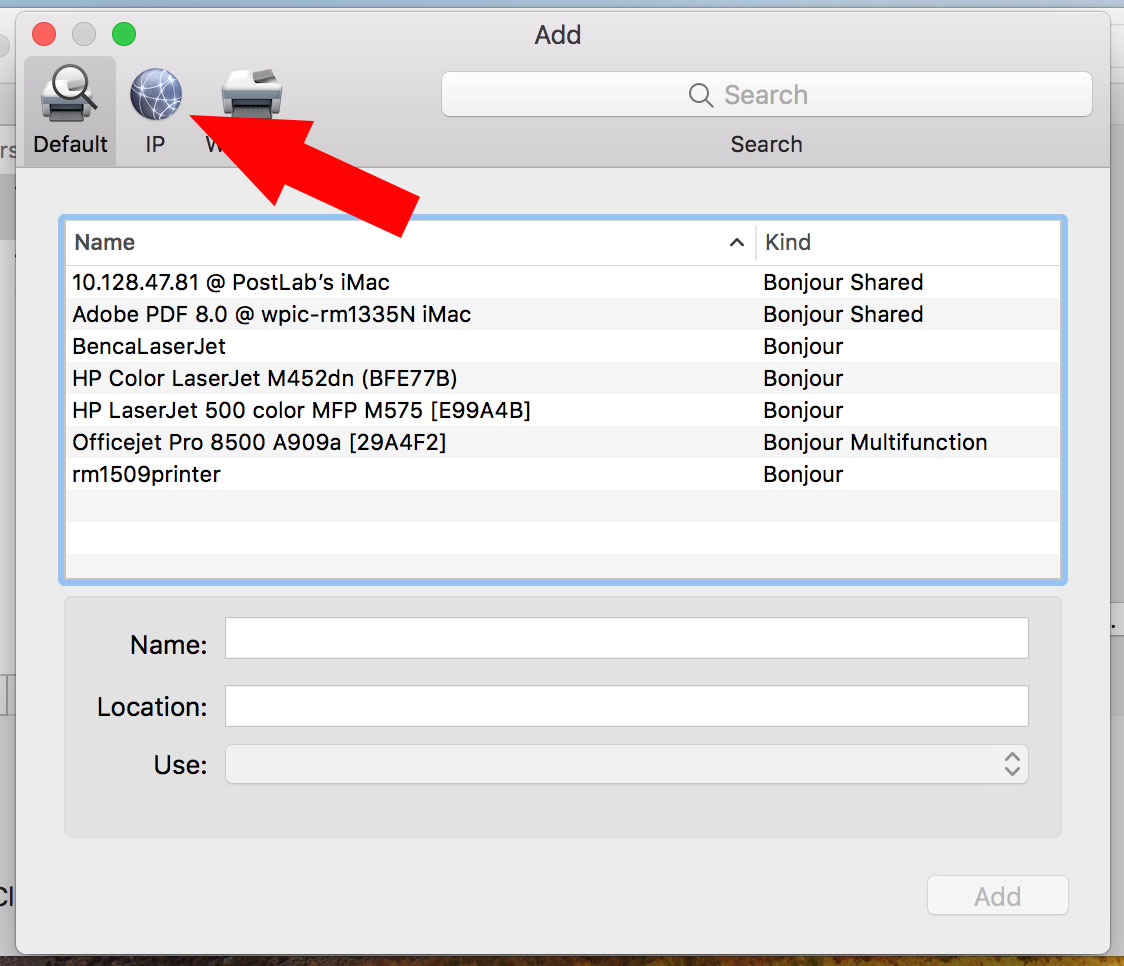
- If the printer is not in the Default menu, click on IP in the top bar of the Add window.
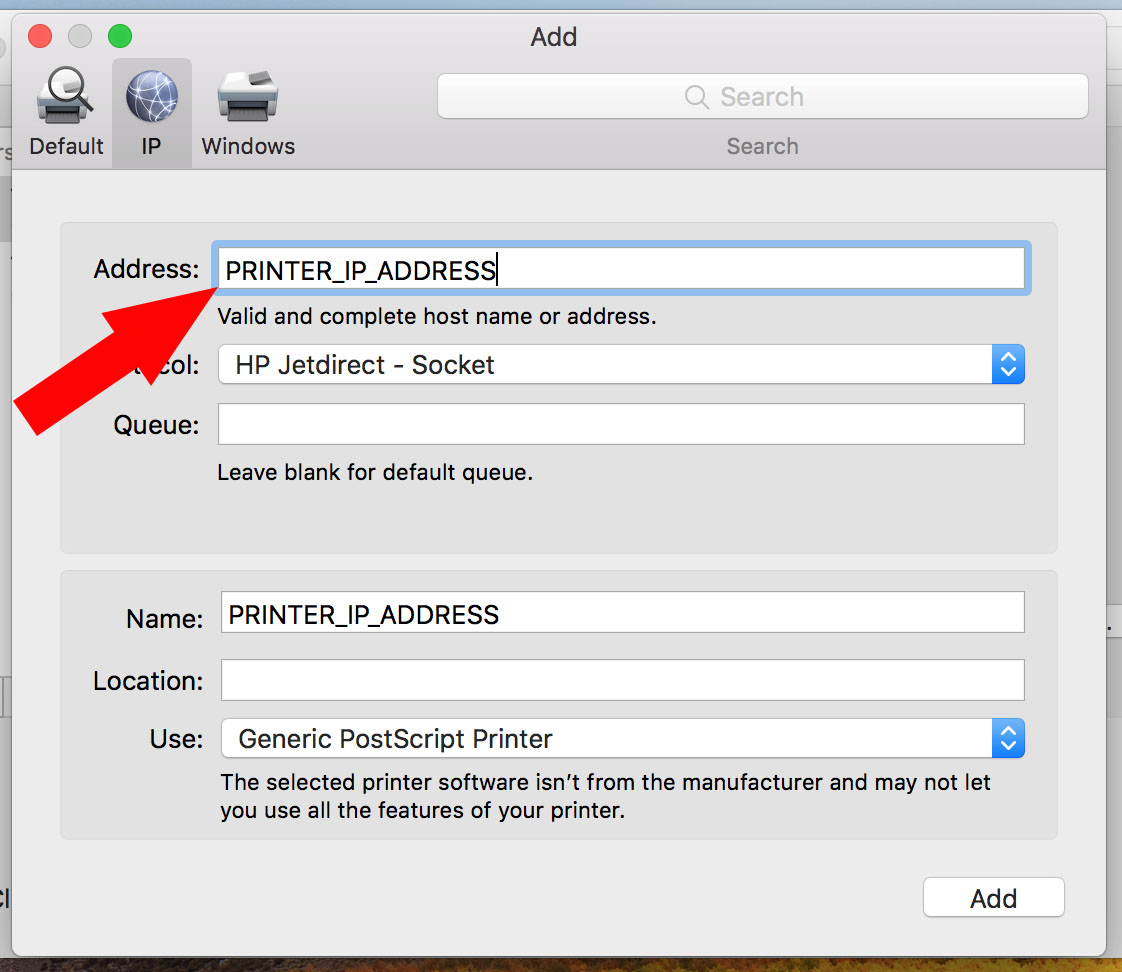
- In the box that says Address: type in the IP address of the printer (this can be found on the printer, or ask someone from the Help Desk to assist you in finding the printer’s IP).
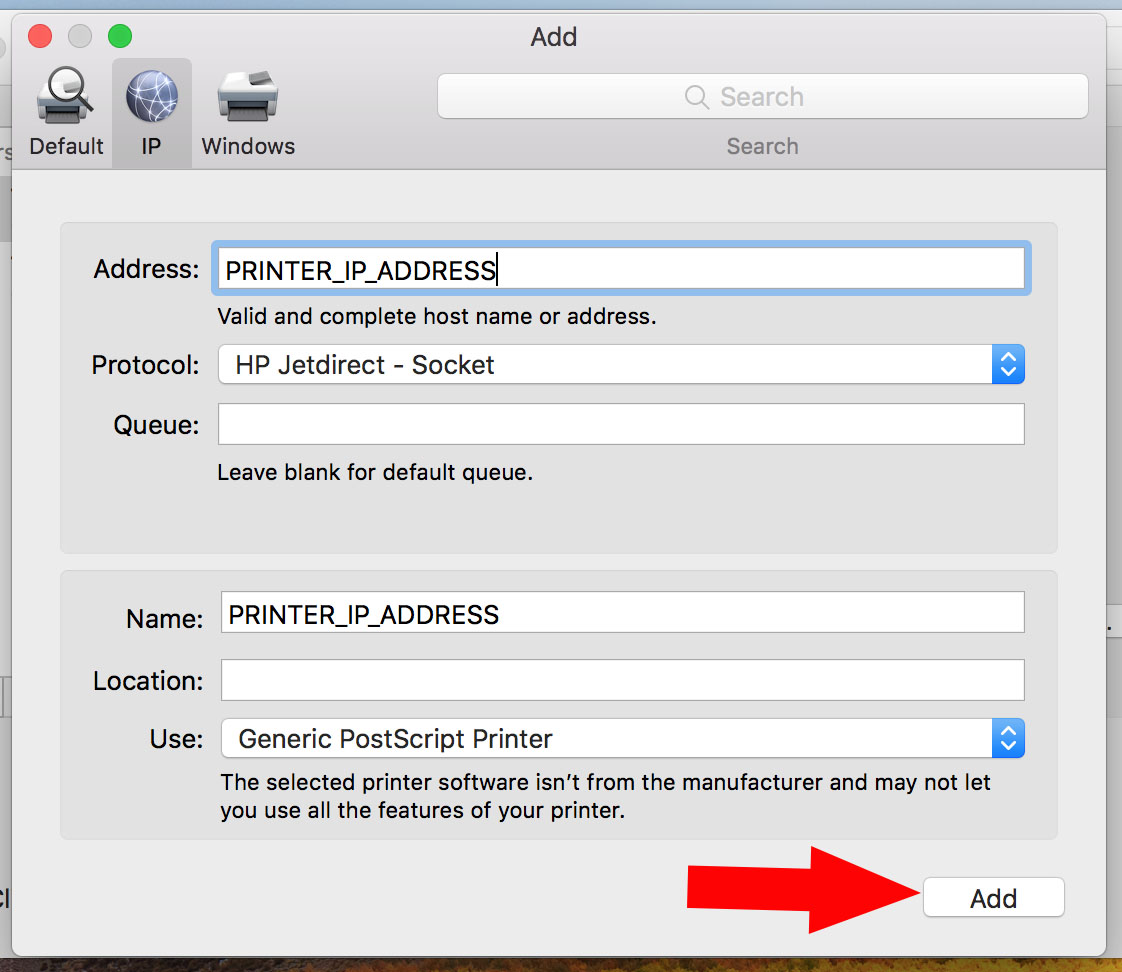
- Click Add.
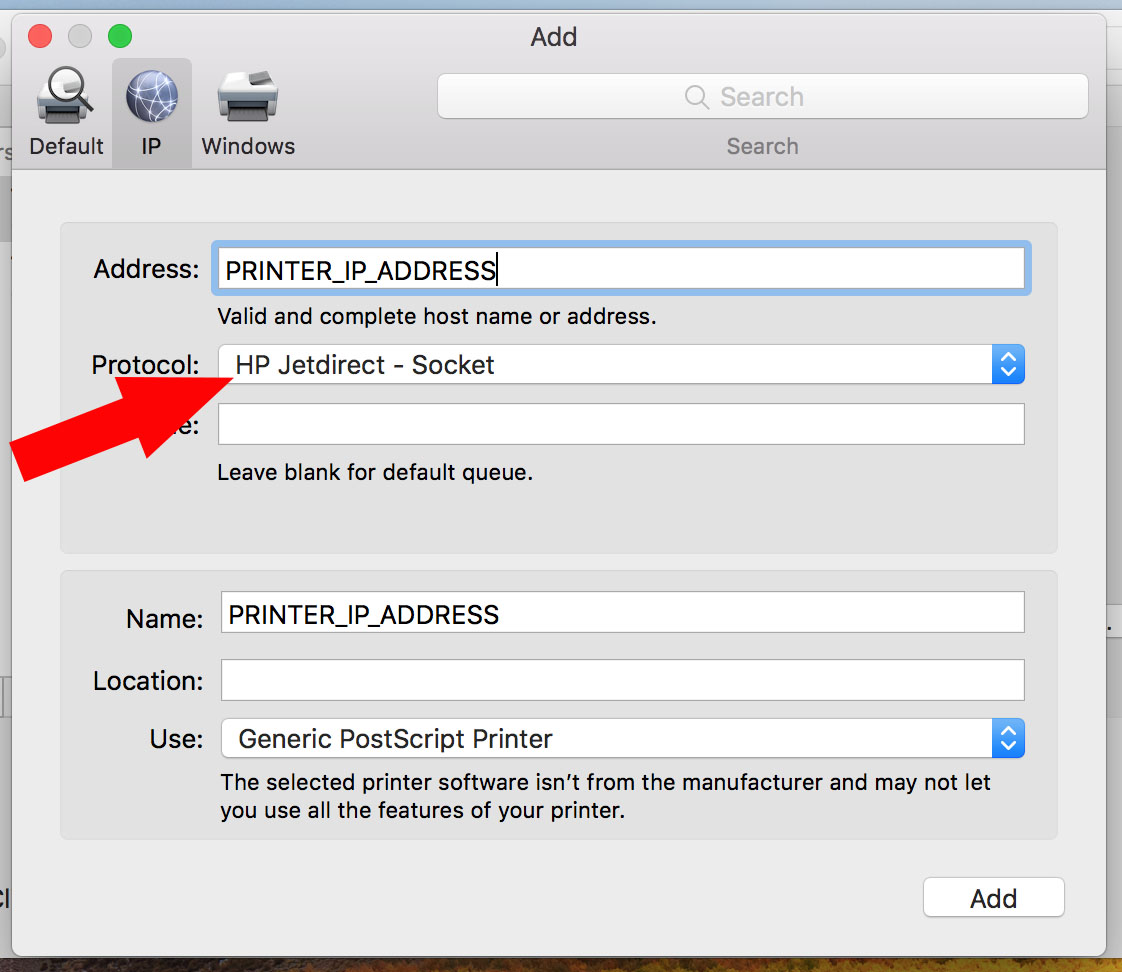
- (Optional) If the computer was unable to connect to the printer, change the Protocol: to HP Jetdirect – Socket and click Add again.
- The printer’s driver should automatically download and install, if it still doesn’t work, please contact the HelpDesk so we can assist you!
- Click on System Preferences from the system tray.

- Click on Printers & Scanners. Note: you might have to click on the lock to allow making changes.

- Find the + in the bottom left corner of the window that pops up.

- If the printer is not in the Default menu, click on IP in the top bar of the Add window.

- In the box that says Address: type in the IP address of the printer (this can be found on the printer, or ask someone from the Help Desk to assist you in finding the printer’s IP).

- Click Add.

- (Optional) If the computer was unable to connect to the printer, change the Protocol: to HP Jetdirect – Socket and click Add again.

- The printer’s driver should automatically download and install, if it still doesn’t work, please contact the HelpDesk so we can assist you!