
In order to connect to the iEEG data repository, you must be on the WisPIC internal network. You are on this network if any of the following conditions are true:
- You are on a computer at WisPIC that has a physical Ethernet cable connected to it.
- You are on a WiFi-connected laptop that is connected to SMPH’s VPN Portal.
- You are on a computer outside of WisPIC that is connected to SMPH’s VPN Portal.
If any of these conditions is true, follow the steps below based on your computer operating system below.
- Click the yellow folder labeled File Explorer in the task bar:

- In left column, right-click This PC to select Map Network Drive…, shown next:

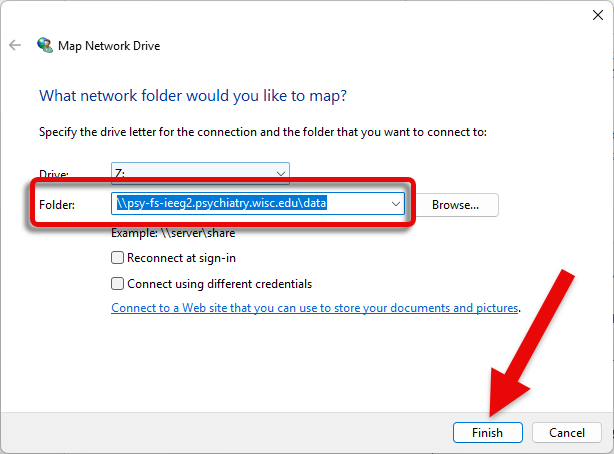
- A smaller window will appear where you select any available drive letter from the drop-down “Drive” menu, e.g., Z:.
- Type in the entire address in the “Folder” field: \\psy-fs-ieeg2.psychiatry.wisc.edu\data. (For VPN-connected laptops, it is recommended to uncheck the “Reconnect at sign-in” box.) Then, click Finish.
- For the last step, enter your NetID after “ad\” (note the direction of the slash, which is a backslash), e.g., ad\bbadger. Finally, click Finish:

If you need further assistance, or this process didn’t work, please contact the help desk.
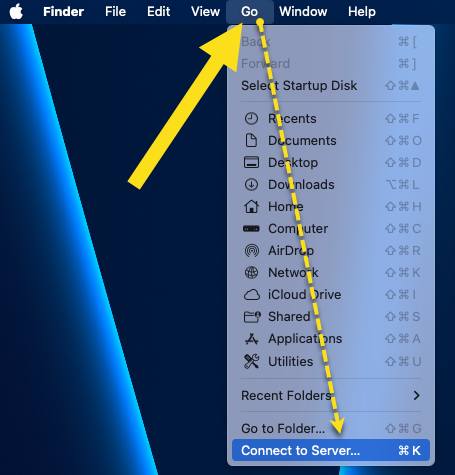
- In the Finder menu bar, click Go then Connect to Server, as demonstrated below (or press command-K on the keyboard):
- In the window that appears, enter smb://restricted.drive.wisc.edu/boly/psy-fs-ieeg1 then click Connect:

- If prompted, enter your ad\yourNetID (note the direction of the slash) and password, then click Connect. Otherwise, the share will automatically mount and be displayed.
- In the Finder menu bar, click Go then Connect to Server, as demonstrated below (or press command-K on the keyboard):
- In the window that appears, enter smb://psy-fs-ieeg2.psychiatry.wisc.edu. After that, click Connect, as shown next:

- Enter your ad\yourNetID (note the direction of the slash) and password, then click Connect. The example below is what Bucky would enter:

- When prompted to select a volume, select “Data,” then click OK.
If you need further assistance, or this process didn’t work, please contact the help desk.