Connection Instructions
- Ensure that you are connected to VPN. Click here to learn how to connect to VPN.
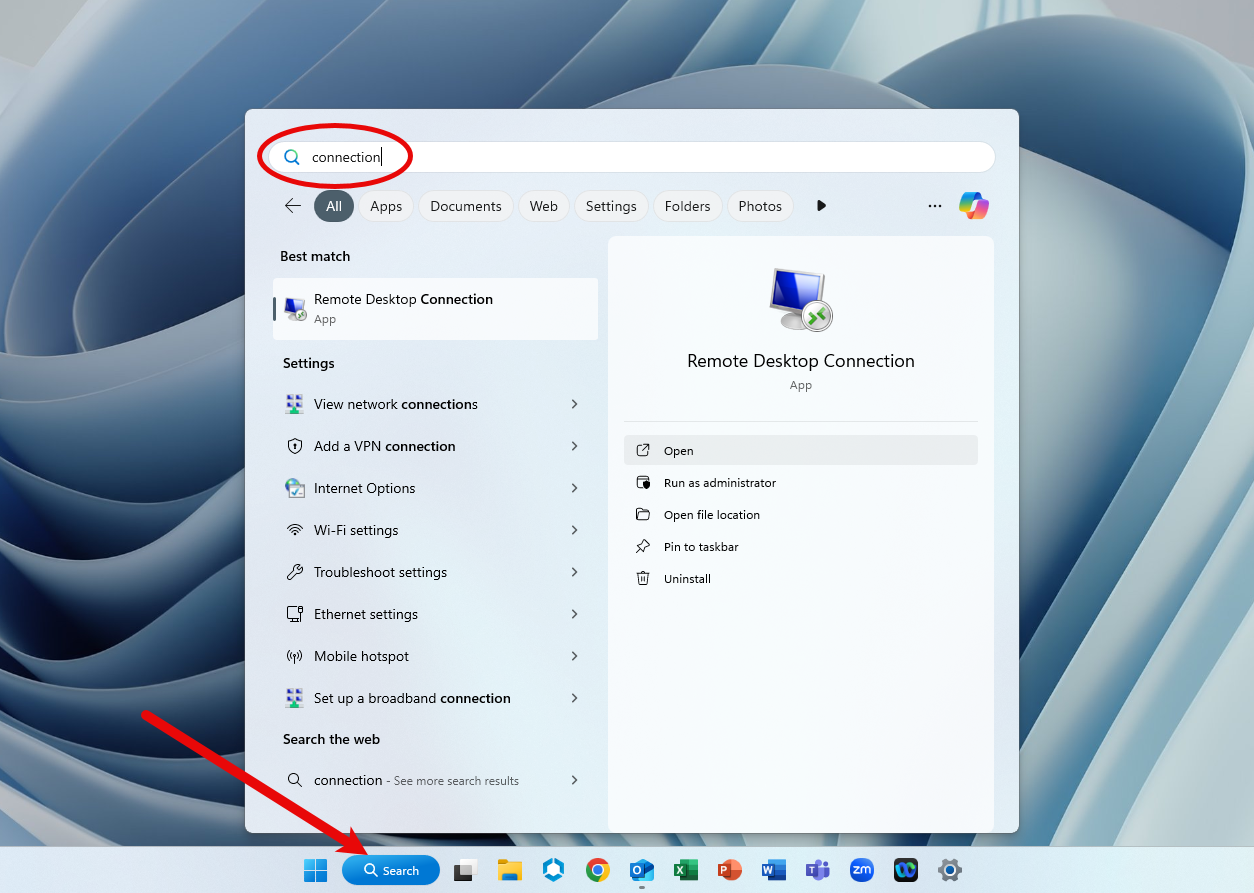
- In the Task Bar, click the Search icon and type connection in the search field. Open a program titled Remote Desktop Connection, as shown next:
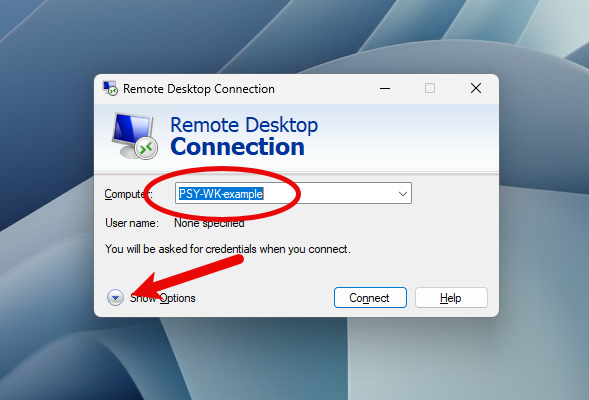
- Enter the name of your PC, which starts with either PSY-NB- or PSY-WK- and ends with your computer’s serial number, e.g., PSY-WK-example (demonstrated below). Then, click the option to Show Options:
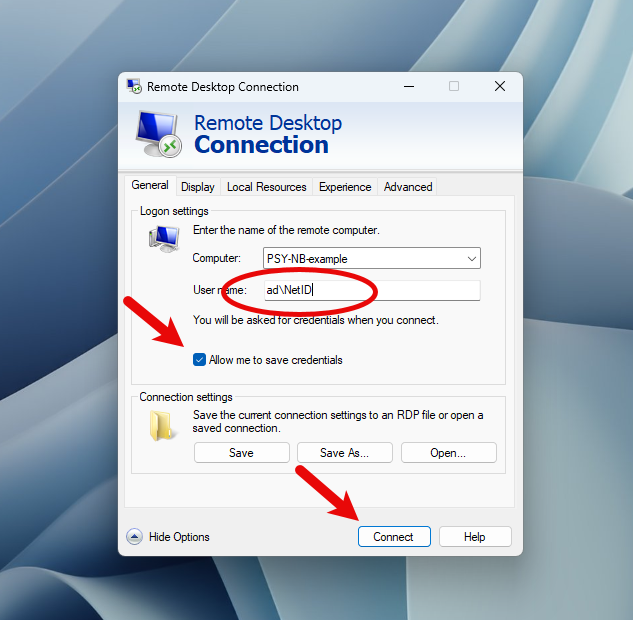
- The window will expand where you’ll enter ad\[yourNetID]. For example, Bucky Badger would enter ad\bbadger as shown in the example below. It is recommended to check the box that allows you to save credentials, i.e., your User name. Finally, click the Connect button, and your remote session should start.
Contact the Help Desk if you run into any issues or need further assistance.
- Ensure that you are connected to VPN. Click here to learn how to connect to VPN.
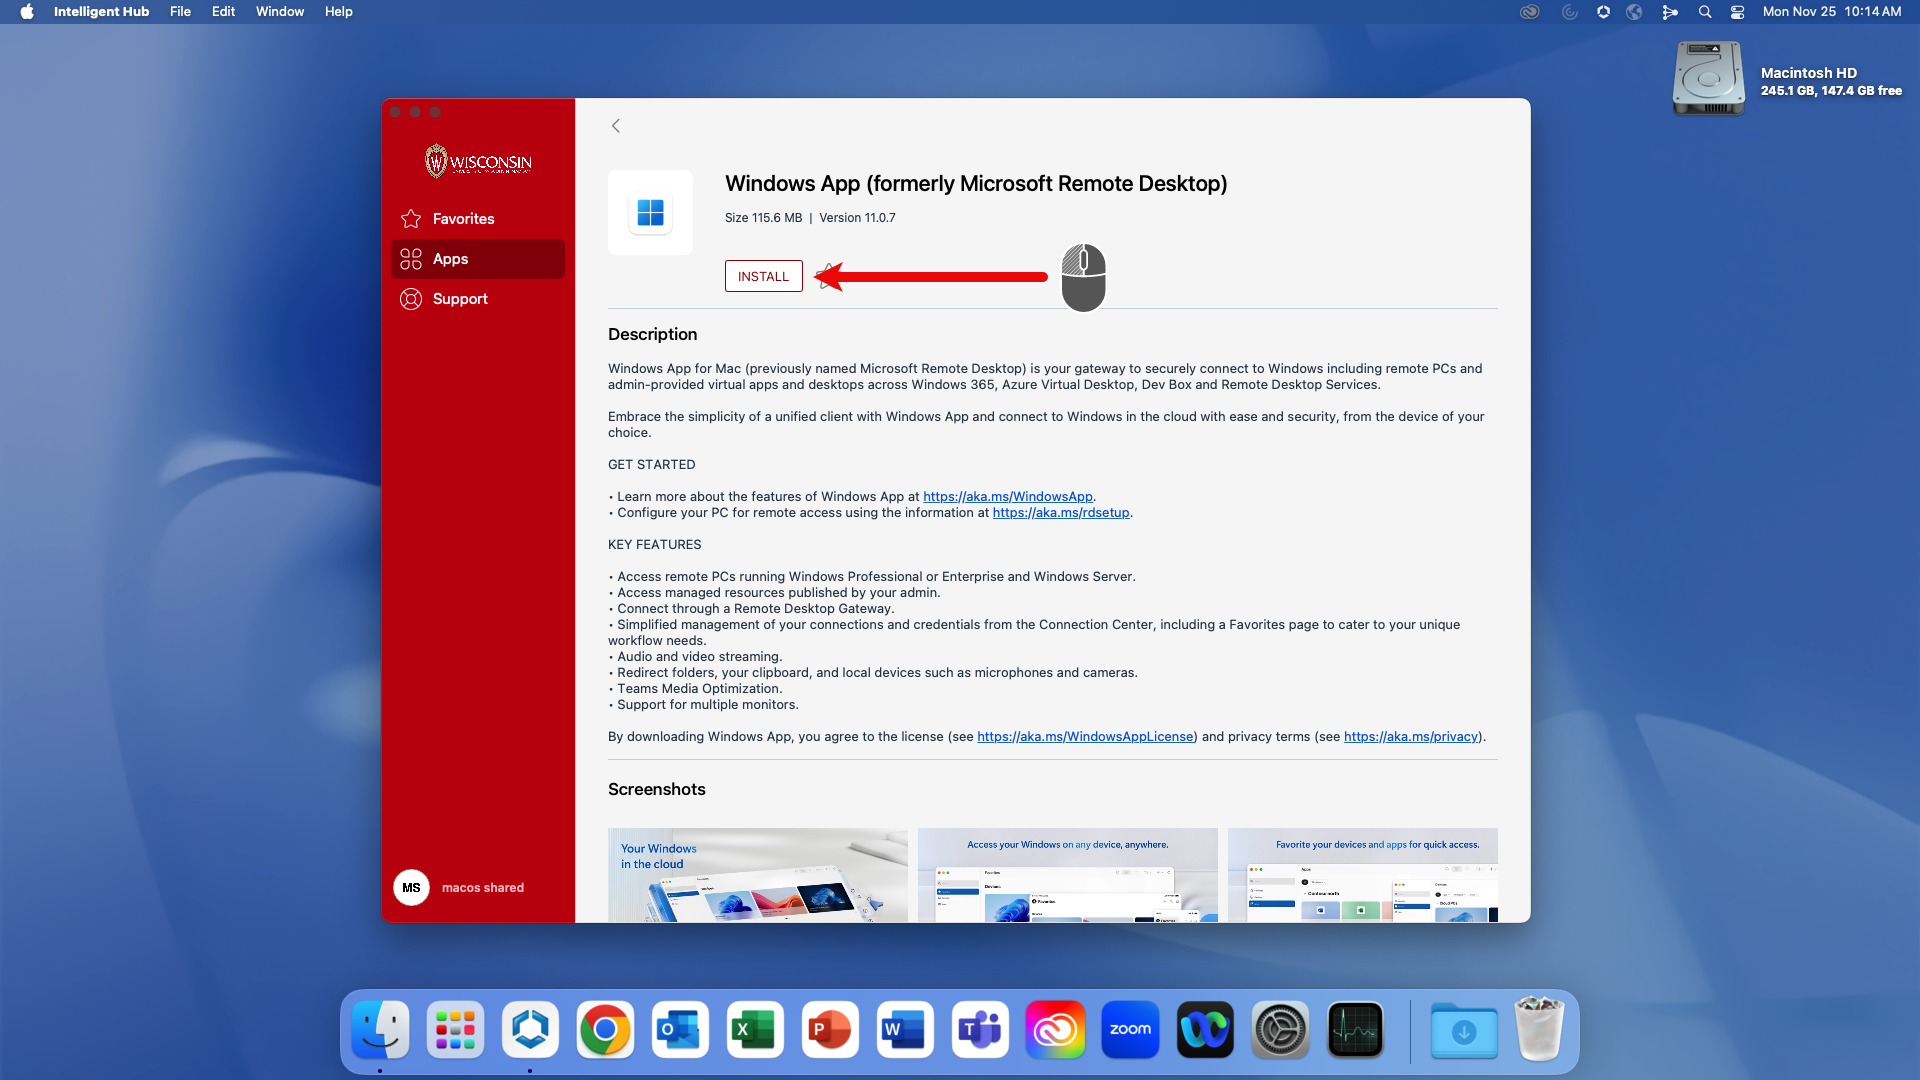
- Open the Workspace ONE Intelligent Hub application and type Windows App into the search field (more information here). Click Install, as shown below:
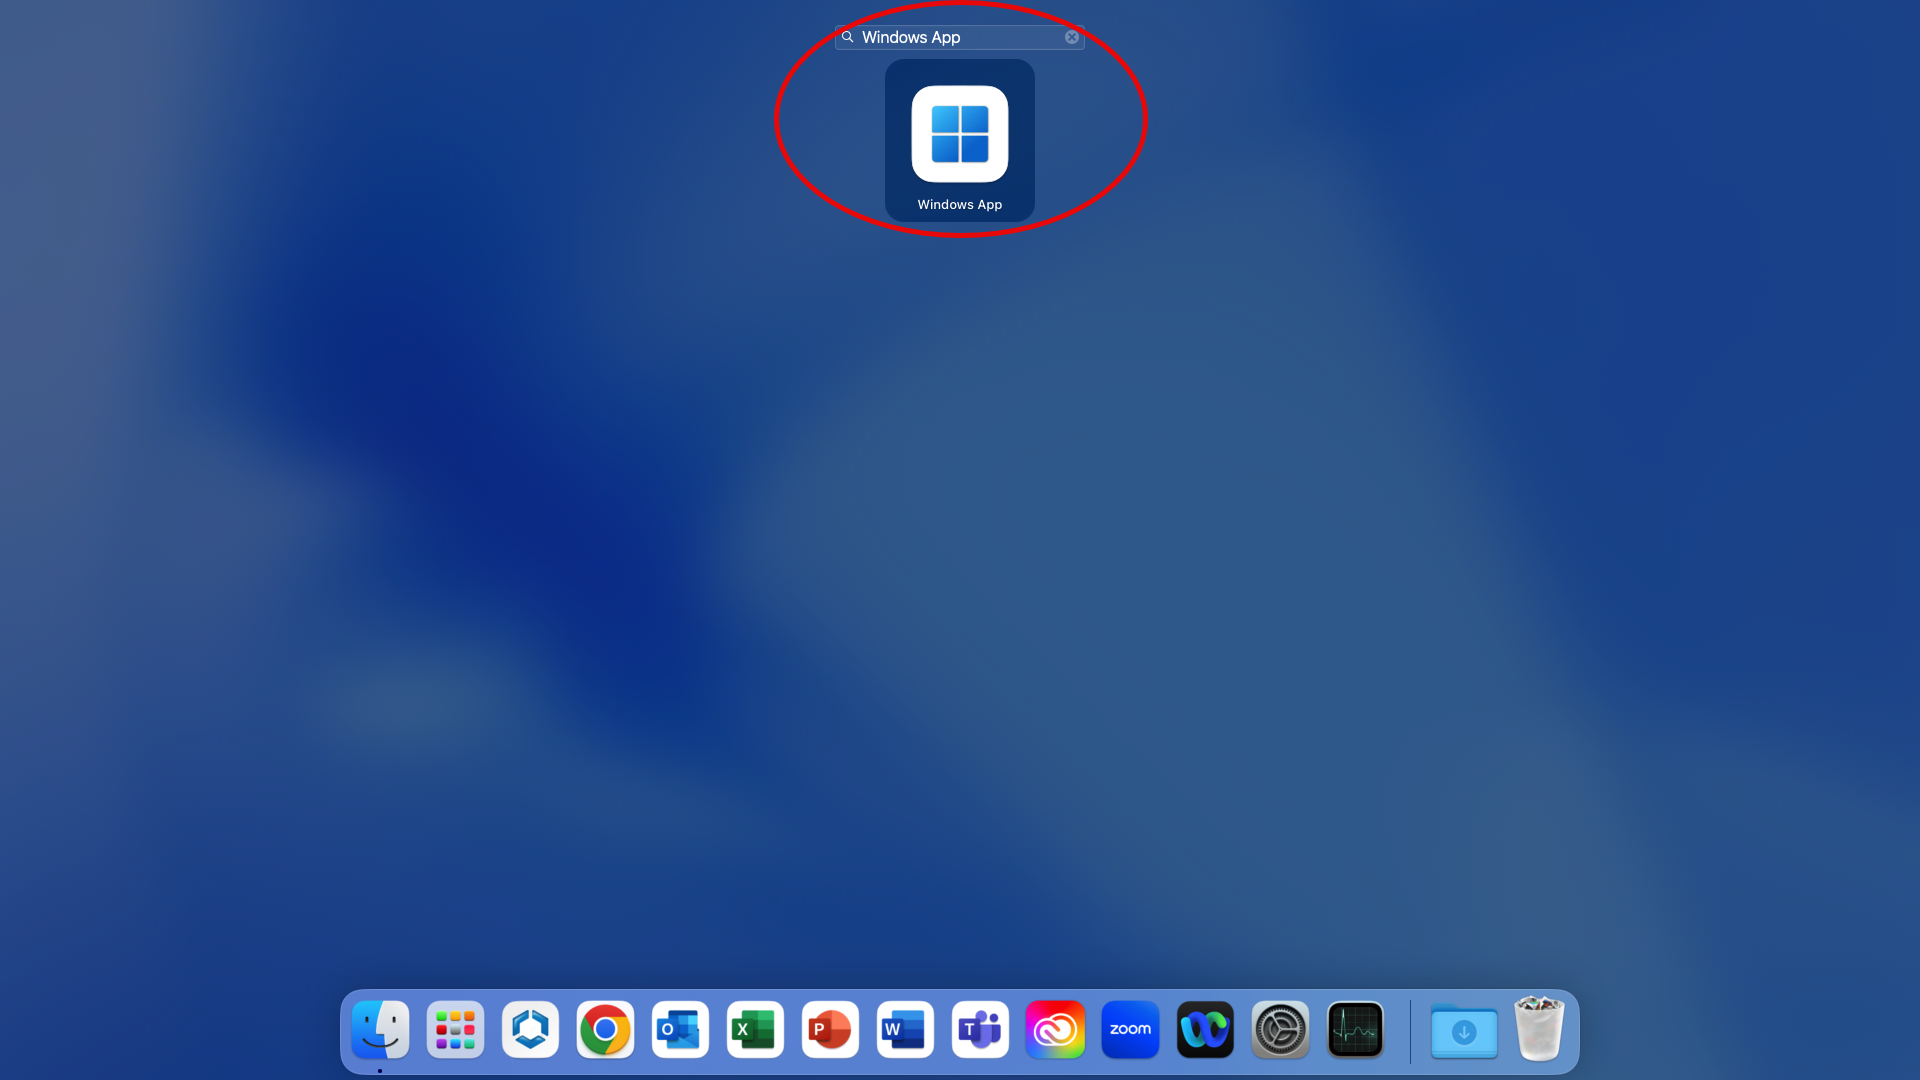
- Search for Windows App in either Spotlight or Launchpad:
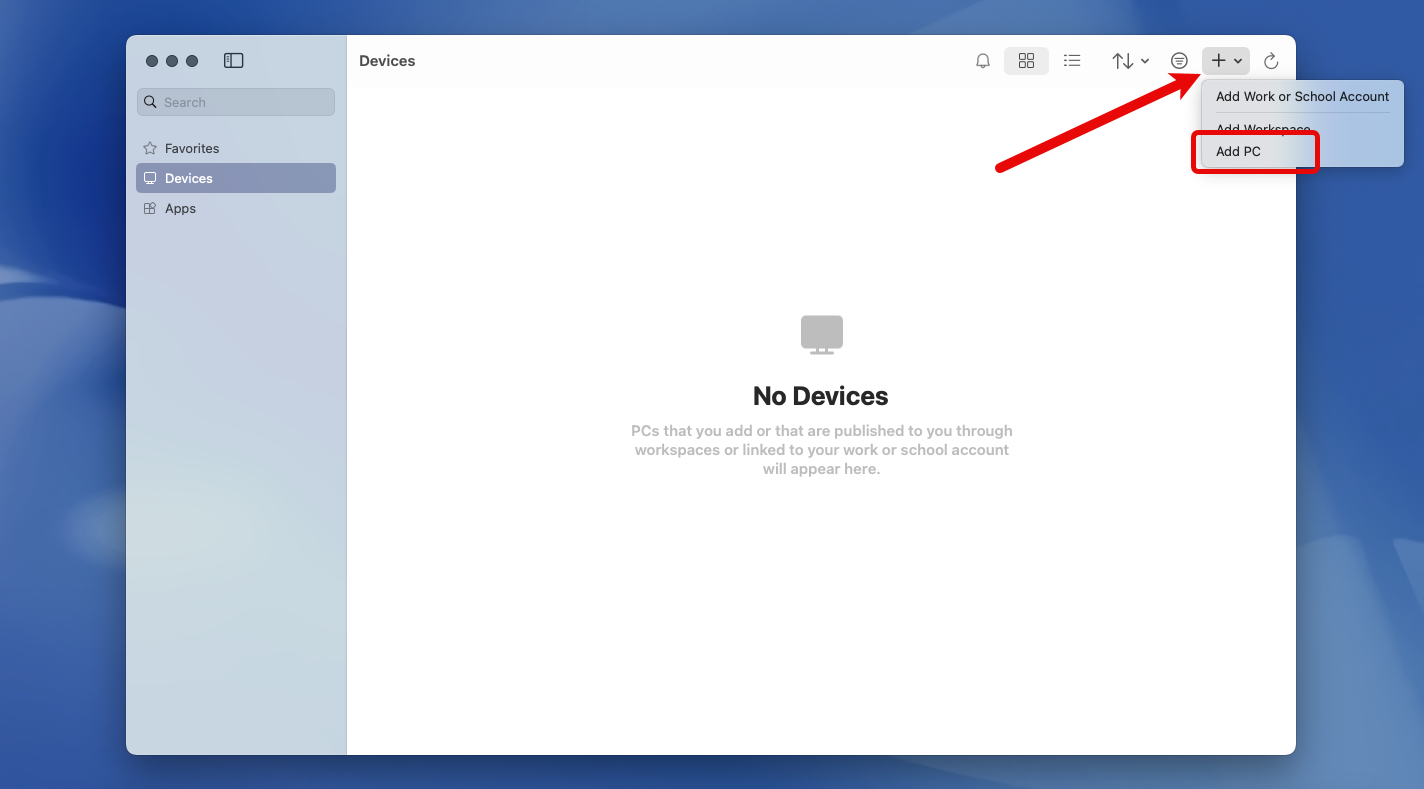
- In the main window, towards the right, click the + drop-down menu and select Add PC:
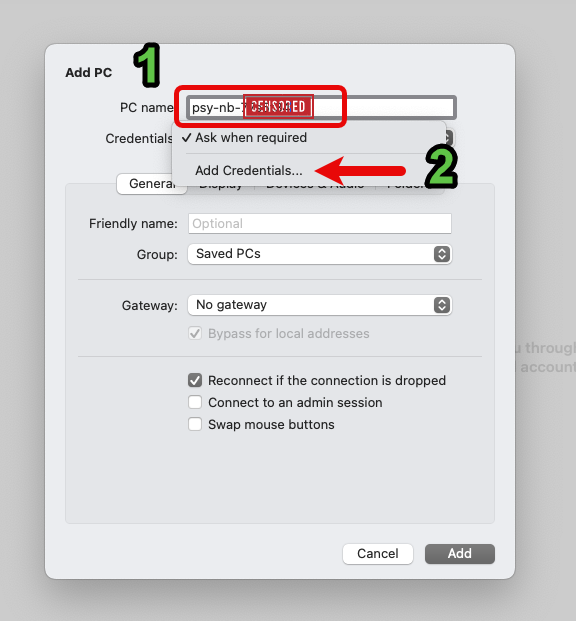
- In the smaller configuration window, enter the PC name of the computer that you’re remotely accessing. This starts with either PSY-WK- or PSY-NB- and ends with the serial number, e.g., PSY-WK-example. After that, click the Credentials menu to select Add Credentials…, as demonstrated next:
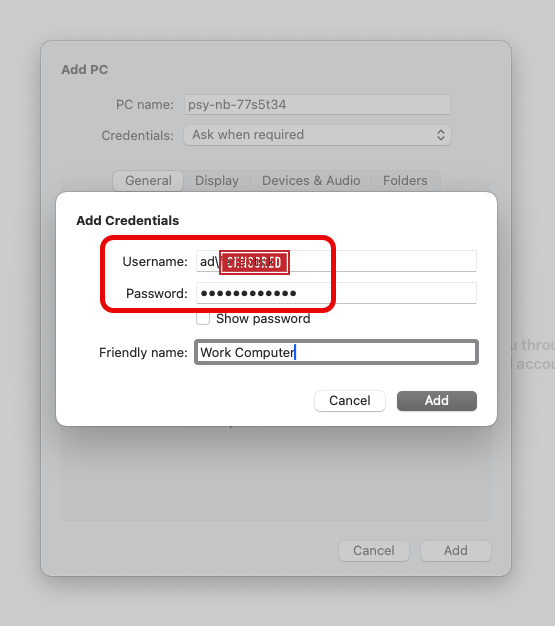
- Next, enter ad\yourNetID and your NetID password in the respective fields. (Optional: you can add a user-friendly name for this remote connection.) Click the Add button when you are finished, as shown below:
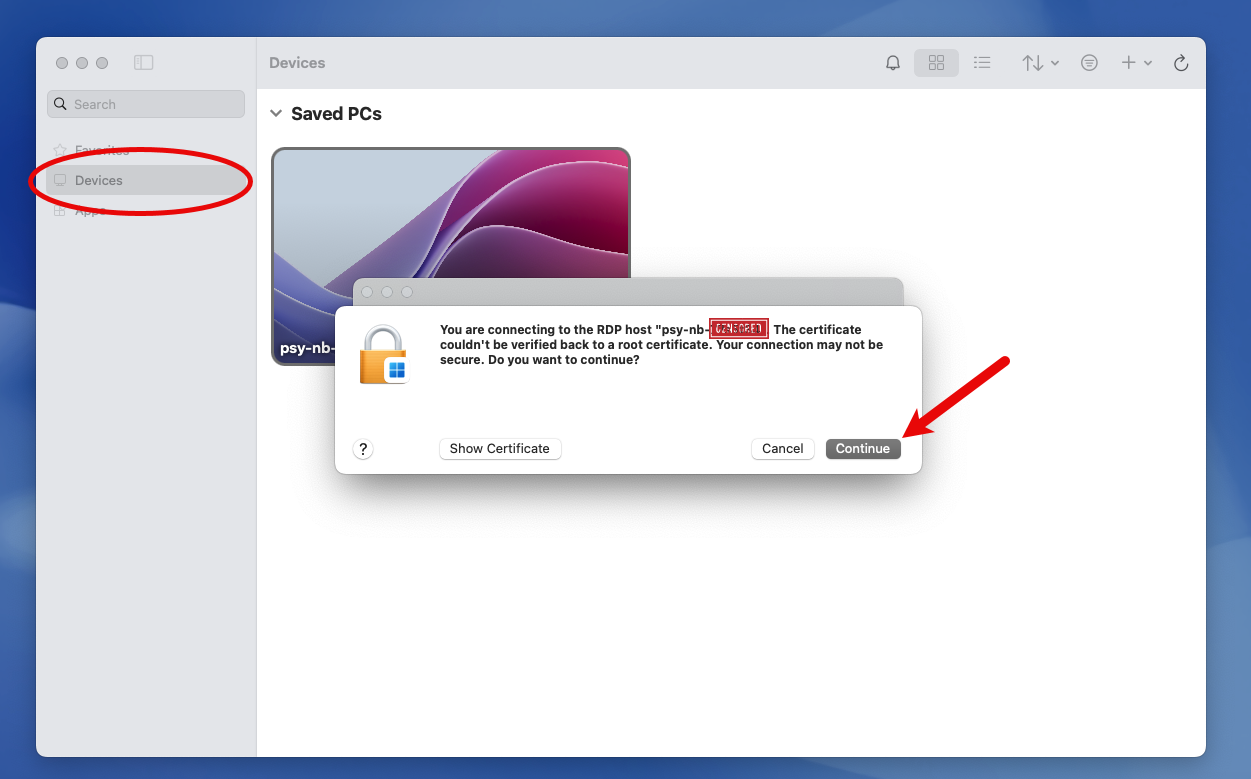
- After adding a PC, you can find it in Devices in the left pane. To remote in, click the box with the PC name, and you’ll need to click Continue each time you want to launch it (example is below). You should now be connected!
Contact the helpdesk if you run into any issues or need further assistance.
Important: The method describe below does not hide or obscure the remote computer’s screen. Everything on your remote computer’s screen is visible to anybody who can physically see the monitor. Exercise caution with the data you access while connecting to another Mac.
Connection Steps
- Ensure that you are connected to VPN. Click here to learn how to connect to VPN.
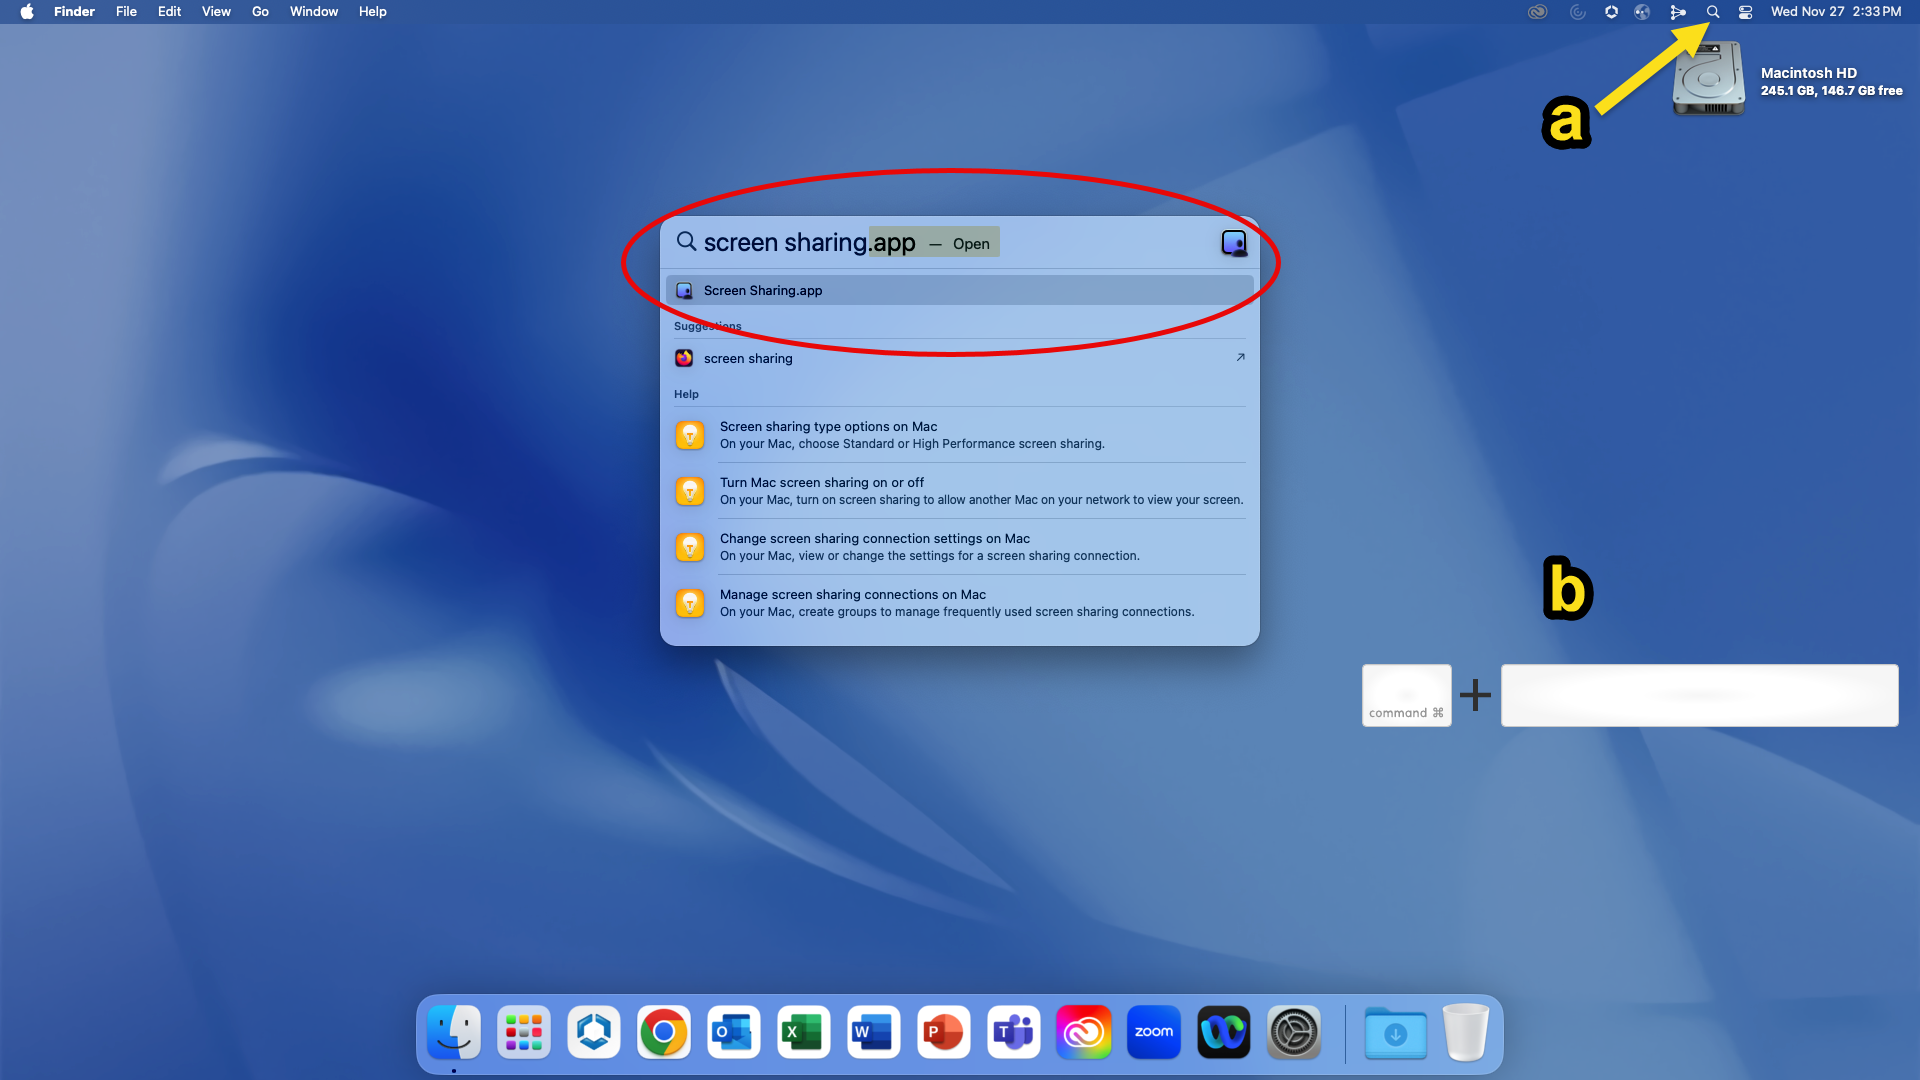
- Either (a) click the Spotlight icon (magnifying glass) in the top right menu bar or (b) press Command + Space bar, and search for screen sharing, as shown below. Click the Screen Sharing.app to launch it.
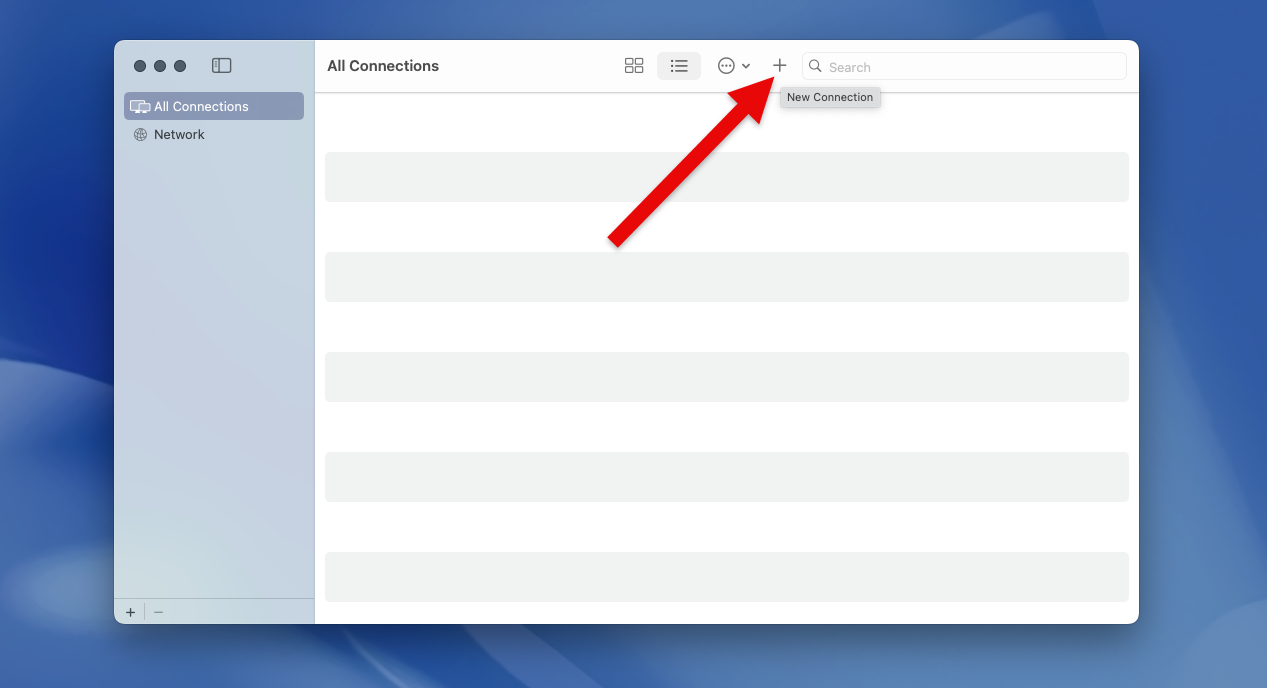
- A blank Screen Sharing window will appear. Look for the + icon towards the top-right to add a New Connection, as shown next:
- In the last step, you should see a smaller window appear, which is where you enter the name of the computer that you’re accessing. The address starts with either PSY-WK- or PSY-NB- and ends with the last six of the serial number (demonstrated below). Finally, click the Connect button to start the remote session.

If everything worked correctly, you should now see your remote macOS desktop.
Contact the helpdesk if you run into any issues or need further assistance.